

Mod Podge is a versatile crafting essential that can be used for decoupage, sealing artwork, and even as an adhesive for various DIY projects.
While store-bought Mod Podge can be expensive, making your own at home is not only cost-effective, but it’s also customizable.
Whether you’re working on a scrapbooking project, upcycling furniture, or creating custom gifts, homemade Mod Podge can be just as effective as the store version!
In this guide, we’ll walk you through the simple process of making Mod Podge at home with ingredients you likely already have in your kitchen. This recipe is quick, easy, and perfect for both beginners and experienced crafters.
What is Mod Podge?
Mod Podge is a popular crafting product that functions as an adhesive, sealer, and finish all in one.
It’s often used in decoupage projects, where paper or fabric is glued to surfaces like wood, glass, or canvas. It gives a smooth, glossy finish and helps seal the artwork to ensure longevity.
Ingredients Needed:
To make Mod Podge at home, you’ll need just two ingredients:
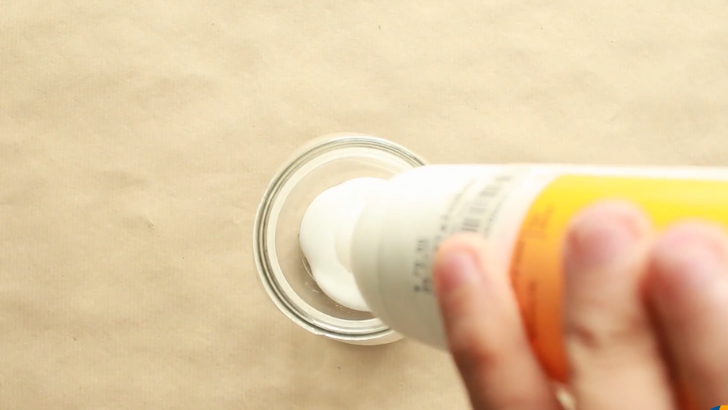
- White Glue (PVA Glue or Elmer’s Glue) – This acts as the base adhesive.
- Water – This will dilute the glue to give it a more workable consistency.
- Optional: A few drops of glycerin or cornstarch (if you want to thicken it a little or enhance the gloss finish).
Step-by-Step Instructions:
Step 1: Gather Your Materials
Before you start, make sure you have all the materials ready. You will need:
- A measuring cup or bowl
- A spoon or stir stick for mixing
- A clean container for storage (like a glass jar or plastic bottle)
- White glue (PVA glue or Elmer’s Glue)
- Water (tap water works fine)
- (Optional) Glycerin or cornstarch for added gloss
Step 2: Mix the Glue and Water
Start by mixing the glue with water in a 1:1 ratio. For example, if you’re using 1/2 cup of white glue, add 1/2 cup of water.
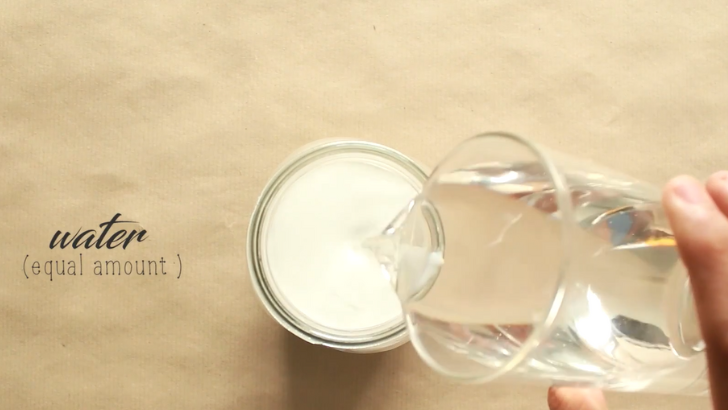
Pro Tip: For a thicker version of Mod Podge, you can use slightly less water (3/4 of the amount of glue). For a more fluid, watery consistency, add more water.
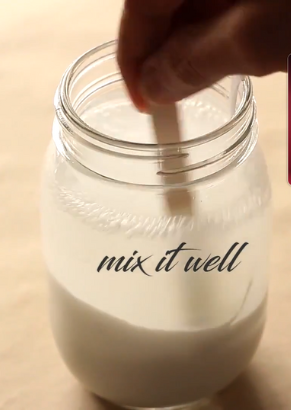
Stir the mixture thoroughly until the glue dissolves completely into the water. This is your basic Mod Podge formula.
Step 3: Add Optional Ingredients for Extra Shine (Optional)
If you want to enhance the finish of your homemade Mod Podge, you can add one or both of the following:
Glycerin: Add about 1 teaspoon of glycerin to make the Mod Podge dry with a glossy, smooth finish. Glycerin also helps to keep the mixture flexible.
Cornstarch: If you prefer a thicker, more paste-like consistency, mix in 1/2 teaspoon of cornstarch. This will help with thickening and gives your Mod Podge a bit more body for projects like photo frames or intricate decoupage.
Step 4: Mix Until Smooth
Stir all the ingredients together until the mixture is smooth and consistent. Make sure no lumps remain if you’re using cornstarch or any other additives.
Step 5: Store Your Homemade Mod Podge
Once your mixture is well-blended, transfer it into a clean jar or container with a tight-fitting lid for storage. Store it in a cool, dry place, and make sure to shake or stir it before each use, as the ingredients may separate over time.
Tips and Tricks:
Color Variations: If you want to make a colored Mod Podge, you can add food coloring to your mixture. This works well for kids’ projects or if you’re creating custom-colored craft items.
Use as a Sealer: Let your homemade Mod Podge dry completely (it usually takes a few hours) before adding a second coat for sealing. It will dry clear and give a beautiful, glossy finish to your project.
For a Matte Finish: If you prefer a matte look, you can skip the glycerin and use cornstarch. Alternatively, you could use a matte-finish acrylic paint as the base adhesive and then follow the same steps.
How to Use Your Homemade Mod Podge
Once your Mod Podge is ready, it’s time to start crafting! Here are a few ways you can use it:
Decoupage: Apply a thin layer of Mod Podge to the surface of the object you’re decorating. Stick on your paper or fabric, then apply another coat of Mod Podge over the top to seal it.
Sealing Photos: To make photos or artwork last longer, cover them with a thin layer of Mod Podge for a protective seal. It will give your artwork a professional finish and preserve it for years.
Upcycling Furniture: Use Mod Podge to decoupage old furniture pieces with patterned paper, napkins, or fabric. Apply a few layers for extra durability.
Crafting: Whether you’re making greeting cards, jewelry, or scrapbooking, homemade Mod Podge works great as a glue or sealer for all kinds of DIY projects.
Final Thoughts
Making your own Mod Podge at home is quick, simple, and cost-effective! By using basic materials, you can create a product that’s just as effective as the store-bought version.
Customize it to your liking by adjusting the consistency, adding extra gloss, or even infusing color for your creative projects.
So, the next time you’re working on a decoupage or crafting project, save some money and try making your own Mod Podge with this easy recipe!
Happy crafting!


