
Origami, the traditional Japanese art of paper folding, offers endless possibilities for creating fun and exciting shapes.
One of the most popular origami creations is the ninja star, also known as the shuriken. Whether you’re a beginner or an experienced paper folder, making an origami ninja star is a great project that improves precision, concentration, and creativity.
In this guide, we’ll take you through the step-by-step process of making an easy origami ninja star.
Materials Needed
- Two square sheets of paper (preferably 6×6 inches)
- A flat surface for folding
- Optional: Colored or patterned paper for a decorative look
Step-by-Step Instructions
Step 1: Prepare Your Paper
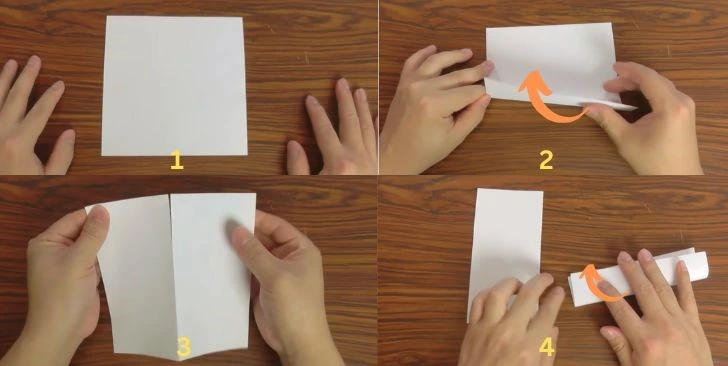
Take two square sheets of paper. If using larger sheets, trim them to a perfect square.
If you want a multi-colored ninja star, use different colored papers for each half.
Step 2: Fold the Paper in Half
Take one square sheet and fold it in half lengthwise, creating a rectangle.
Crease well and unfold it.
Repeat with the second sheet of paper.
Step 3: Fold Each Paper into a ‘Z’ Shape
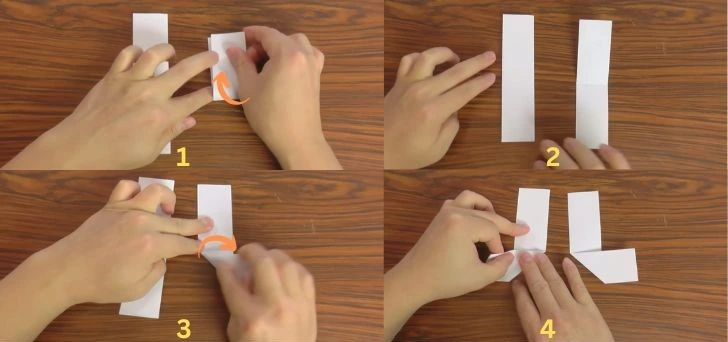
Take one of the rectangular pieces and fold the top left corner down to create a diagonal fold.
Fold the bottom right corner upwards to form a ‘Z’ or lightning bolt shape.
Repeat with the second paper, but in the opposite direction so that the folds mirror each other.
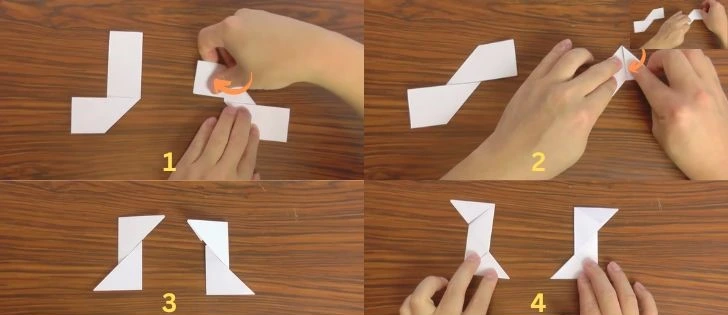
Step 4: Create Triangle Flaps
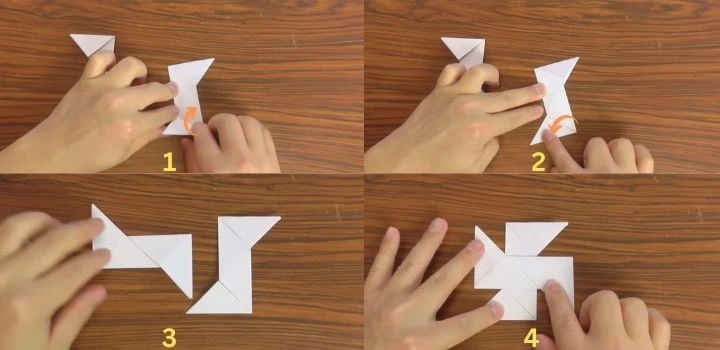
On each piece, fold the top and bottom corners inward to create small triangles.
Ensure the folds are crisp, as these flaps will interlock to form the ninja star.
Step 5: Assemble the Ninja Star
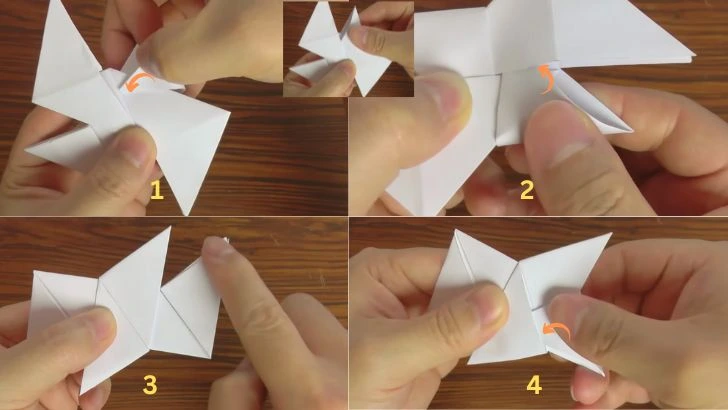
Take both folded pieces and align them in an ‘X’ shape.
Insert the triangle flaps of one piece into the slots of the other piece.
Carefully tuck all four flaps into place, securing the shape.
Adjust the folds to make sure the ninja star is tight and symmetrical.
Step 6: Final Adjustments
Press down on all edges to ensure a firm structure.
If needed, reinforce the folds to enhance durability.
Now your origami ninja star is ready to spin and throw!
Creative Variations
Use different colors for a multi-toned ninja star.
Try using patterned or metallic paper for a unique look.
Make multiple ninja stars and connect them to form a chain.
Tips for Perfect Ninja Stars
Ensure precise folds for a balanced and symmetrical ninja star.
Use thicker paper for a sturdier design.
Experiment with different paper sizes to create various ninja star dimensions.
Conclusion
Making an origami ninja star is a fun and rewarding activity suitable for all ages. With just a few simple folds, you can create your very own ninja star, perfect for decoration or play. Try making a few in different sizes and colors to impress your friends and family. Happy folding!


