
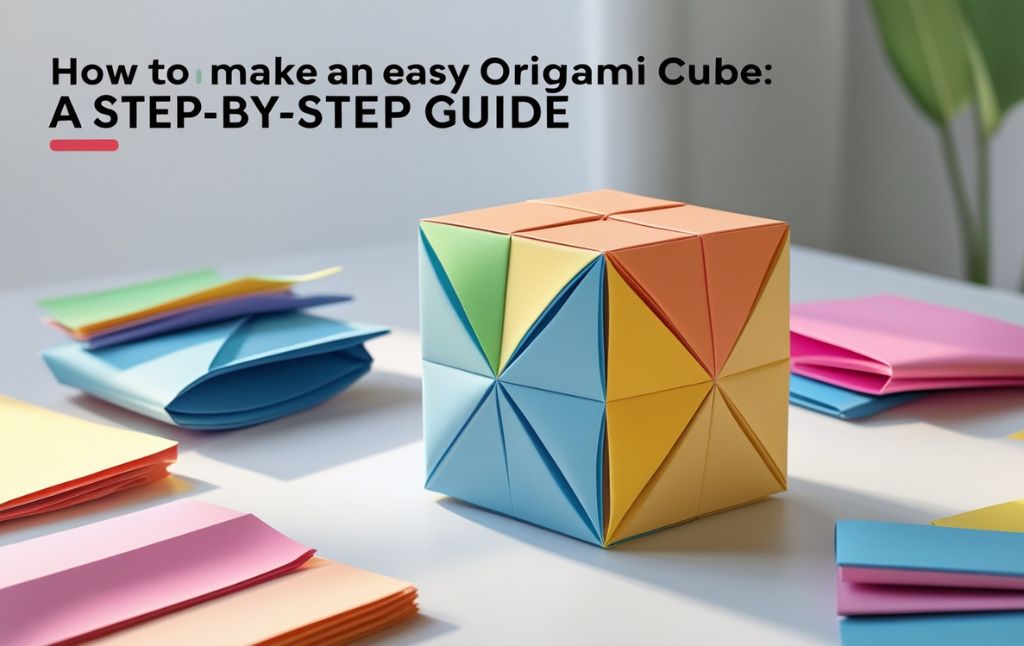
Origami, the traditional Japanese art of paper folding, allows you to create beautiful and intricate designs using just paper.
One of the most fascinating origami projects is the paper cube, also known as the sonobe unit cube. This guide will walk you through the steps to fold an origami paper cube easily.
Materials Needed
- Two square sheets of paper (preferably 6×6 inches)
- A flat surface for folding
- Optional: Colored or patterned paper for a decorative look
Step-by-Step Instructions
Step 1: Prepare Your Paper
Take two square sheets of paper. If using larger sheets, trim them to a perfect square.
If you want a multi-colored Origami Paper Cubes, use different colored papers for each half.
You have to fold the paper in the manner mentioned above.
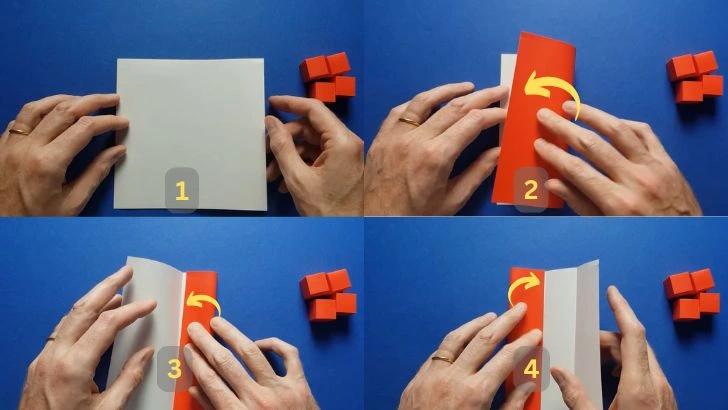
Step 2: Fold the Paper in Half
You have to fold the paper and draw the line as per the sequence given in the above image.
Take one square sheet and fold it in half horizontally, then unfold it.
Fold the left and right edges toward the center crease.
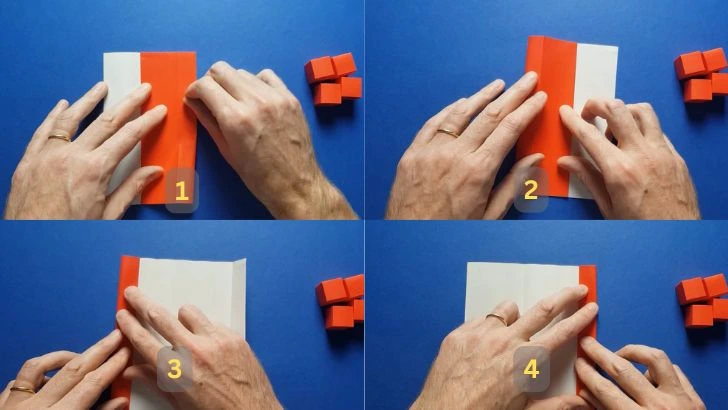
Now you have to fold the paper in half and make it half.
and fold it further as shown in the image above and cut small paper strips.
Step 3: Fold a Single Sonobe Unit
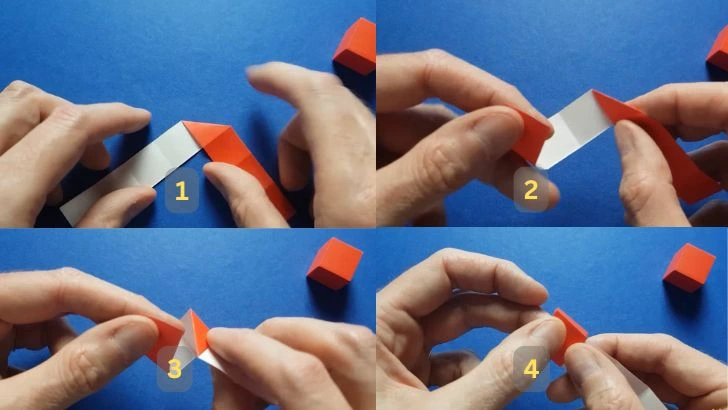
Now you have to repeat this paper strip by following the serial numbers in the image given above.
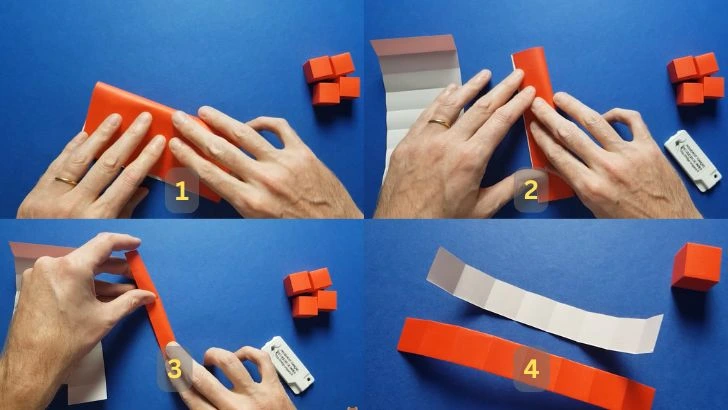
Step 4: Create small box
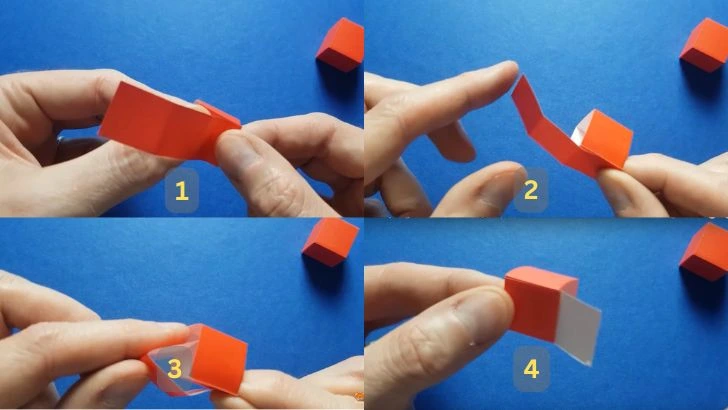
Looking at the image given above, you have to fold the paper in such a way that it takes the shape of a box.
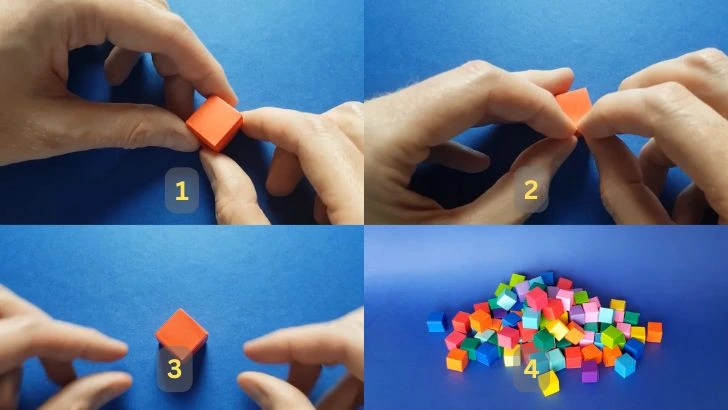
Step 5: Assemble the small box

You have to follow the same steps as mentioned before with another paper strip and make another box.
Now you have to fix both the boxes to each other as mentioned in the steps above.
Step 6: Final Adjustments
Press down on all edges to ensure a firm structure.
If needed, reinforce the folds to enhance durability.
Now your Origami Cube is ready to spin and throw!
You can adopt this Creative Variations
Use different colors for a multi-toned Origami Cube
Try using patterned or metallic paper for a unique look.
Make multiple Origami Cube and Make Minecraft Blocks or Lego Bricks.
Tips for Perfect Origami Cube
Ensure precise folds for a balanced and symmetrical Origami Cube.
Use thicker paper for a sturdier design.
Experiment with different paper sizes to create various Origami Cube dimensions.
Conclusion
Making an Origami Cube is a fun and rewarding activity suitable for all ages. With just a few simple folds, you can create your very own Origami Cube, perfect for decoration or play. Try making a few in different sizes and colors to impress your friends and family. Happy folding!


