
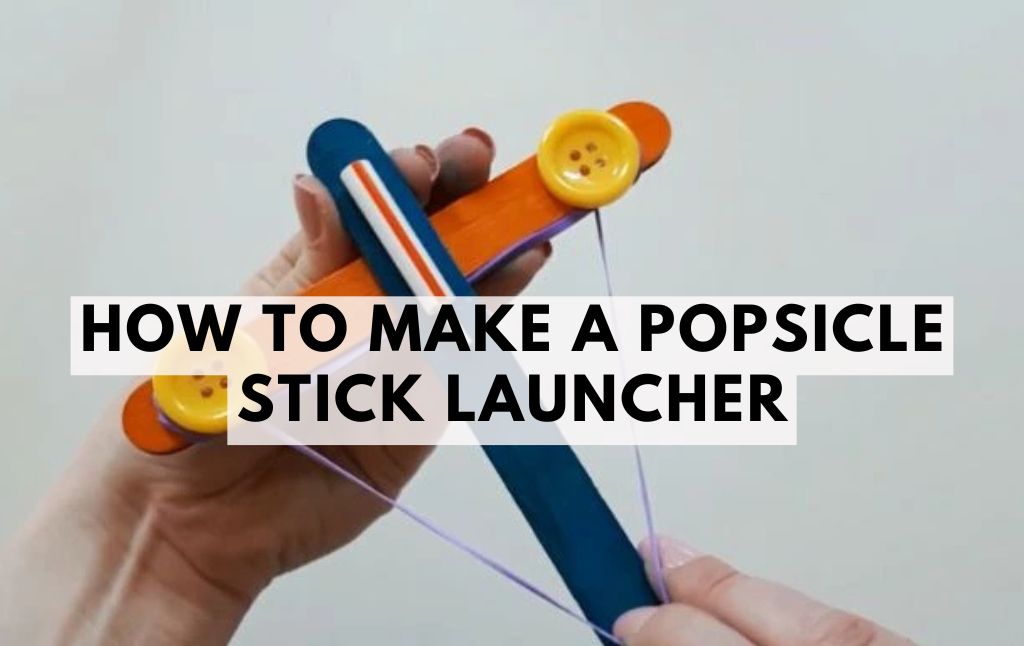
Creating a popsicle stick launcher is a fun and engaging DIY project that combines creativity, engineering, and physics.
This simple yet exciting craft is perfect for kids and adults alike, making it a great STEAM-inspired activity.
In this guide, we’ll walk you through the steps to make your very own popsicle stick launcher and experiment with different designs.
Materials Needed
- 4 popsicle sticks (two of one color, two of another for decoration)
- Hot glue gun and glue sticks
- 2 small buttons
- 1 plastic straw
- Rubber bands
- Scissors
- Q-Tips (cotton swabs)
- Paint or markers (optional for decoration)
Step-by-Step Instructions
Step 1: Painting the Sticks
Start by painting two of the popsicle sticks one color and the other two a different color. This is purely for aesthetics, so feel free to get creative with patterns or designs! Let the paint dry completely before moving on.
Step 2: Strengthening the Structure
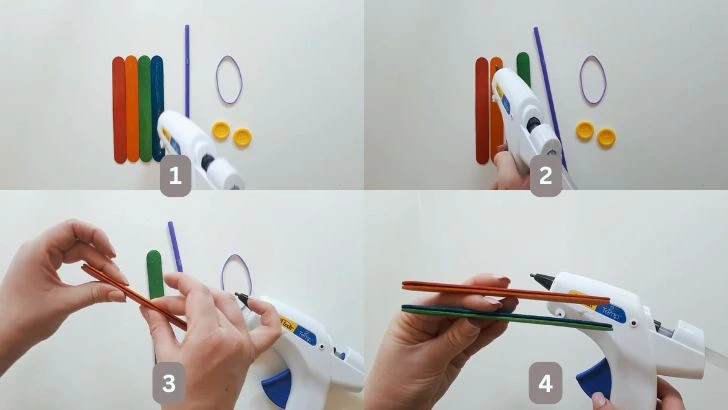
Using a hot glue gun, glue two popsicle sticks together. Repeat this with the other two sticks. This reinforcement adds durability and provides a strong anchor point for the rubber band.
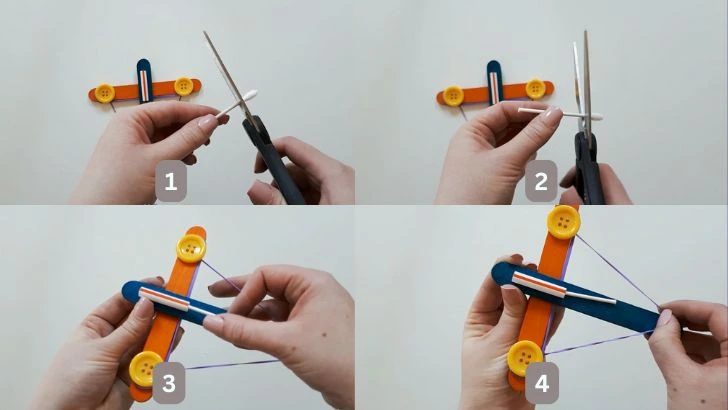
Step 3: Assembling buttons to the Launcher
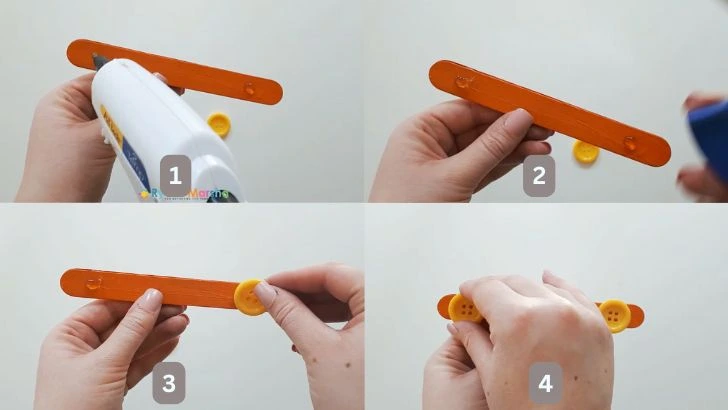
Take one pair of sticks Glue one button on each end of the crossbar, approximately 2 cm from the edges. These buttons will act as guides to keep the rubber band in place.
Step 4 : Assembling the Launcher
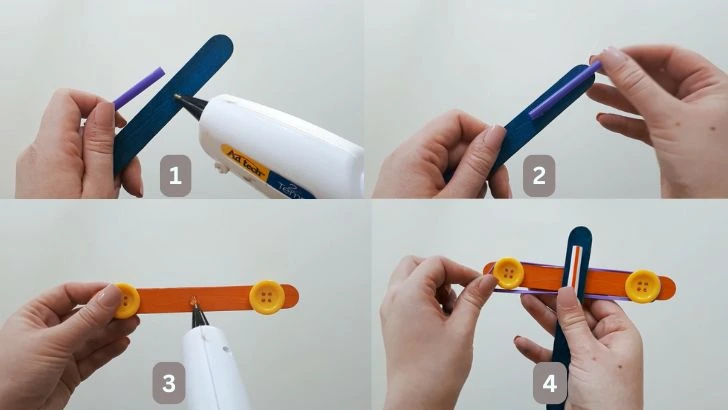
Now take the second glued pair of popsicle sticks and Cut a piece of straw to a length of 6–8 cm. Glue it to the top of the handle, just above the crossbar. Allow the glue to dry completely before continuing.
Position the crossbar about 1/4 of the way down from the top of the handle and glue it in place securely.
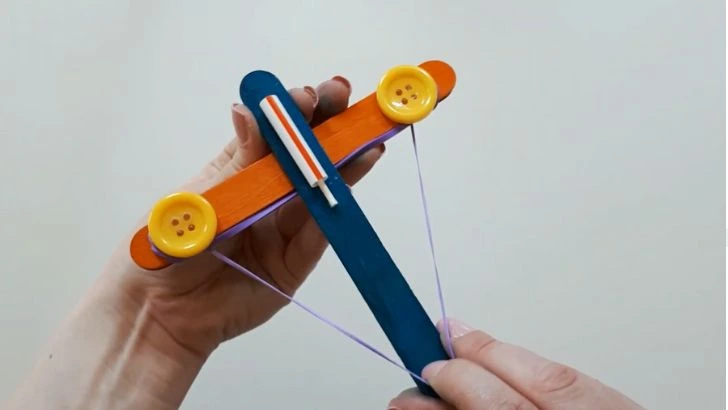
Step 6: Securing the Rubber Band

Wrap the rubber band around one end of the crossbar and then repeat on the other side.
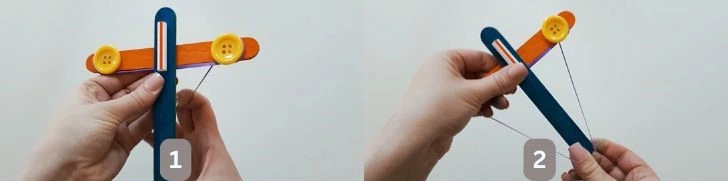
Pull the long end of the rubber band and anchor it at the bottom of the handle. This will provide the launching tension needed for the projectiles.
Using the Popsicle Stick Launcher
Insert a Q-Tip (cotton swab) into the end of the straw.
Carefully lift the rubber band off the end of the handle and pinch both the Q-Tip and the rubber band between your index finger and thumb.
Pull back until the Q-Tip is just inside the straw.
Make sure your other fingers are out of the way, then release to launch!
Pro Tips & Experimentation
Vary Straw Length: Experiment with different straw lengths to see how it affects launch distance. Longer straws may provide more pull but require additional finger strength.
Adjust Cotton Swabs: If your Q-Tips become fuzzy, roll the ends between slightly moistened fingers or wrap a small piece of clear tape around the ends to reduce friction.
Design Variations: Try decorating your launcher with different colors, stickers, or patterns to personalize your creation.
Final Thoughts
This popsicle stick launcher is a fantastic hands-on activity that encourages problem-solving, creativity, and scientific thinking. Whether you’re competing for the longest launch or simply having fun indoors, this DIY project is sure to entertain kids and adults alike.
So grab your materials, start crafting, and enjoy launching your Q-Tip projectiles across the room! Happy crafting! 🎯🚀


