
Creating a DIY harmonica using popsicle sticks is a fun and simple craft that combines creativity with a bit of science!
This easy-to-make project is perfect for kids and adults alike, helping to explore sound vibrations and musical tones.
Follow this step-by-step guide to craft your own harmonica from everyday household items.
Materials Needed
- 2 popsicle sticks (thick or thin)
- 1 wide rubber band
- 2 loom bands (small rubber bands)
- 1 piece of paper
- 1 plastic straw
- 2 toothpicks
- Scissors
Step-by-Step Instructions
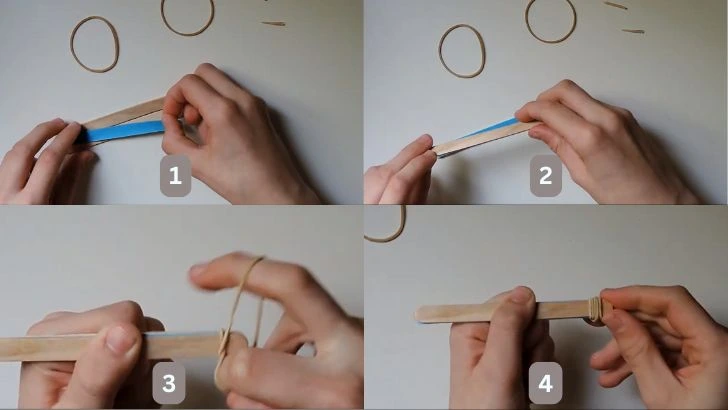
Technique One: Elastic Band Harmonica (Best for Younger Kids)
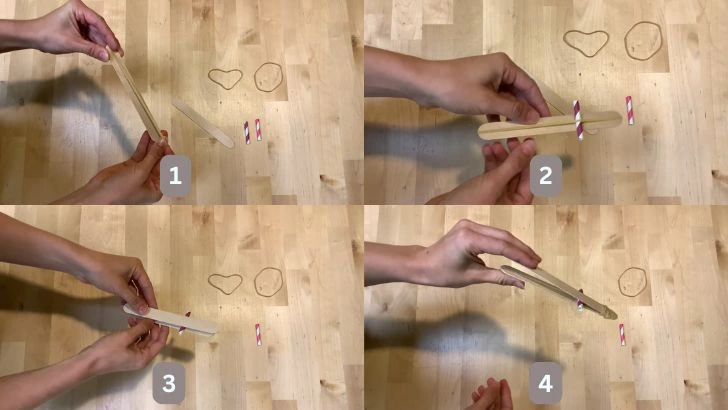
Take one popsicle stick and stretch a wide rubber band lengthwise around it.
Cut the plastic straw into two small pieces, each about the width of the popsicle stick.
Place one piece of straw under the rubber band near each end of the popsicle stick.
Place the second popsicle stick on top, sandwiching the straws between the two sticks.
Secure both ends with loom bands, making sure everything is held tightly in place.
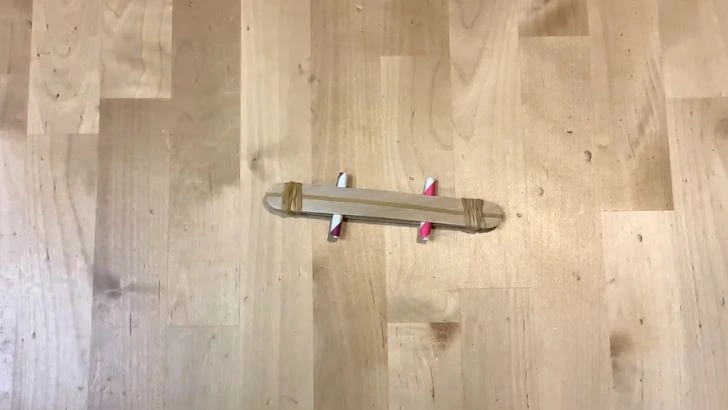
Your harmonica is ready! Blow into the middle to produce sound.
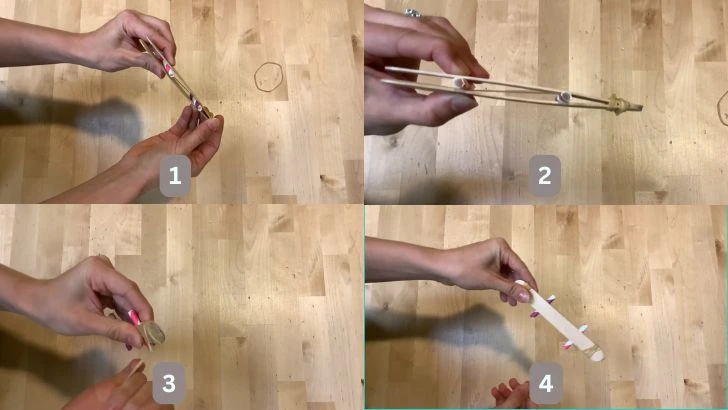
Technique Two: Paper Harmonica (For Older Kids & Experimentation)
Cut a piece of paper the same size as your popsicle stick.
Lay the paper on one popsicle stick and place the second popsicle stick on top.
Secure one end by wrapping a loom band tightly around it.

Cut a toothpick to the width of the popsicle stick and insert it between the paper and the stick, sliding it close to the loom band.
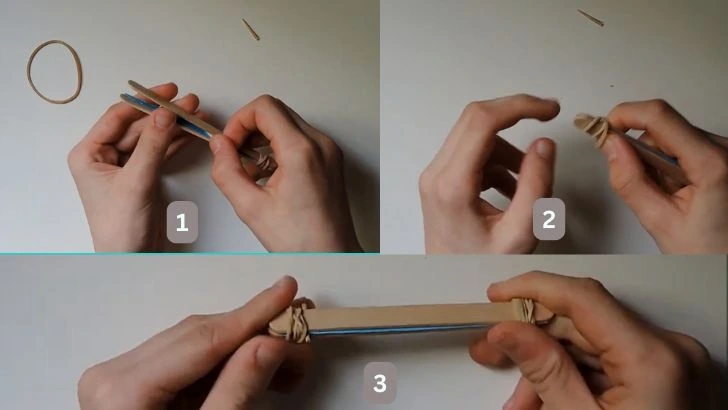
Repeat with another toothpick on the other end.
Secure the second end with another loom band.
Blow between the sticks to create sound!
The Science Behind It
When you blow into the harmonica, the paper or rubber band vibrates, creating sound waves that travel through the air to your ears.
The frequency of these vibrations (measured in Hertz) determines the pitch of the sound. Faster vibrations produce a higher pitch, while slower vibrations create a lower pitch.
Experimenting with Sound
Try using different sizes of paper or rubber bands to see how it affects the pitch.
Cut the paper into a shape that varies in width from one end to the other. This can create multiple pitches in a single harmonica!
Press the sticks together while blowing to change the sound.
Benefits of This Activity
Fine Motor Skills – Helps with hand-eye coordination and dexterity.
Scientific Exploration – Encourages learning about sound waves and vibrations.
Creativity & Music – Introduces the concept of making music through simple materials.
Final Thoughts
Building a harmonica out of popsicle sticks is not just a fun craft but also a great way to learn about sound and music.
Whether you’re making it with kids or experimenting with different designs, this DIY project is sure to bring enjoyment and education together. So grab your materials and start crafting your very own musical instrument today! 🎵


