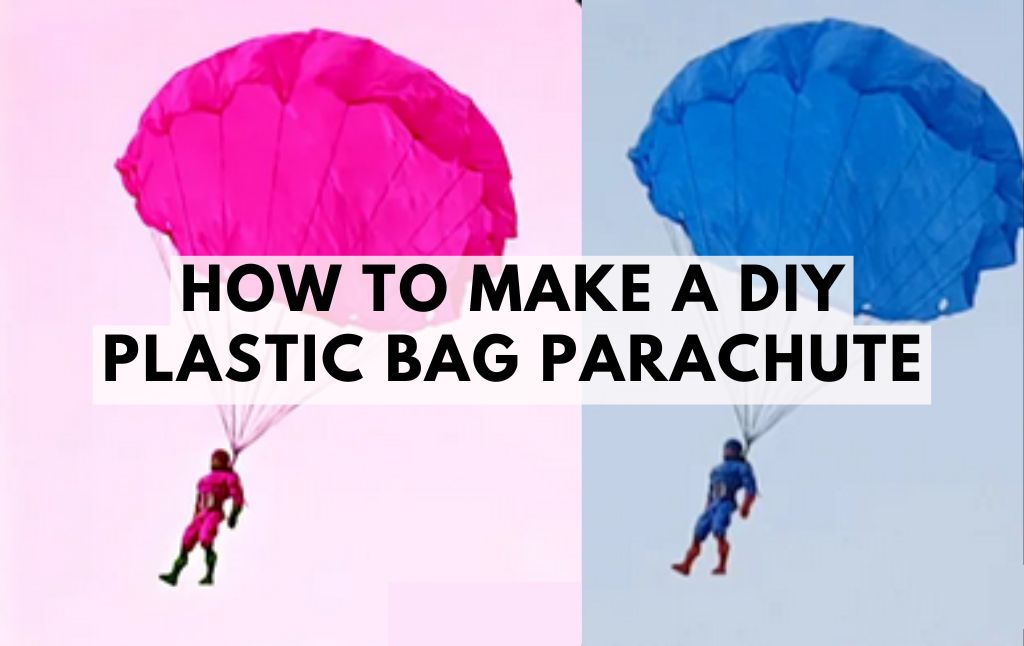
Looking for a fun and simple science activity that your kids will love? A DIY plastic bag parachute is a fantastic hands-on project that combines creativity and physics.
Using basic household materials, you can create a working parachute that demonstrates the principles of air resistance and gravity. Let’s get started!
Materials You’ll Need
- Plastic bag (such as a gallon-sized Ziploc bag)
- Scissors
- Tape
- Hole punch
- Plastic or paper cup
- String or yarn (approximately 9 inches per piece)
Step-by-Step Instructions
Step 1: Prepare the Plastic Bag
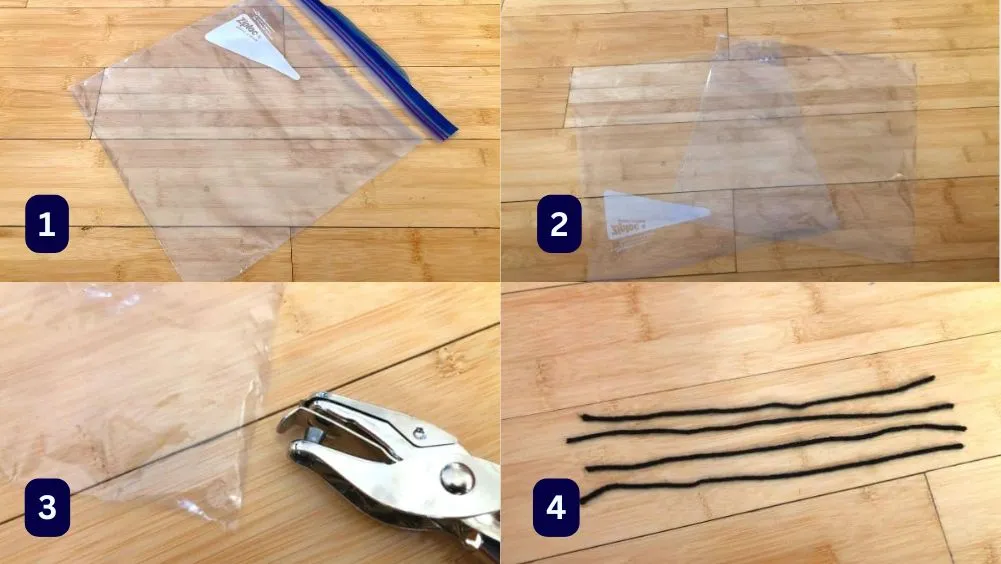
Start by cutting off the top part of the plastic bag, using the zipper as a guide to ensure a straight line. Then, cut down the sides to create two squares of plastic. You will only need one square for this project, so set the other aside for later use.
Step 2: Create Attachment Points
Using a hole punch, make holes in all four corners of your plastic square. These holes will be used to attach the strings that will hold the cup.
Step 3: Attach the Strings
Cut four equal-length pieces of string, approximately 9 inches long. Thread one end of each string through the holes you punched in the plastic bag. Secure the strings to the plastic using a small piece of tape. Make sure the tape is on the underside of the parachute so it doesn’t interfere with the airflow.
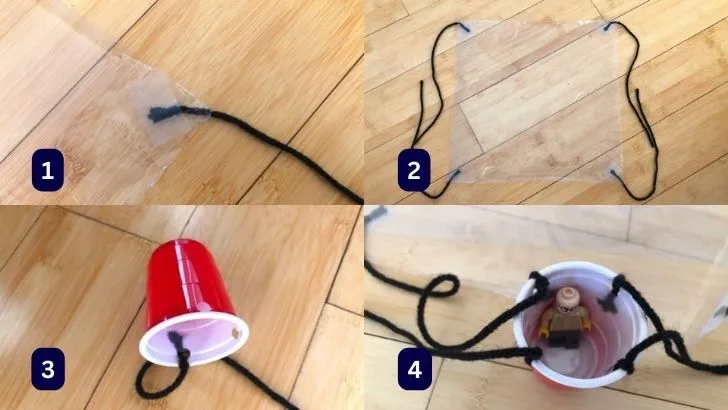
Step 4: Prepare the Cup
Punch four evenly spaced holes around the rim of your cup. These holes should be positioned at 90-degree angles to ensure an even weight distribution.
Step 5: Connect the Strings to the Cup
Take the loose ends of the strings attached to your parachute and thread them through the holes in the cup. Tie a knot at each end to secure them in place. For extra security, you can also tape the loose ends inside the cup to prevent slipping.
Step 6: Test Your Parachute!
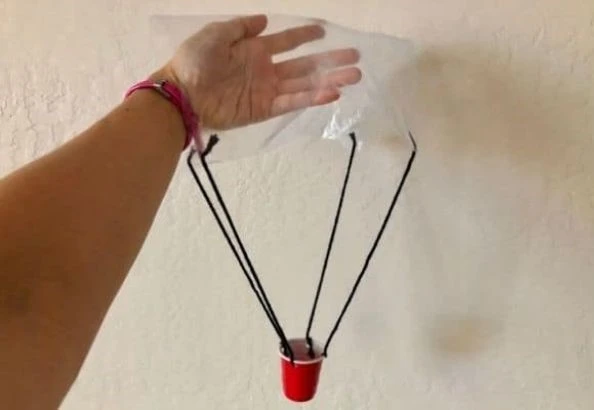
Now comes the fun part—testing your parachute! Place a small object (like a LEGO figure) inside the cup. Hold the parachute by the plastic square with your palm facing up and lightly toss it upward in front of you. Watch as your parachute glides to the ground with a soft landing.
The Science Behind the DIY Parachute
This experiment is a great way to teach kids about air resistance (also known as drag). When the parachute is released, gravity pulls it downward. However, as the parachute falls, air pushes against its surface, slowing the descent.
The larger the surface area of the parachute, the more air resistance it creates, leading to a slower and smoother fall.
Fun Science Extensions:
Change the parachute size: Try making a smaller or larger parachute to see how it affects the fall speed.
Vary the weight: Add different objects to the cup and observe how they influence the parachute’s descent.
Alter the string length: Experiment with shorter or longer strings and note any changes in how the parachute falls.
Cut a hole in the parachute: Does a small hole in the center affect the parachute’s motion? Give it a try and find out!
Final Thoughts
This DIY plastic bag parachute is an excellent way to engage kids in STEM learning while providing hours of entertainment.
Plus, it’s a great way to repurpose old plastic bags! Whether you’re conducting science experiments or just having fun dropping parachutes from the stairs, this activity is sure to be a hit.
Try it today and let your little engineers explore the physics of flight in a fun and interactive way! ✈️🎈