Looking for a charming, budget-friendly, and wonderfully creative craft for spooky season? It’s time to raid your recycling bin!
You can turn a simple cardboard egg carton into the most adorable gallery of ghost family portraits you’ve ever seen.
This project is perfect for crafters of all ages and allows for endless customization. Create a whole haunted hallway of these sweet spirits, each with its own unique personality. Let’s get started!
What You’ll Need:
- A cardboard egg carton
- Scissors
- White acrylic paint and a paintbrush
- Cardboard (from a shipping box works great)
- Colorful or patterned scrapbook paper
- Glue (a glue stick for paper and craft glue for the 3D parts)
- A black fine-tip marker
- Optional: A pink marker, a gold paint pen, and small decorations (mini pumpkins, ribbons, black paper for hats, etc.)
Step-by-Step Instructions
Step 1: Form Your Ghost
Your ghost’s body will be made from the cone shaped dividers inside the egg carton. Carefully cut out one of these cones.
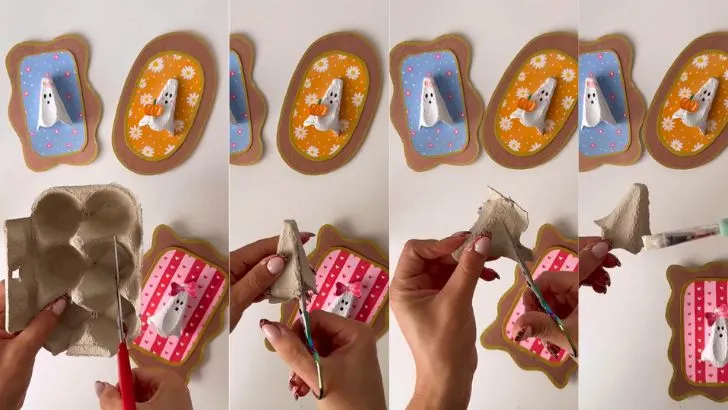
Once separated, use your scissors to trim the bottom edge, giving it a wavy, flowing look like a classic ghostly sheet.
Step 2: Paint Your Ghost White
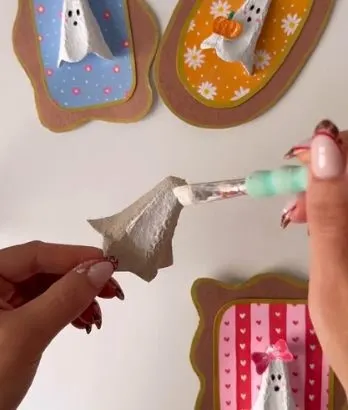
Using your white acrylic paint, give the egg carton cone a solid coat. Since the cardboard is absorbent, you might need two coats for a bright, even finish. Set it aside to dry completely.
Step 3: Give Your Ghost a Face
Once the paint is dry, it’s time to bring your little ghost to life. Use your black fine tip marker to draw two simple ovals for eyes and a small circle or oval for a mouth.
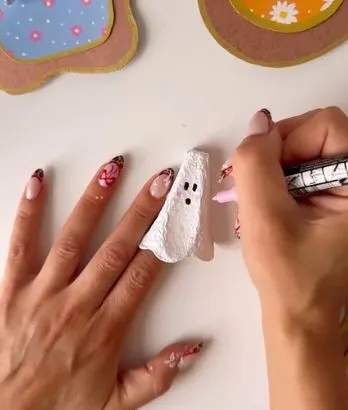
For an extra touch of cuteness, add two little pink dots on either side of the face for rosy cheeks.
Step 4: Create the Portrait Frame
Cut a frame shape out of your plain cardboard. You can make it rectangular, oval, or a whimsical, wavy shape. Next, cut a slightly smaller piece of decorative scrapbook paper to be the “wallpaper” or background for your portrait.
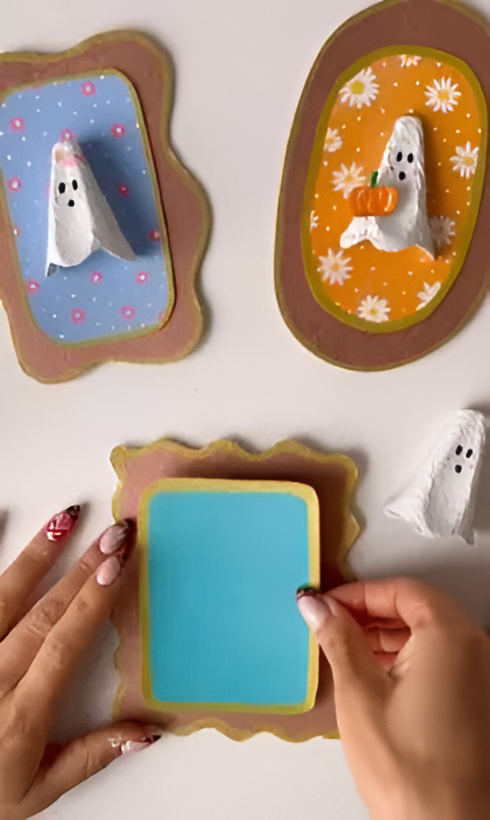
A gold paint pen adds a lovely touch when traced around the edges of both the frame and the background paper. Glue the background paper onto the center of the cardboard frame.
Step 5: Assemble Your Ghost Portrait
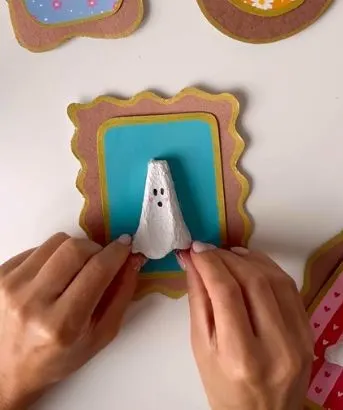
Apply a dab of craft glue to the back of your finished ghost and press it firmly into the center of your prepared frame. Hold it for a few seconds to make sure it’s secure.
Step 6: Accessorize and Embellish!
This is where you can let your creativity run wild! Give each ghost its own personality with unique accessories.
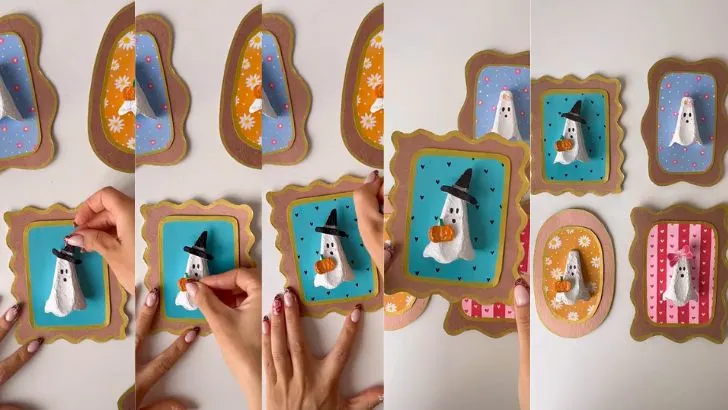
- Craft a tiny witch hat from black paper.
- Add a small pink bow to its head.
- Glue on a miniature pumpkin for it to hold.
- Draw little hearts, stars, or flowers on the background paper.
Create a whole collection of these portraits to display as a spooktacular gallery wall. It’s a wonderfully whimsical way to celebrate the Halloween season! Happy crafting
Get the Pottery Barn Look for Less: DIY Glowing Ghost Cloche
Create Your Own Spooky & Glowing Ghost Family This Halloween!
Craft a Vampire Candy Holder for Halloween
Create Your Own Spooky Glowing Ghosts
Create a Magical DIY Heart Bottle Lamp
How to Fold a Glowing Origami Petal Sphere