
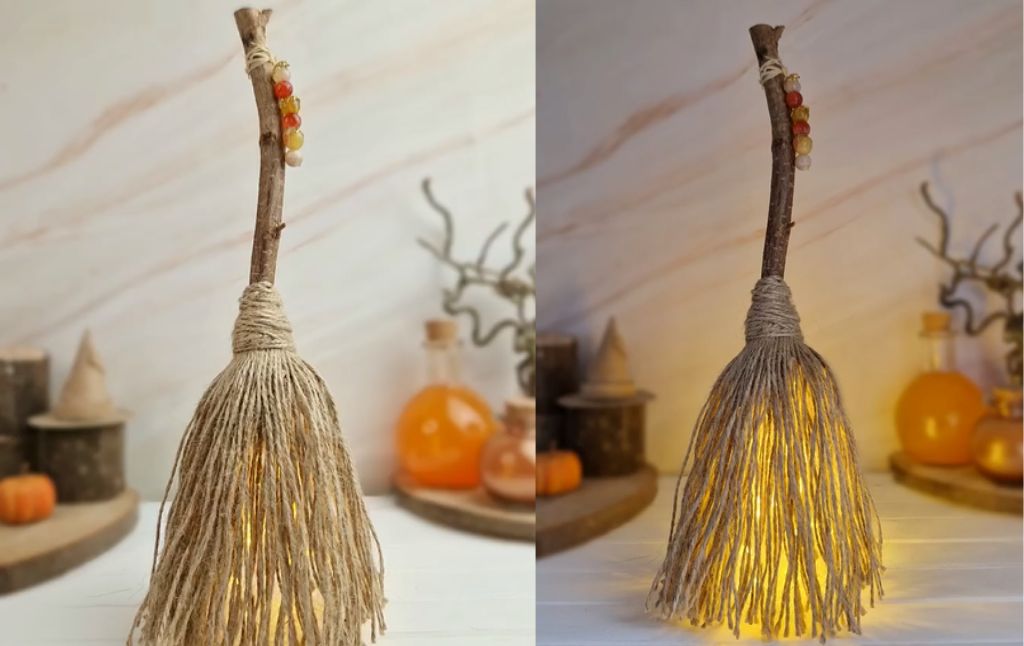
Ready to add a touch of rustic, whimsical magic to your home this spooky season? This enchanting witch’s broom isn’t just a charming decoration it’s also a cozy, glowing lamp! Combining natural elements with a warm, magical light, this project is the perfect way to bring a bit of enchantment to your mantelpiece, shelf, or Halloween tablescape.
This craft is wonderfully simple, budget-friendly, and results in a stunning piece of decor you’ll want to display all autumn long. Let’s get crafting!
What You’ll Need:
- Twine or jute string
- A sturdy stick or branch for the handle
- A small, empty glass bottle (a small sauce or juice bottle works perfectly)
- A piece of cardboard
- Scissors
- Battery-powered LED fairy lights
- Hot glue gun and glue sticks
- Optional: Assorted beads for decoration
Step-by-Step Instructions
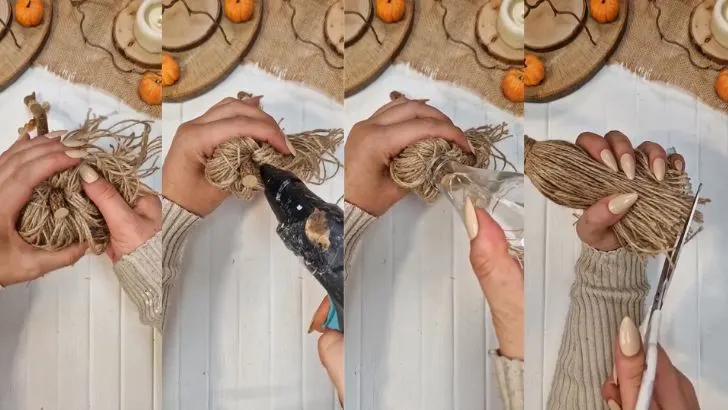
Step 1: Create the Broom Bristles
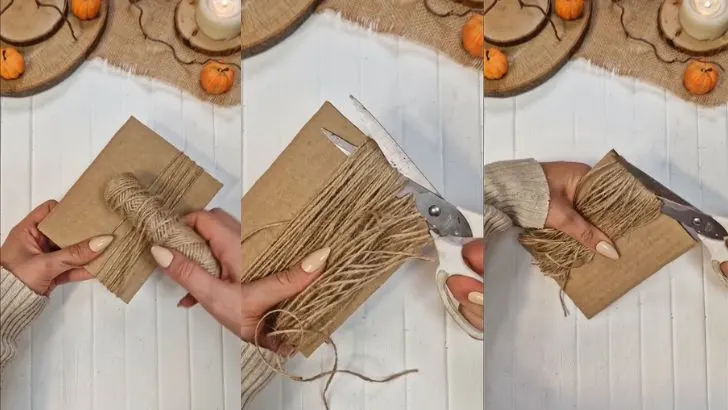
First, you’ll need to make the bristles for your broom. Take a flat piece of cardboard and begin wrapping the twine around it horizontally.
Keep wrapping until you have a thick, lush bundle the more you wrap, the fuller your broom will be.
Once you have a good amount of twine wrapped, carefully slide the bundle off the cardboard, keeping the loops intact. Use your scissors to cut through the loops on both side.
Step 2: Assemble the Broom

Take your sturdy stick and lay it in the center of the twine bundle, about a third of the way down from the folded edge. Fold the top section of twine down over the stick.
Using a separate piece of twine, tightly wrap it around the base of the bristles, just under the stick, to secure everything in place. Continue wrapping up toward the stick to create a neat, bound look, then tie it off securely.
Step 3: Prepare the Glowing Base
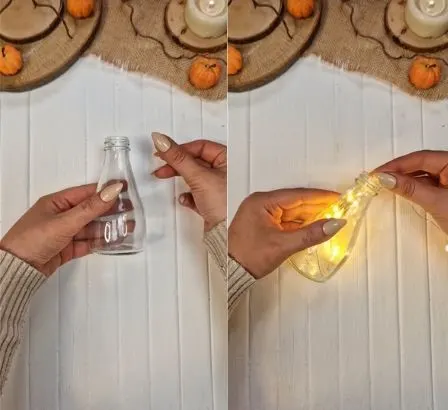
This is where the magic begins! Take your small, clean glass bottle and carefully feed the string of battery powered fairy lights inside. Leave the small battery pack hanging out of the opening.
Step 4: Add the Finishing Touches
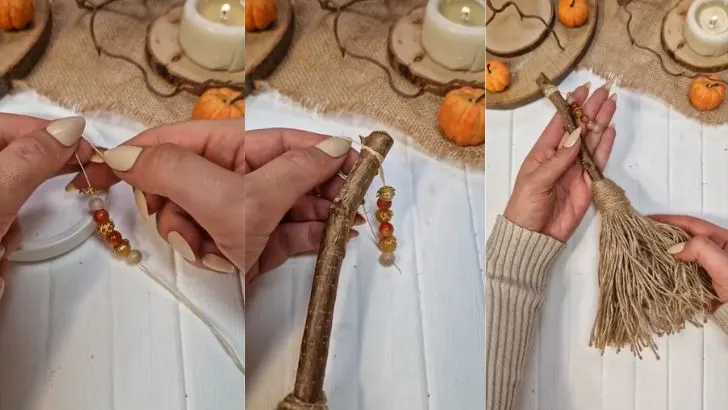
For a little extra enchantment, string a few decorative beads onto a thin piece of twine or wire and wrap it around the top of the broom handle.
Step 5: Combine the Broom and the Light
Apply a generous ring of hot glue around the top opening of the glass bottle. Quickly and carefully insert the bottle, lights and all, up into the center of the twine bristles.
The hot glue will secure the bottle inside, creating a hidden, glowing core for your broom. Make sure the bristles completely cover the bottle.
Now it’s time to perfect your broomstick. Trim the ends of the twine bristles with your scissors so they are even and can stand flat on a surface.
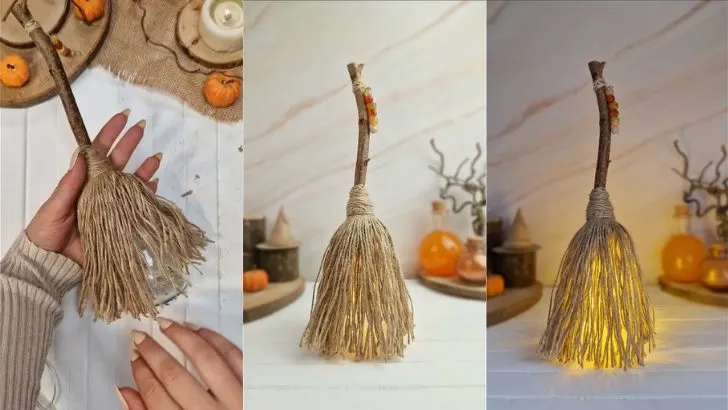
Your magical glowing witch’s broom is now complete! Place it on your favorite shelf, turn on the lights, and watch as it casts a warm, cozy, and wonderfully witchy glow over your space. Happy Halloween crafting.
Craft a Wicked Animated Eyeball Spellbook for Halloween
DIY Yarn Tassel Ghosts: Your New Favorite Halloween Craft
Create Adorable Upcycled Ghost Portraits for Halloween
Get the Pottery Barn Look for Less: DIY Glowing Ghost Cloche
Create Your Own Spooky & Glowing Ghost Family This Halloween!
Craft a Vampire Candy Holder for Halloween
Create Your Own Spooky Glowing Ghosts
Create a Magical DIY Heart Bottle Lamp


