
Hello, fellow Halloween lovers! As the air gets crisp and the spooky season approaches, it’s time to get creative with everyone’s favorite autumn canvas: the pumpkin!
If you’re looking for a fun and less messy alternative to carving, you’ve come to the right place.
Today, I’m sharing five of my favorite no carve pumpkin painting ideas that are perfect for artists of all ages.
From beloved animated characters to abstract patterns and spooky cute designs, these projects are a wonderful way to express your creativity and add a unique touch to your Halloween decor. Let’s get painting!
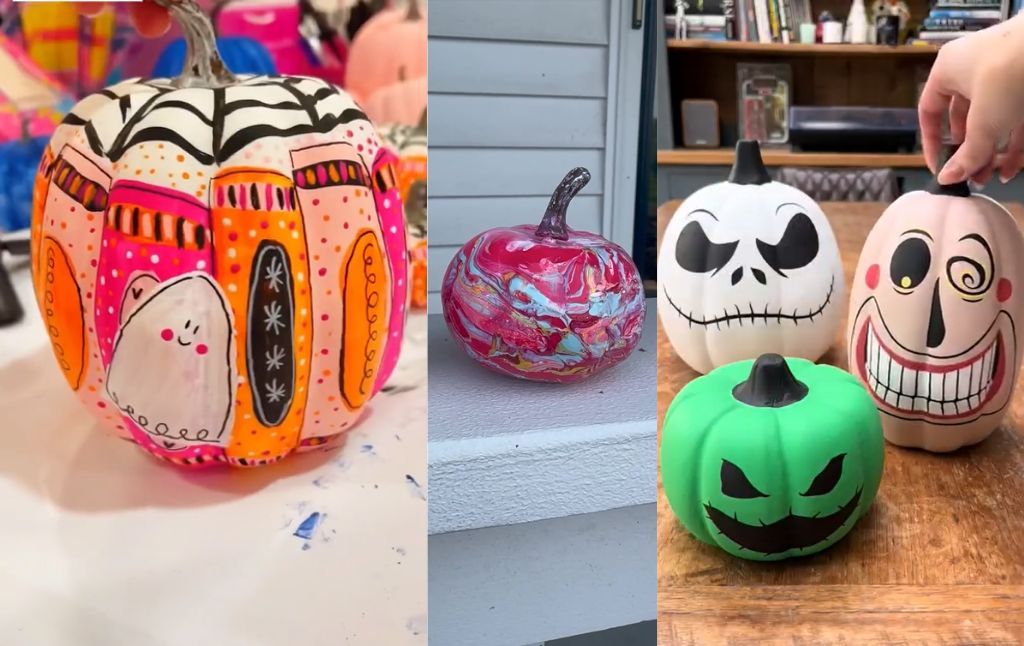
1. “The Nightmare Before Christmas” Character Pumpkins
What’s this? What’s this? It’s the perfect way to bring the magic of Halloween Town to your front porch! Painting pumpkins inspired by “The Nightmare Before Christmas” is a fantastic project for fans of the iconic film.
What You’ll Need: Faux or real pumpkins, acrylic paints (white, black, green, and a pale pink/peach), and paintbrushes.
How to Create Them:
Base Coats: Give your pumpkins a solid base coat white for Jack Skellington, pale pink for the Mayor, and bright green for a classic spooky jack o’ lantern.
Sketch & Paint: Lightly sketch the famous faces, then use black paint to fill in Jack’s iconic eyes and stitched smile, and the Mayor’s wide grin and spiraling eyes.
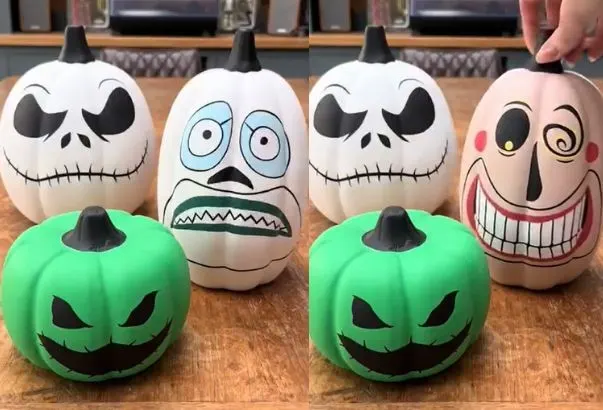
Display: Arrange your trio for a perfect tribute to a Halloween classic!
2. Psychedelic Water Marbled Pumpkins
This technique is pure magic! Water marbling with nail polish creates a stunning, one of a kind psychedelic pattern that looks incredibly intricate but is surprisingly easy to achieve.
What You’ll Need: Small white pumpkins, a bowl of room temperature water, various colors of nail polish, and a wooden skewer.
How to Create Them:
Create Your Pattern: Drip different colors of nail polish onto the surface of the water. Use a skewer to gently swirl the colors into a marbled pattern.
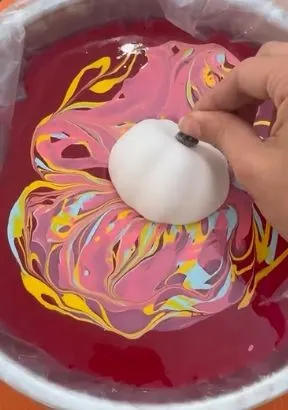
Dip Your Pumpkin: Carefully dip your pumpkin into the water, rolling it so the floating nail polish adheres to the surface.
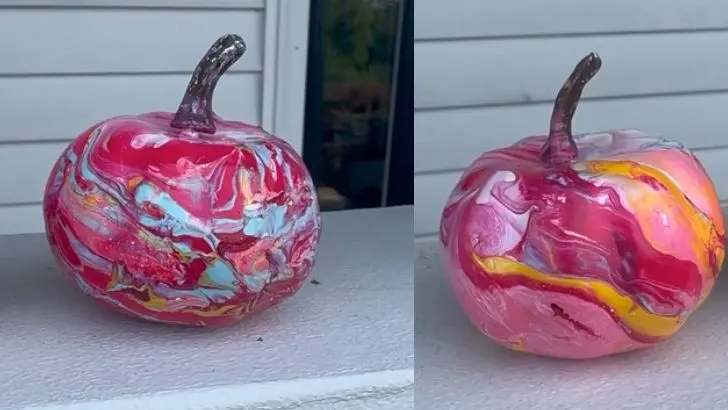
Let It Dry: Place your marbled pumpkin on a protected surface to dry completely. The result is a vibrant, glossy, and completely unique piece of art!
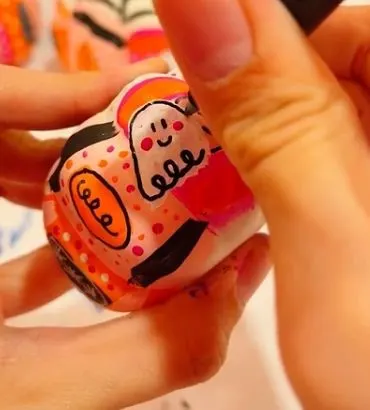
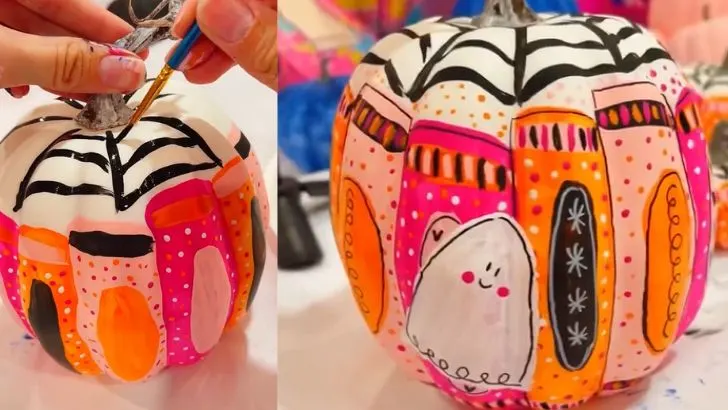
3. Abstract and Artsy Patterned Pumpkins
For those who love color, pattern, and a touch of spooky whimsy, this abstract design is the perfect project. It allows for complete creative freedom and results in a beautiful, decorative piece.
What You’ll Need: White pumpkins, acrylic paints in your favorite Halloween color palette, and paint pens for details.
How to Create Them:
Color Blocking: Paint abstract blocks of color onto your pumpkin, following the natural ridges.
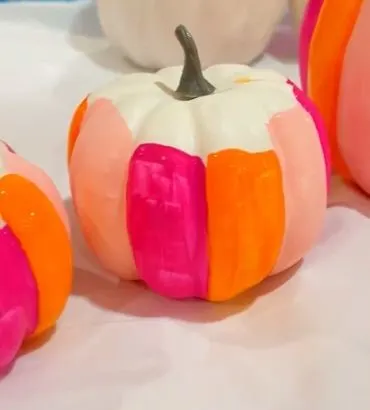
Layer Patterns: Once dry, use paint pens to add layers of fun patterns like polka dots, stripes, and squiggles.
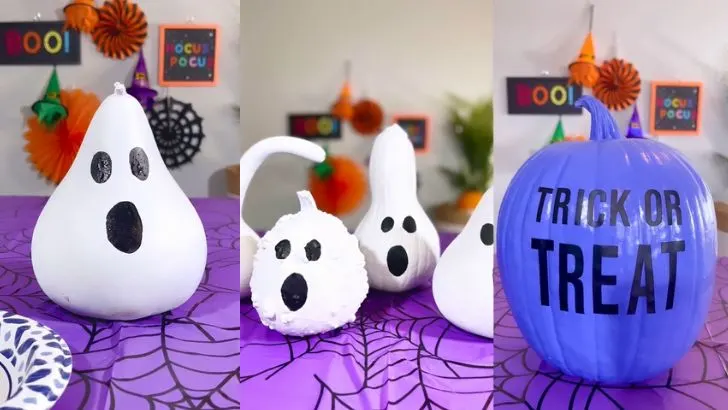
Add a Spooky Touch: Incorporate some classic Halloween elements like a spiderweb on top or a few cute, simple ghosts painted over your colorful patterns.
4. Goofy and Friendly Face Pumpkin
This idea is perfect for a more lighthearted and kid friendly Halloween decoration. With its big, googly eyes and cheerful smile, this painted pumpkin is sure to bring a smile to everyone’s face.
What You’ll Need: An orange pumpkin, acrylic paints (white, black, blue, green, red), and paintbrushes.
How to Create It:
Paint the Eyes: Start by painting two large white ovals for the eyes.
Add Color: Fill in the eyes with a bright blue, add a friendly green nose, and a happy red mouth.

Outline and Highlight: Use black paint to outline all the features and add pupils to the eyes. A few white highlights on the eyes and teeth will make your character pop!
5. “Coco” Inspired Sugar Skull Pumpkins
Celebrate the vibrant and beautiful artistry of Día de los Muertos with pumpkins inspired by the beloved movie Coco. These designs are incredibly detailed and make for a stunning, heartfelt display.
What You’ll Need: Pumpkins (white works best for Miguel), acrylic paints or paint pens in various bright colors, plus black and white.
How to Create Them:
Sketch & Paint: Lightly sketch your design onto the pumpkin. For Miguel, start with a white base. For the alebrije, Dante, you can leave the natural orange of the pumpkin. Begin blocking in the main colors.
Add Intricate Details: Use fine tipped paint pens to add the beautiful, decorative patterns around Miguel’s eyes and the stitches on his mouth. For Dante, have fun with the vibrant, layered colors and bold black outlines.
Finishing Touches: To complete the Miguel pumpkin, you can even drape a piece of red fabric around the top to look like his signature hoodie.
I hope these ideas spark your creativity and encourage you to pick up a paintbrush this Halloween. Happy painting
3 Creative No Carve Pumpkin Painting Ideas for Halloween
3 Creative and Unique Pumpkin Carving Ideas for Halloween
3 Beautiful and Easy Fall Leaf Crafts for Kids
All About Apples: A Fun, Hands On Learning Craft for Kids!
Dive into Fall with 5 Fun Apple Investigation Activities!
A Fun and Educational Apple Life Cycle Craft
Create a Magical Glowing String Pumpkin for Your Autumn Decor
Create a Charming Paper Pumpkin Treat Box for Autumn
Make This Adorable Paper Turkey Hat
Craft a Magical Glowing Witch’s Broom for Your Halloween Decor


