
Guns are one of the most attractive toys for kids. Whereas a toy gun comes in many different materials and qualities, it is always fun to get a toy gun that is less risky for the kids to play with.
You can prepare a toy gun at your home very easily by just collecting a few trash items like recycled rubber bands and some ice cream sticks.
Making a mini-size toy gun at your home is no doubt a fun activity that will not only give you a toy to play with but also build lifetime memories of fun and laughter Apart from this, Water Weenie is also a DIY project that you can enjoy
Making a semi automatic rubber band gun:
Materials Required:
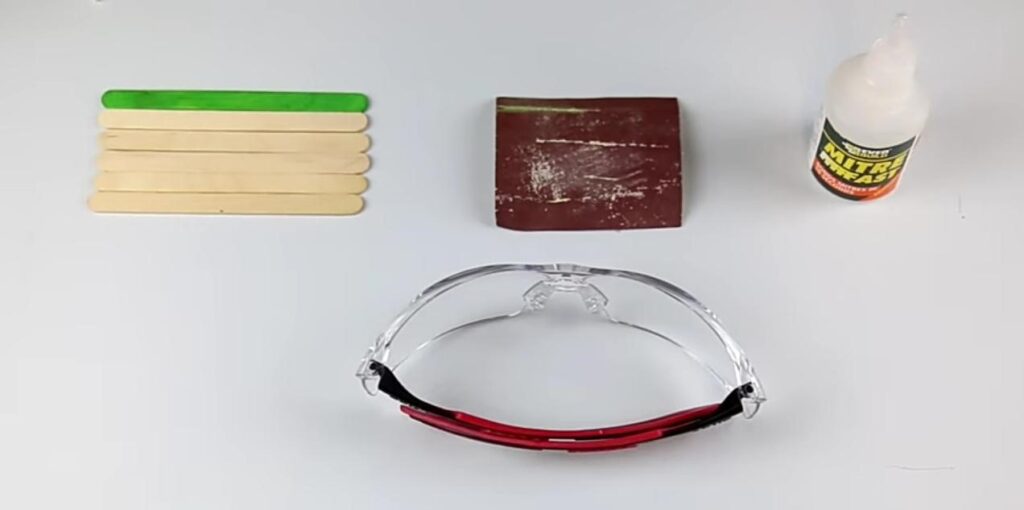
1.) 6 ice cream sticks
2.) A protective shield goggle
3.) A Strong Glue
4.) A sandpaper
5.) A cutter
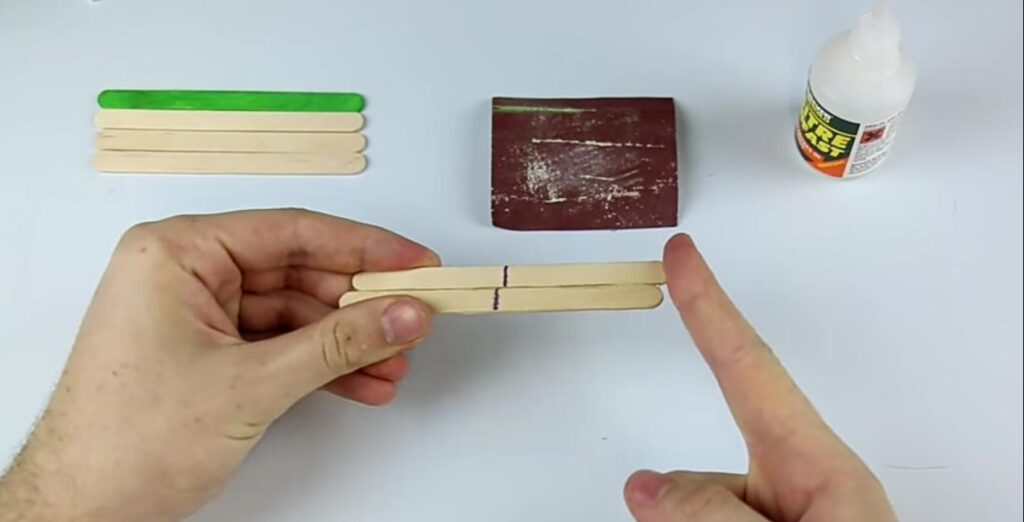
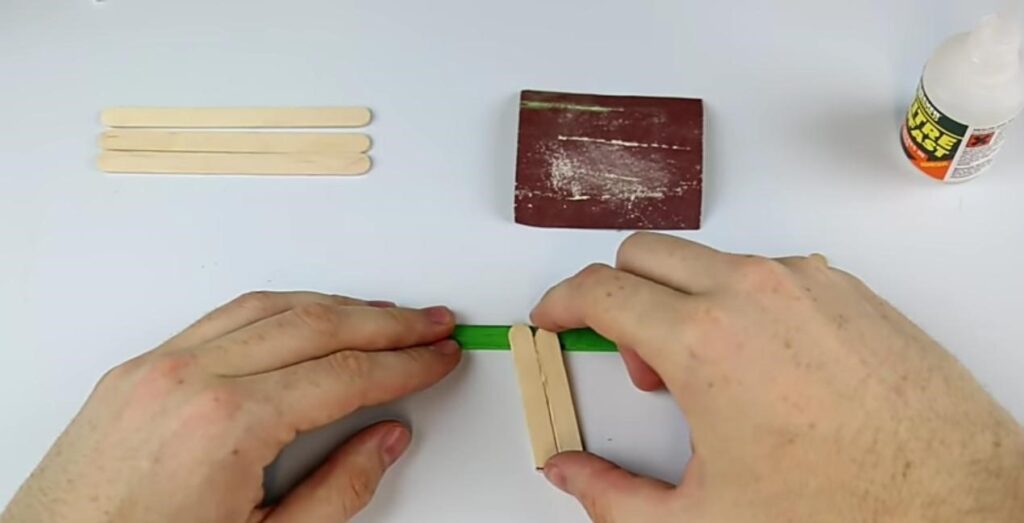
Step 1: Mark Two Icecream Sticks From The Centre
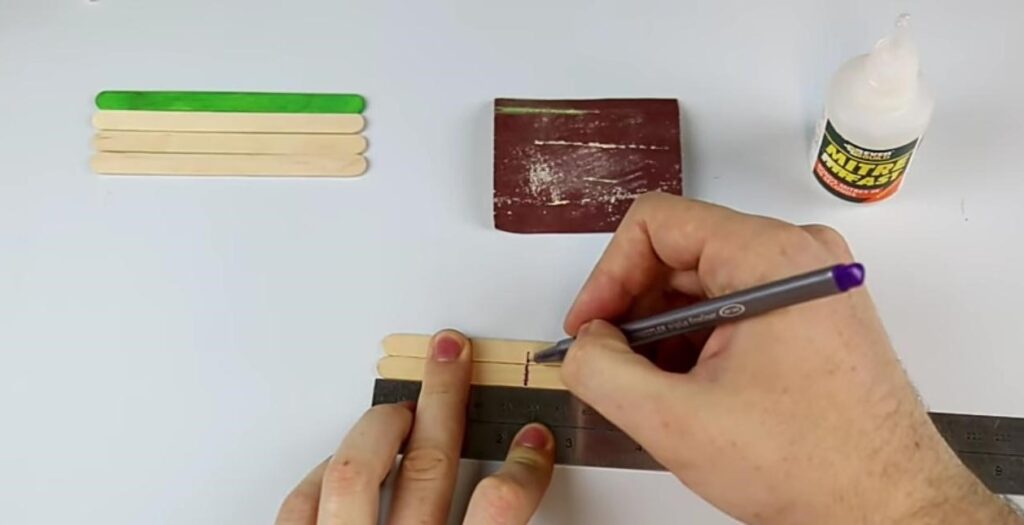
Take two ice cream sticks of the same length and using a scale, mark both of them in the center position.
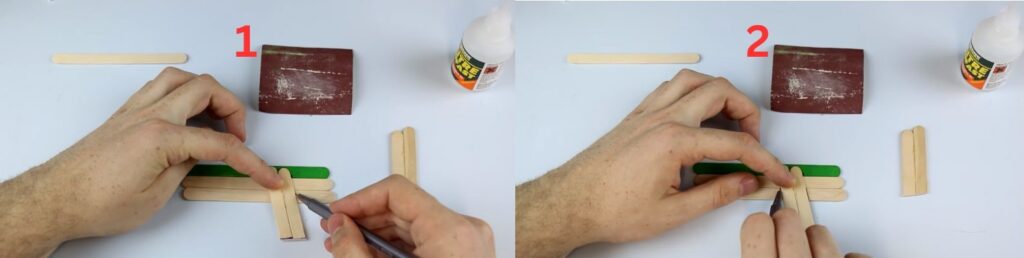
Step 2: Glue Both The Sticks Together
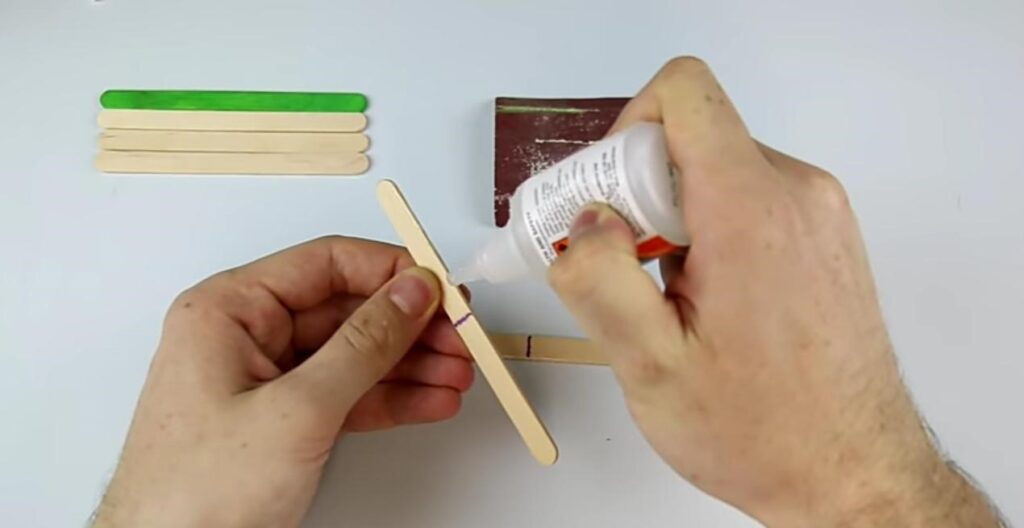
Now take a strong glue stick or a glue gun and run a coat of glue on the side of one of the ice cream sticks. Make sure to put the glue on the entire length of the stick properly.
Now take the other ice cream stick and paste both the sticks together. You have to be a little cautious while performing this step as the sticks must not be placed at the wrong position.
Make sure that the sticks must be glued together in such a manner that their centers do not collide with each other. One stick should be placed a little lower than the other as shown in the picture available above.
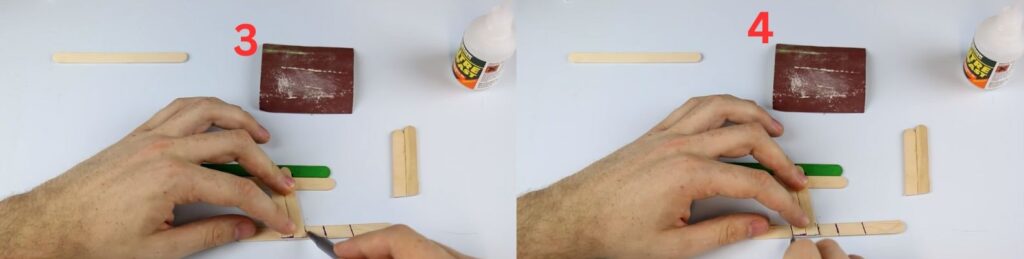
Step 3: Cut The Sticks From The Marked Area
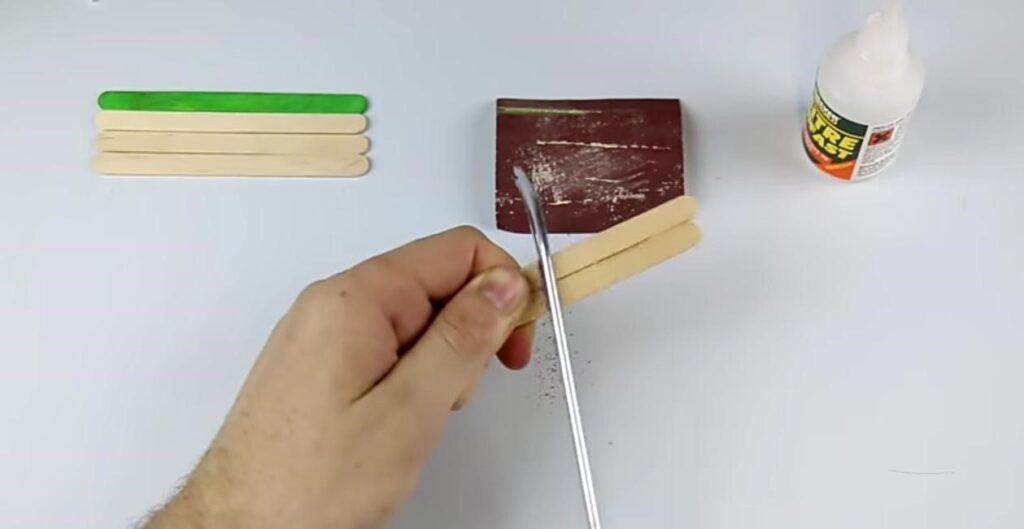
Once the sticks are well glued together, darken the marks that we have drawn on their surface and cut them in two from that portion. This way you will receive two pieces of sticks with diagonal bottoms.
Use sandpaper to clean the ends of the pieces of sticks. This way you will have sharp, pointed ends in a diagonal shape as shown above.
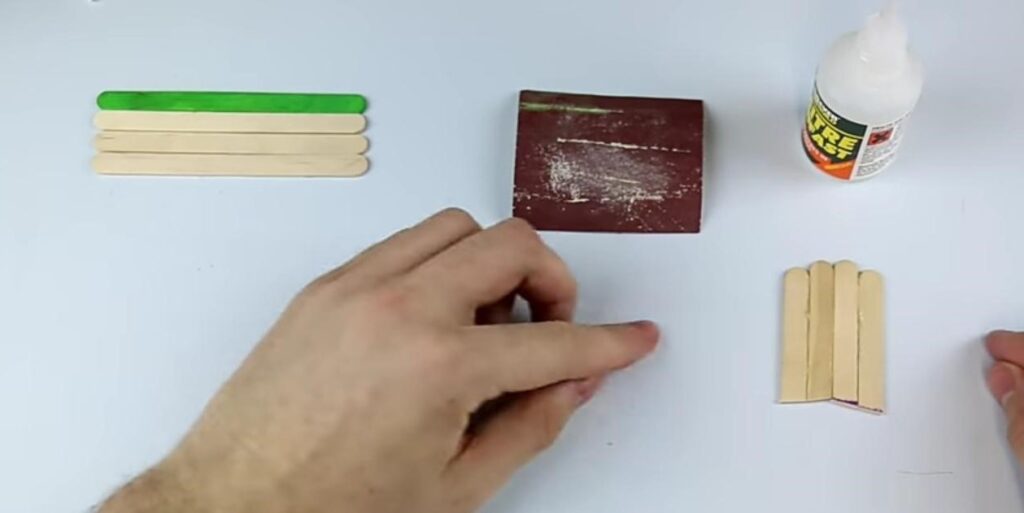
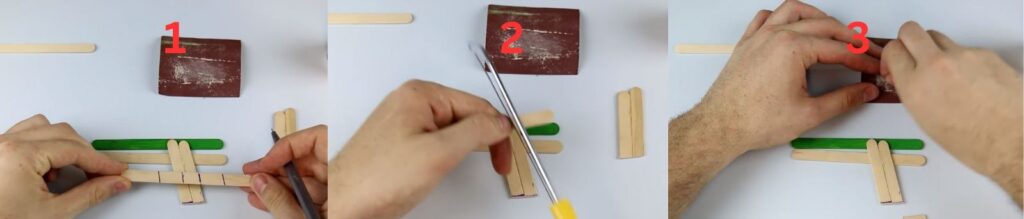
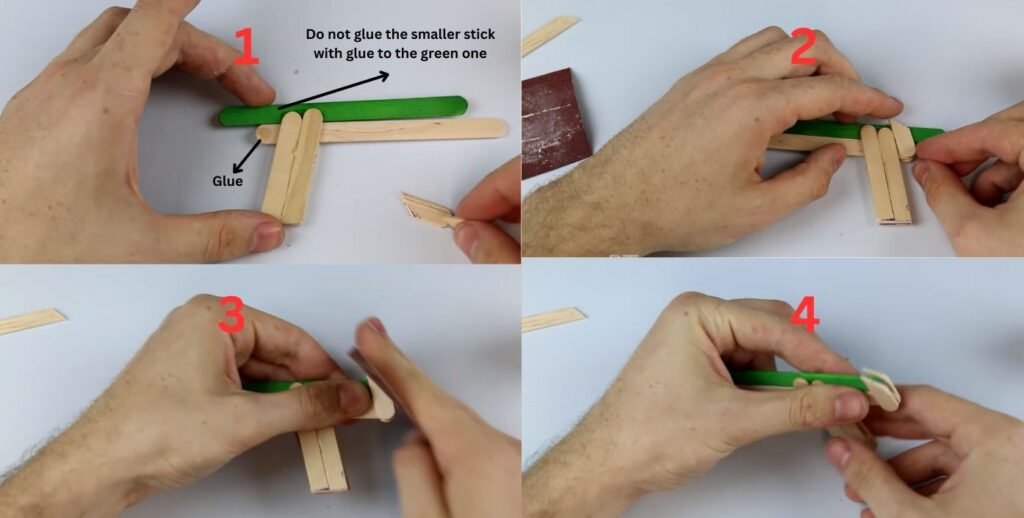
Step 4: Mark Some Areas On Different Sticks And Cut Them Into Pieces
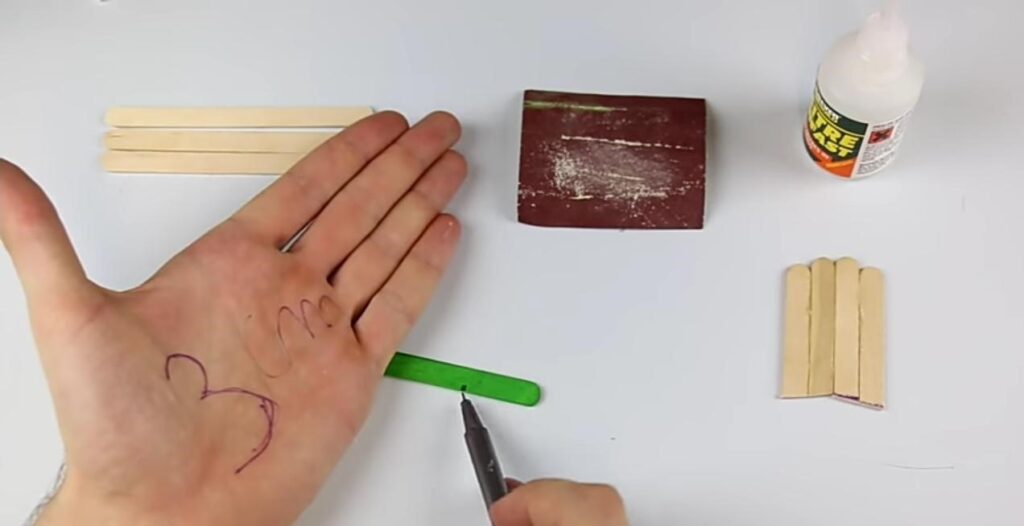
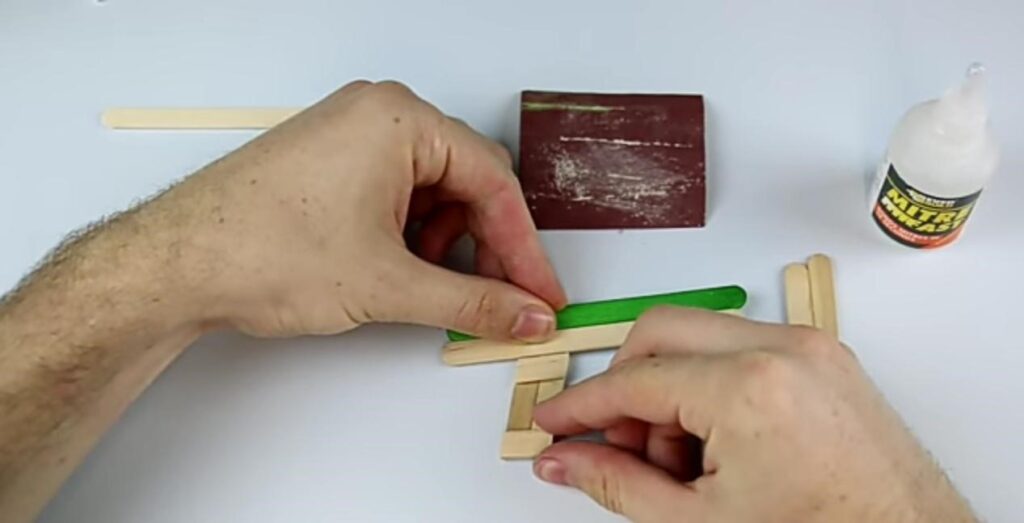
Now take another stick of a different color and mark it at 3 cm from the back.
Now take one of the pieces from the glued ice cream sticks pieces that you have just created. Paste it at the 3 cm point that you have marked on the colored stick.
Now take another two sticks and put them below the structure of sticks that you have already made. Don’t paste it there. Just keep it there and mark the points on the stick which is below. Mark it on the places where the glued stick piece is placed on it and then remove it from there.
Now bring the stick down and again mark two points on the areas where the piece of glued stick is.
You will see that you have got four marks on the stick. All the marks are at an equal distance from each other. You have to cut these four pieces of the stick using a cutter. Now rub these pieces on the sandpaper and get them smooth.
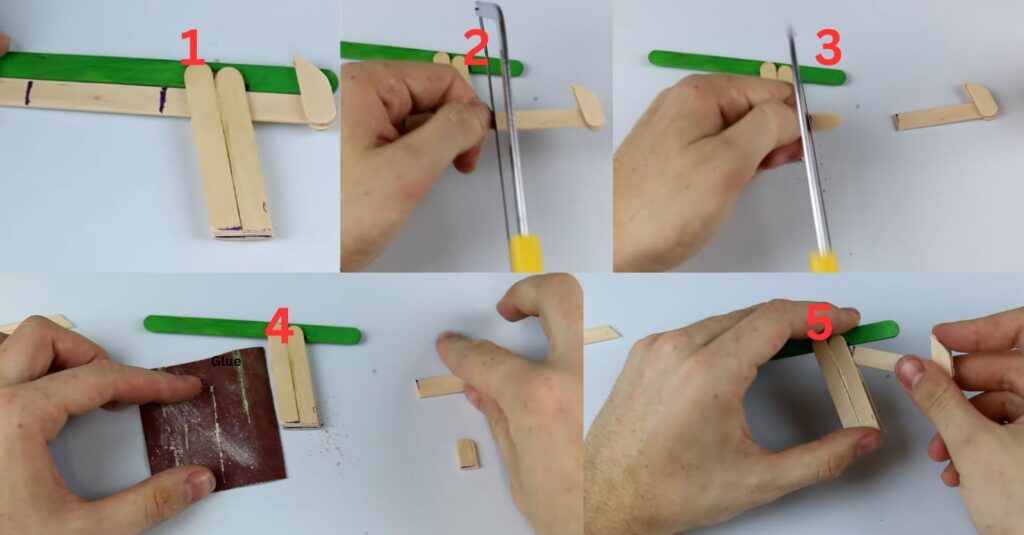
Step 5: Assemble The Gun
Now take two of these pieces and glue them on two different places on the gun. Glue one piece right under the long ice cream stick and the other on the bottom of the stick as shown above.
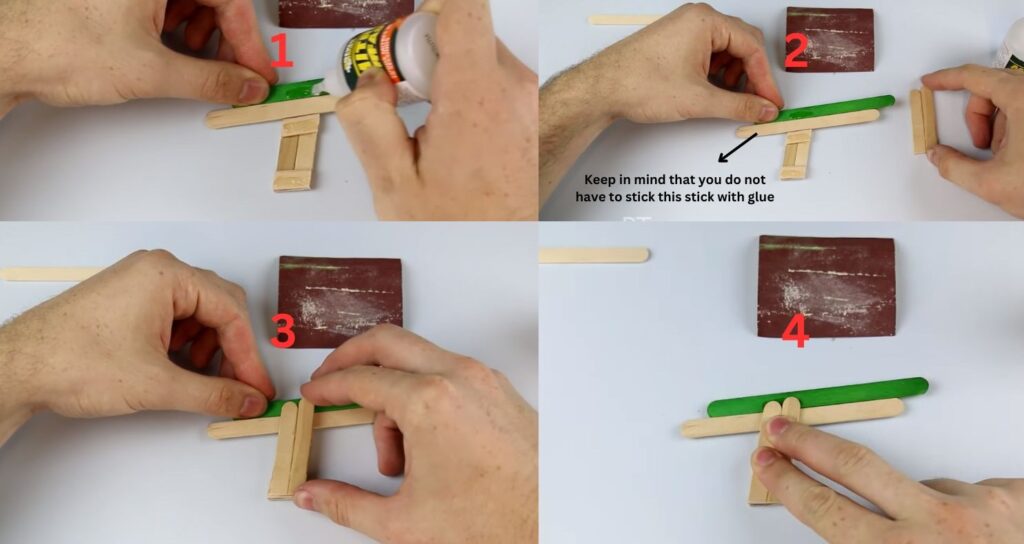
Now put some glue on both the pieces of the ice cream sticks and take the other piece of the two glued sticks that you have made. Put this piece of glued ice cream stick over the first. See the picture above for reference.
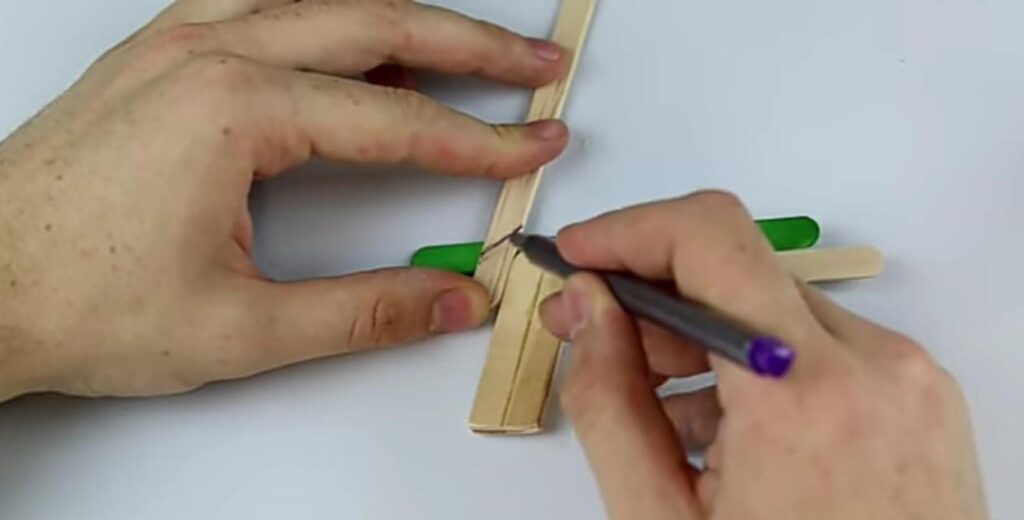
Now take another ice cream stick and this time put it on the colored stick at the place where the glued sticks are (beside the glued sticks). Mark a line on the stick with a pen, as shown above.
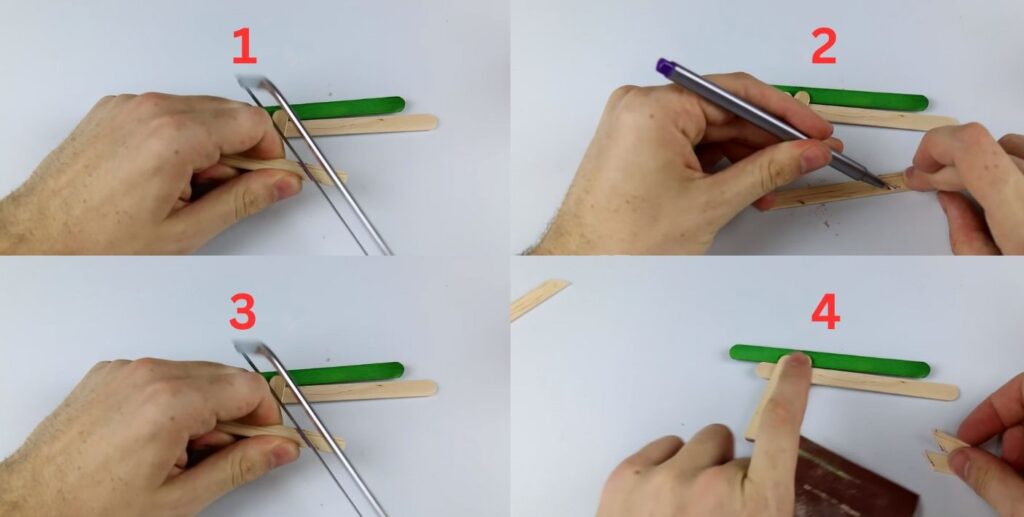
Now remove the stick from there. Cut out the marked piece from the ice cream stick and smoothen it by rubbing it on sandpaper. Now put this piece of ice cream stick on the other end of the same stick to take out another equal piece of the stick. Cut that piece too and now you will have two equal size ice cream stick pieces.
Now the next step is to glue both the pieces of the ice cream stick beside the pair of glued sticks. Glue the pieces on both sides of the gun. Refer to the picture for guidance.
Once you get a structure of the gun similar to the one above, you can proceed with the next step. In this step, you have to mark two areas on the ice cream stick. And then cut out these pieces with the help of a cutter.
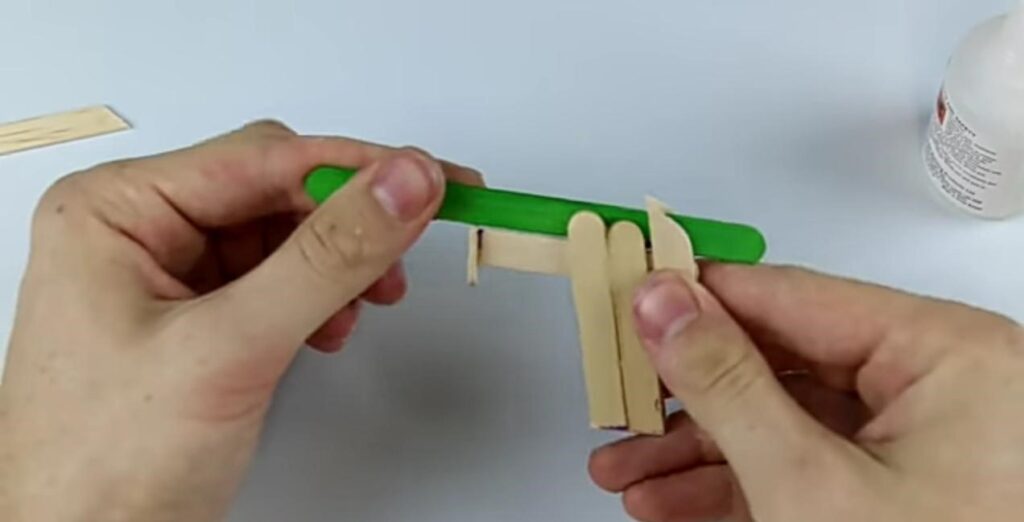
Now glue the piece of ice cream stick that you’ve cut to the front of the ice cream stick which is below the colored stick. See the picture above for reference.
Step 6: Cut The Gun From Some Areas And Attach The Rubber bands

For the next step, we will mark at four different areas with a black marker. You will have to mark 3 areas in the extreme right corner and a small mark on the front and cut this parts. You can refer to the picture above for guidance.
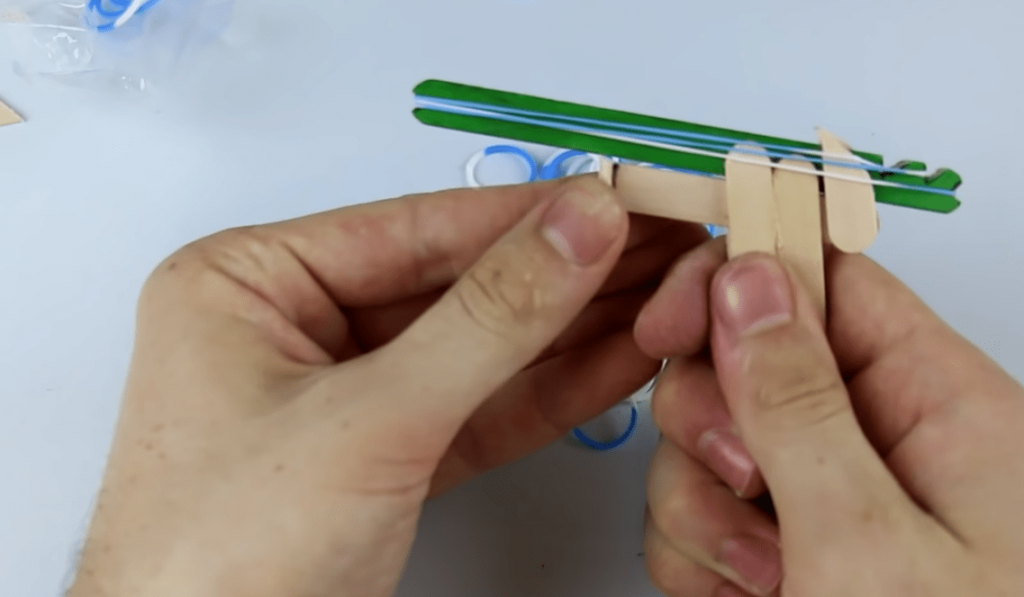
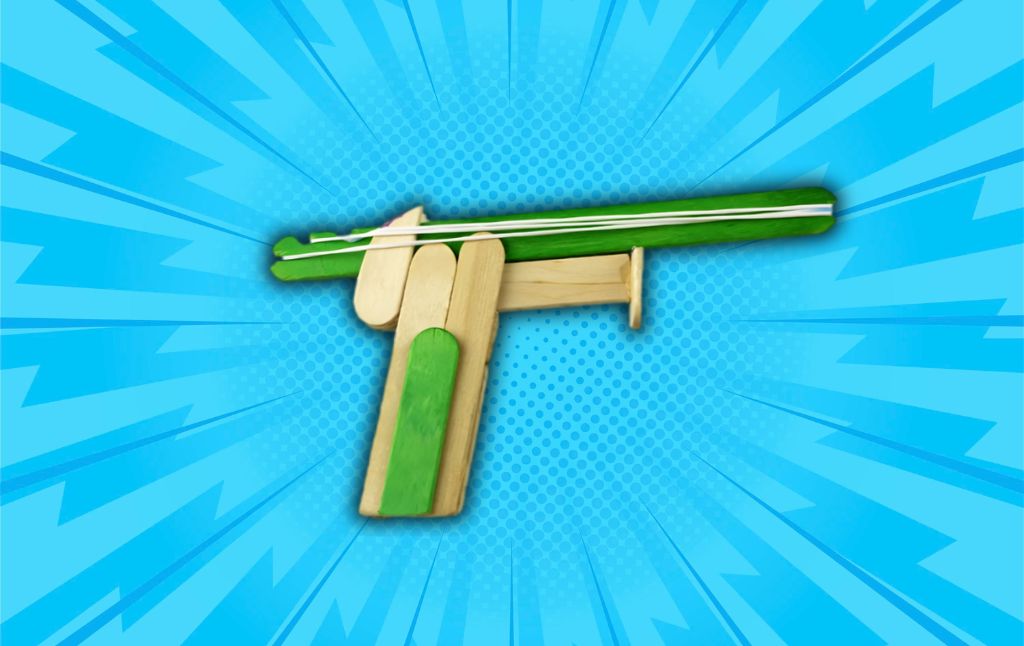
That’s it. Your rubber band gun is ready. Now all you have to do is fix the rubber band in the groove we made and press the trigger back. The rubber band will be thrown forward from the gun.


