
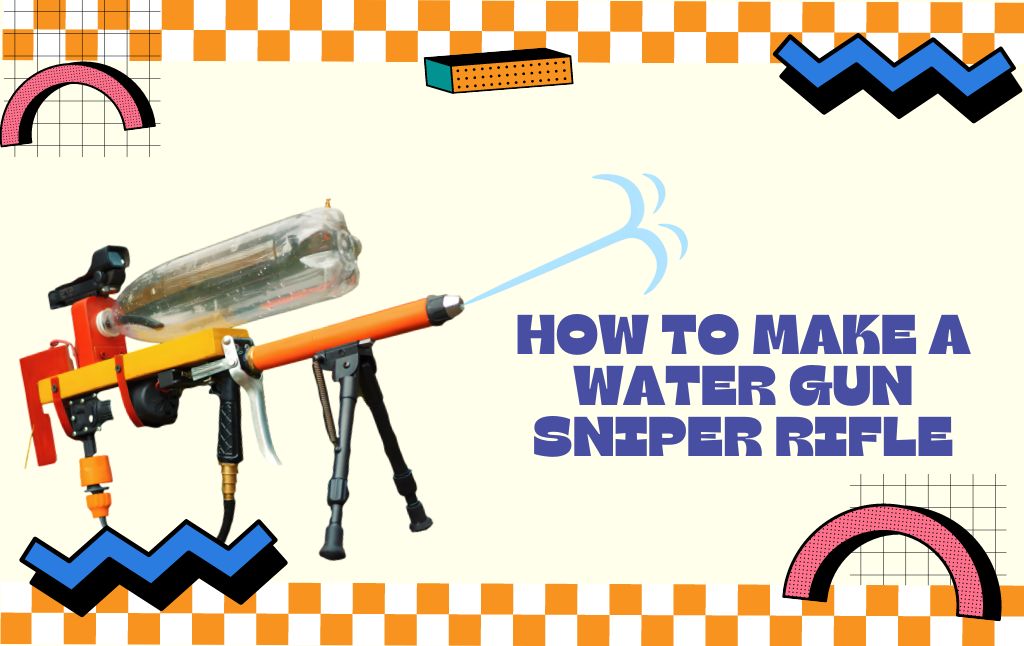
A water sniper rifle is a long-shaped high-precision rifle known to be more robust, powerful, high-range, and accurate than the others. It is not only an advanced version of a standard water rifle, but its up-to-date technology is also worth mentioning in the list of features that make it exceptional.
Most of us love playing a water fight but find it difficult to arrange a water gun sniper rifle around ourselves. So here we have discussed an easier way of creating a water gun sniper rifle at home with absolutely less effort and on an affordable budget with attractive colour.
Materials Required:
- A High-Pressure Water Sprayer Nozzle
- A 12 VC Diaphragm Pump
- An 11.1V Lipo Battery
- A Limit Switch
- A Hose Connector
- A Flexible Hose
- A Rectangular Wooden Board
- A Screwdriver
- Iron Nails
- A Semicircular Wooden Board
- Two Wire Connectors
- A Two Way Screwdriver
- A Bicycle Valve
- A Battery Holder
Steps To Be Followed:
Step1: Prepare The Base
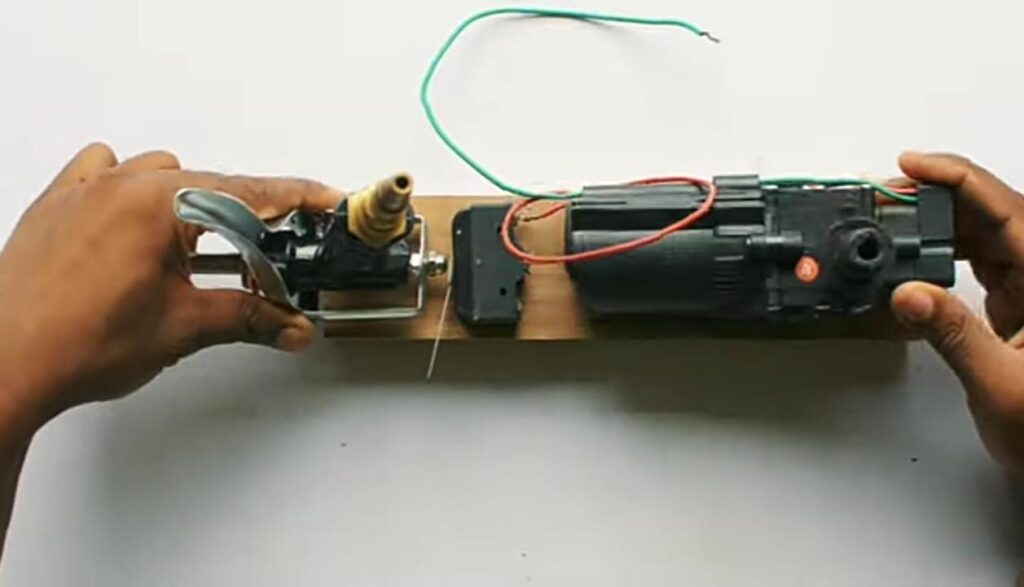
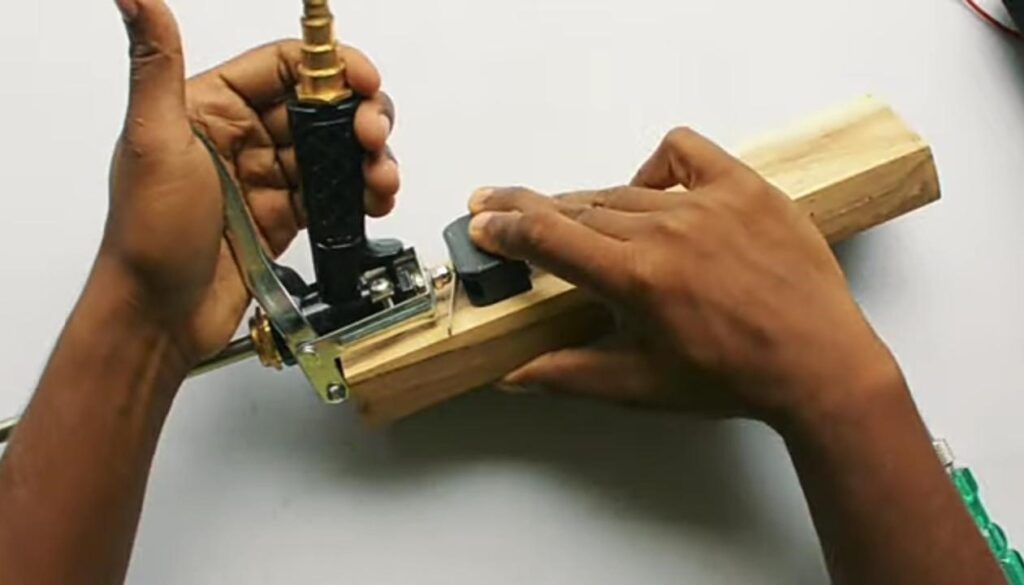
Preparing the base of a water gun sniper rifle is the first step in making one.
For this purpose, you have to place a high-pressure water sprayer nozzle, a 12 VC Diaphragm Pump, and a limit switch on a wooden base to determine the exact location where they will be fixed, as shown above.
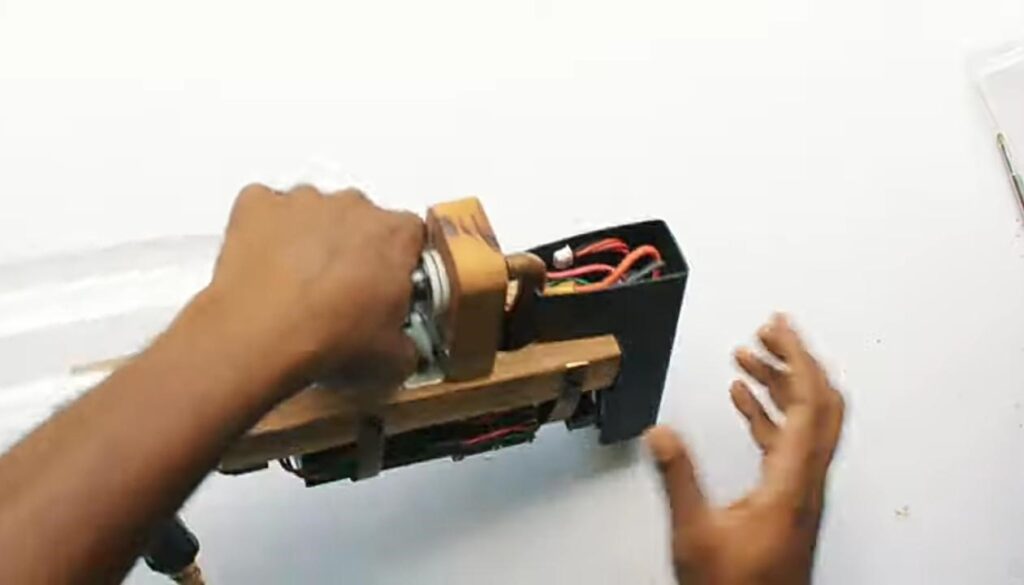
Step2: Fix The Mechanism At Its Place
The next step is to fix the sprayer nozzle, diaphragm pump, and limit switch in the same place on the wooden board where you decided.
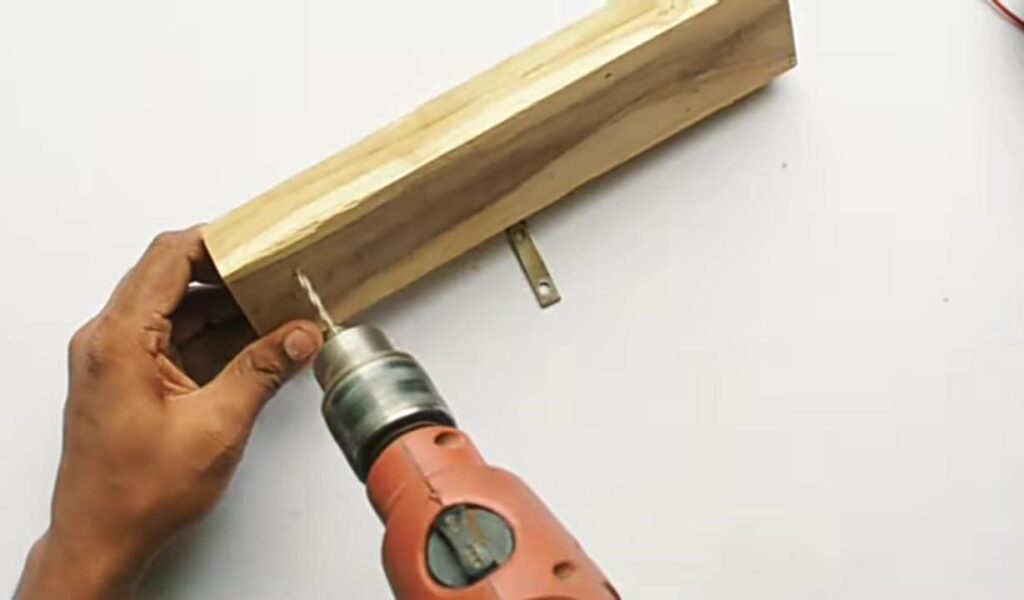
We start by fixing the high-pressure water sprayer nozzle on the extreme left edge of the wooden board. For this purpose, we will make two holes with a drill machine and then fix the sprayer nozzle, which will look like the one shown below.
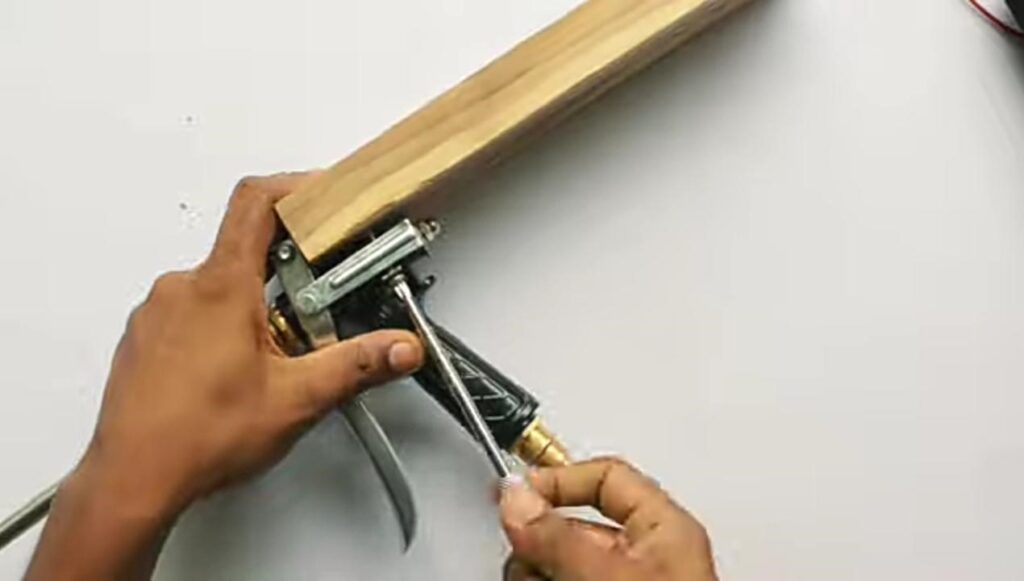
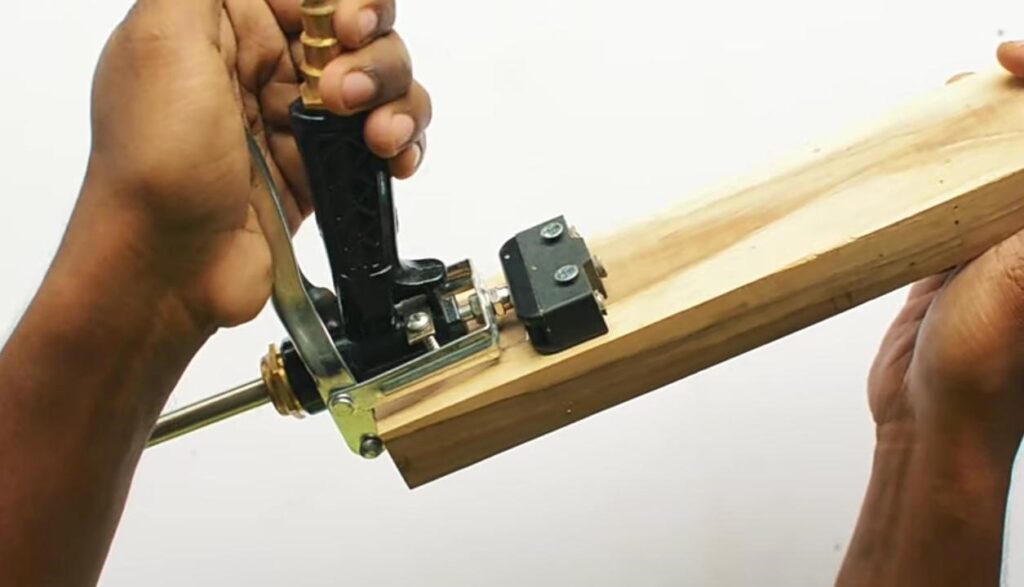
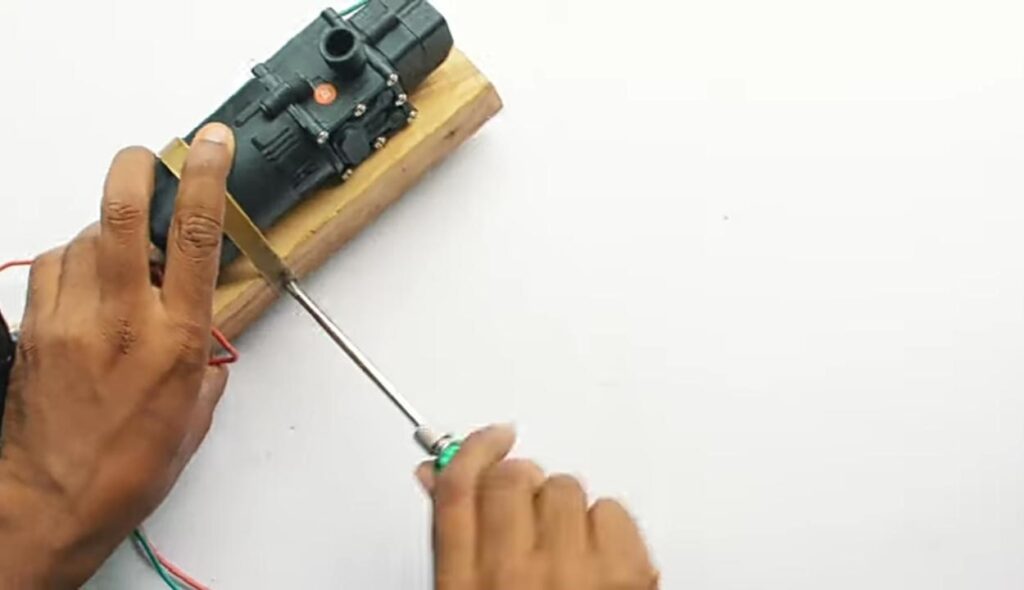
After fixing the sprayer nozzle in its place, the next step is to restore the limit switch just beside it on the board. For this purpose, mark two small holes on the wooden board and drill them out. Now, fix the limit switch with the screwdriver in the same position where its end meets the sprayer when pushed inwards.
To place the limit switch, you must cut out the extra portion from the limit switch and then place it so that the water gun touches the limit switch when pressed inwards, as shown in the picture below.
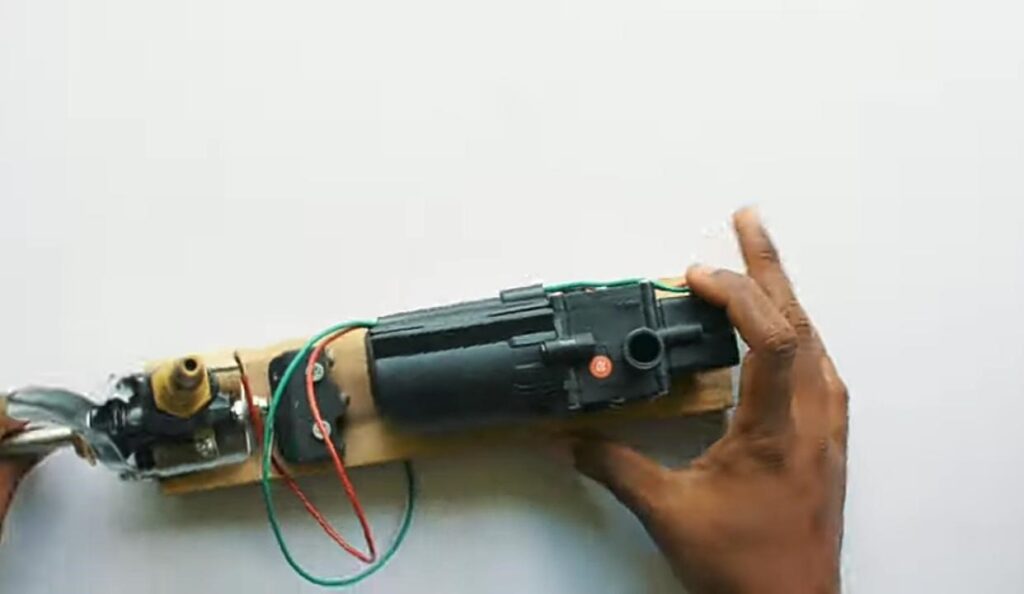
After fixing the sprayer nozzle and the limit switch on the wooden board, you have to add the 12 VC Diaphragm Pump to the extreme right corner, as shown in the picture below.
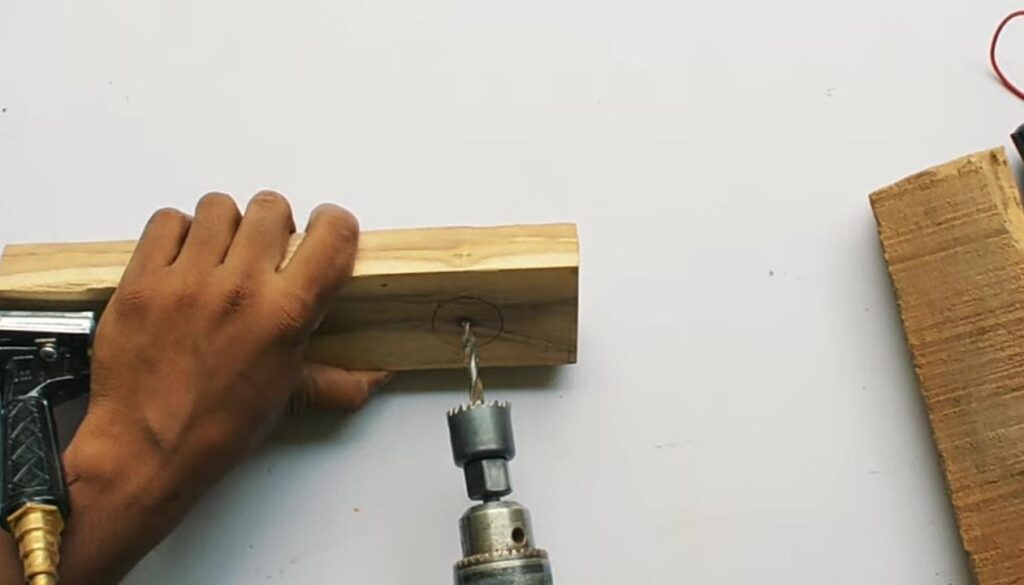
For this purpose, make a big circle in the extreme right corner of the wooden surface and start drilling it with a drilling machine.
You have to make the hole the same size as the picture above.
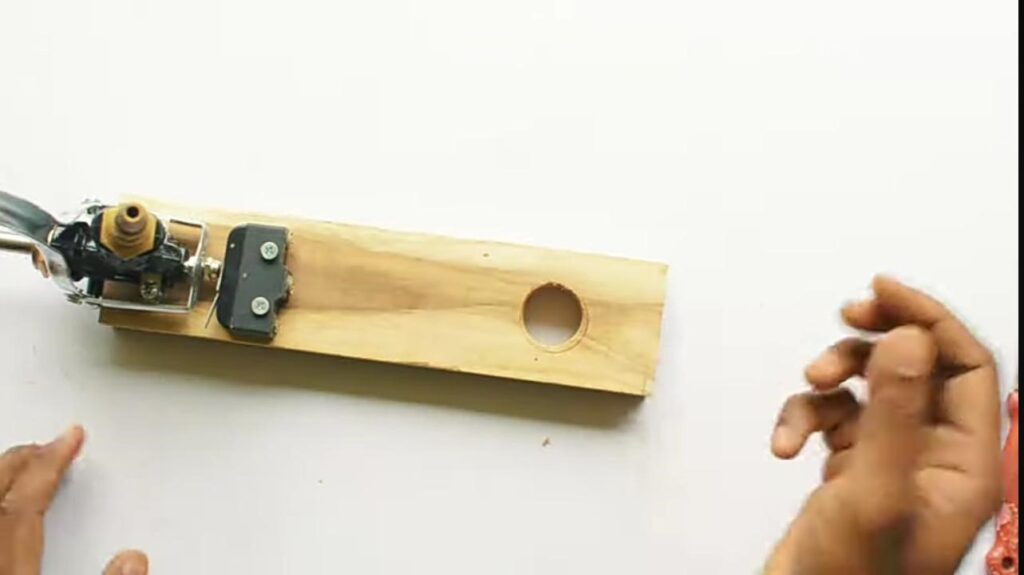
Step3: Fix The Diaphragm Pump In The Hole That You Created
Once you feel that the hole is suitable and big enough to hold the base of the diaphragm pump, you have to fix the 12 VC diaphragm pump inside the hole and ensure that its base sits appropriately inside the hole you have created.
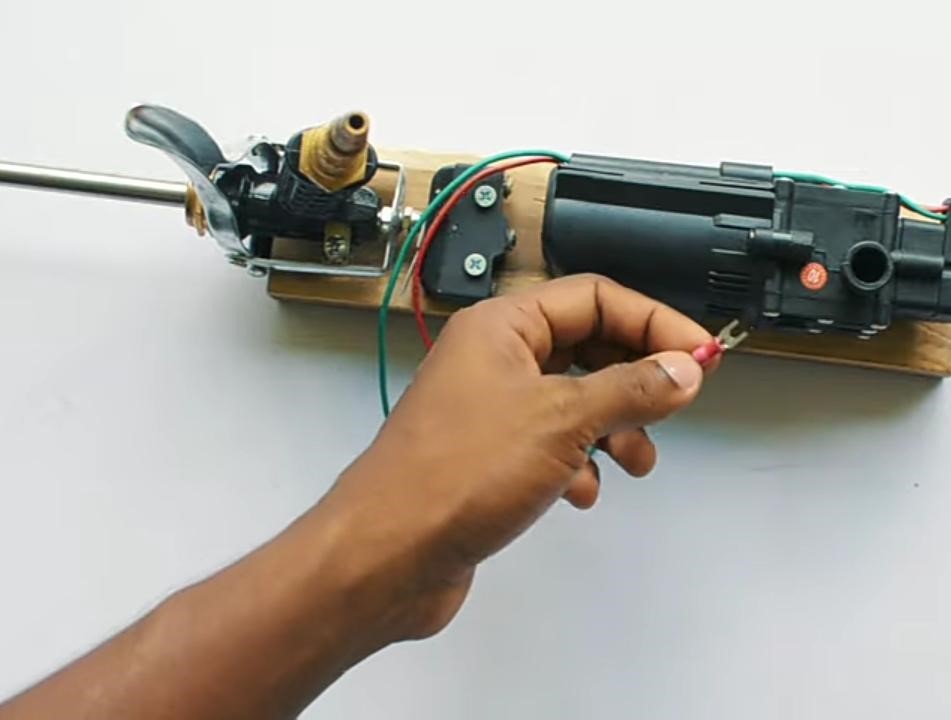
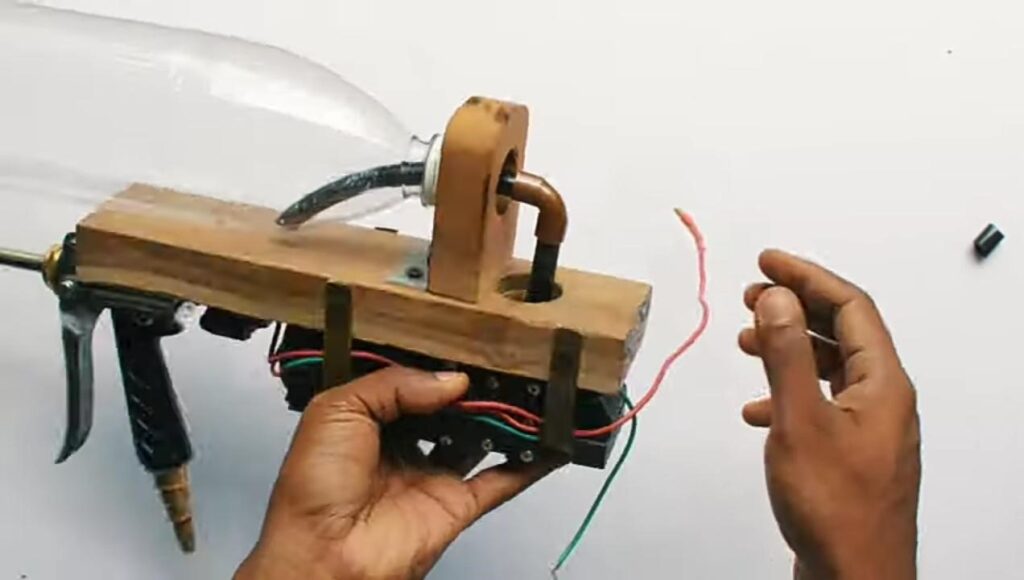
After placing the diaphragm pump in its place, start by attaching its wire to the limit switch. For this purpose, you must attach a U-shape wire connector to the wire, as shown above.
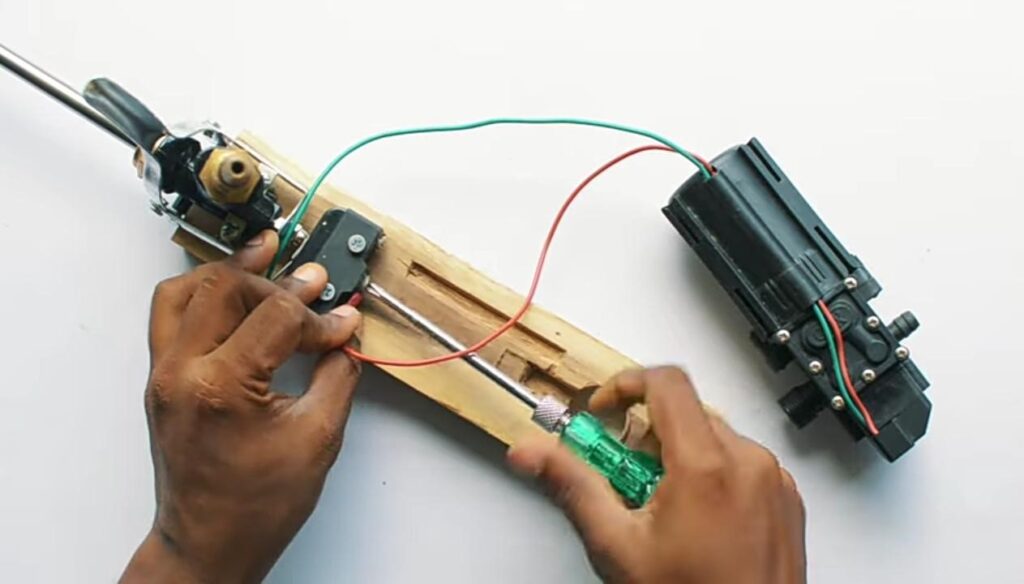
Your diaphragm pump would most probably have red and green wires. You have to attach two U-shape wire connectors to these wires and then attach them to the limit switch. Press the limit switch after connecting the U-shape wire connectors to the cables to ensure it fits well.
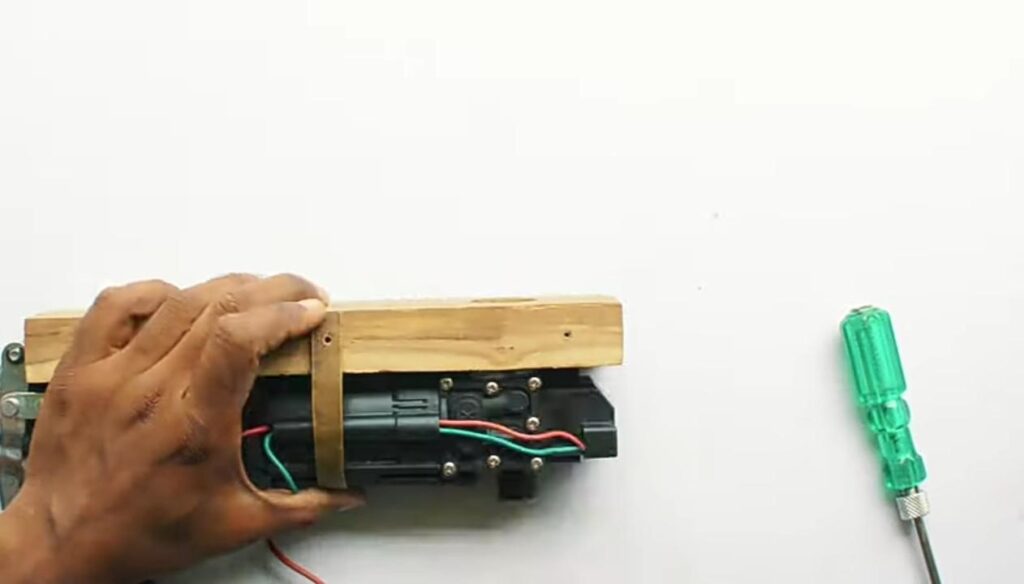
The next step is to secure the diaphragm pump on the wooden board with the help of a U-shaped wooden strip or a heavy piece of cardboard strip. You have to drill two holes on the side of the cardboard sheet, one on each side, and then fit the screws inside it to secure the diaphragm pump.
You must do this with two cardboard strips, as one strip would not correctly hold the diaphragm pump on the wooden board.
Step4: Attach The Water Container
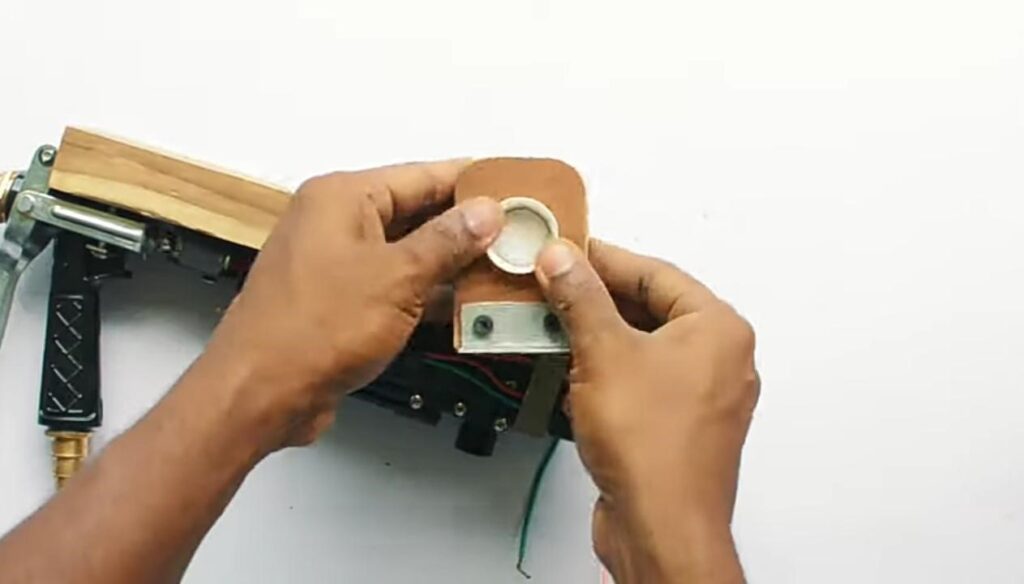
Now that we have made the base of the water sniper rifle, we need to make the water container where we will store water to shoot at our friends. Cut out a semicircular wooden board piece and make a hole in it. The hole should be the same size as the bottle cap you will use as the water container.

Flip down the structure we created on the base of the rectangular wooden board and fix the semicircular wooden board on the back side of your water rifle.
Ensure that the structure looks something like the one shown above and your bottle fits nicely in its place.
Now drill a hole inside the plastic water bottle cap and pass a hose connector through it.
Step5: Attach The Lipo Battery
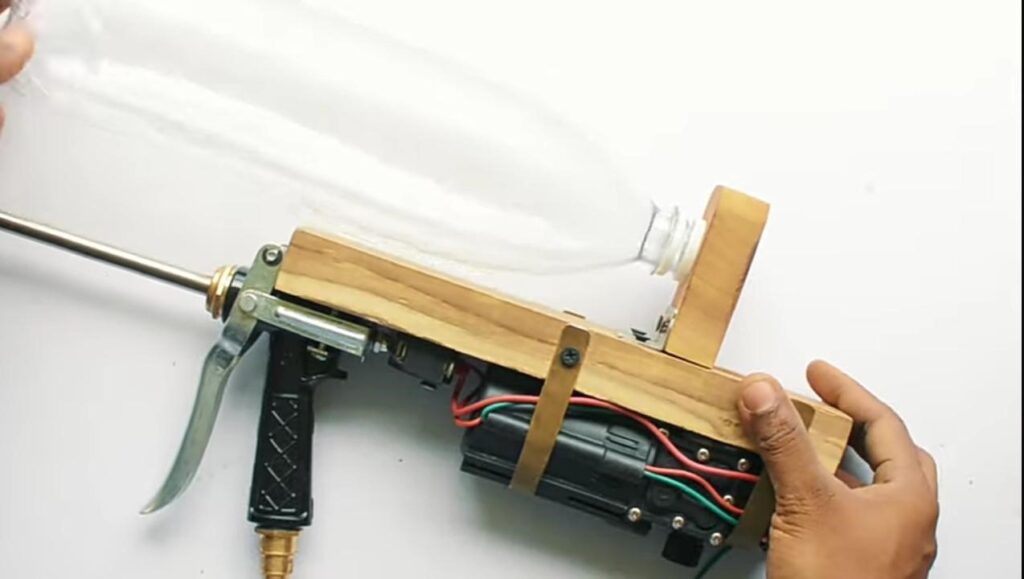
Next, you must pass the bottle along with the hose connector from the hole in the semicircular wooden piece and then attach a small tube to it to ensure it is fixed correctly on the rectangular wooden board. You have to attach the hose connector to the bottom of the diaphragm pump through the hole that we have created in the rectangular wooden board.
You can reference the picture shown above for this purpose.
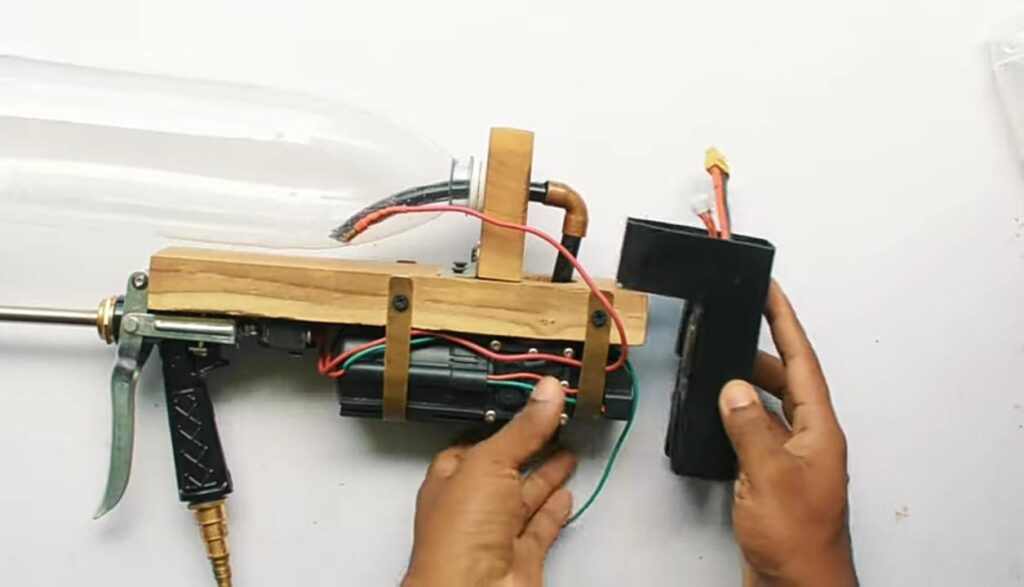
The most crucial step is attaching the battery to our water gun model. Here, we have used an 11.1V Lipo battery. We have placed this battery inside a holder, and we will then attach the battery and the holder to the extreme right corner of our water rifle.
To fix the Lipo battery in its place, you will have to screw two holes inside the rectangular wooden board and then secure the holder along with the battery by drilling through the screws inside it.
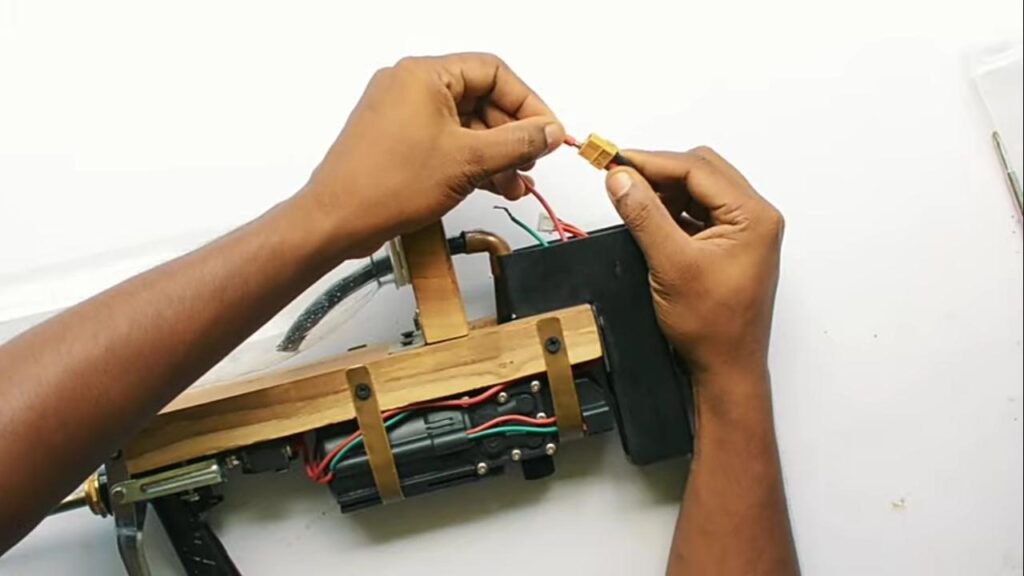
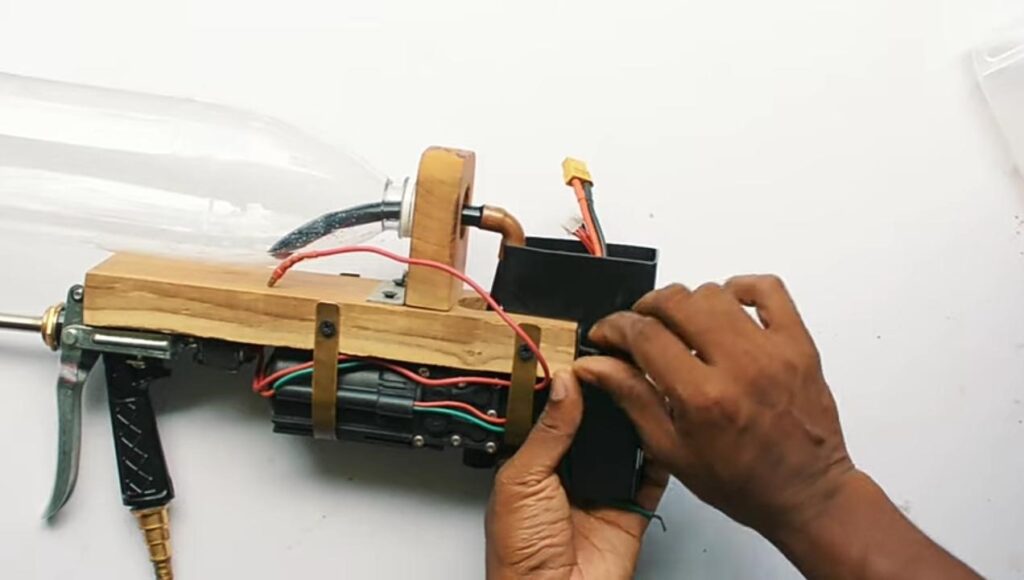
Once the battery and holder are well attached to your water gun model, you must attach the other end of the red and green colored wires to the Lipo battery. We hope you remember attaching one end of these wires to our limit switch, and now the other is to be attached to the battery to get a working sniper rifle.
After you have fixed the wires and put them in their place on the battery, check whether your model is working. If you think everything is fit and fine, dump all these wires inside the battery holder to ensure they are not easily visible.
Step7: Attach The Hose Connector
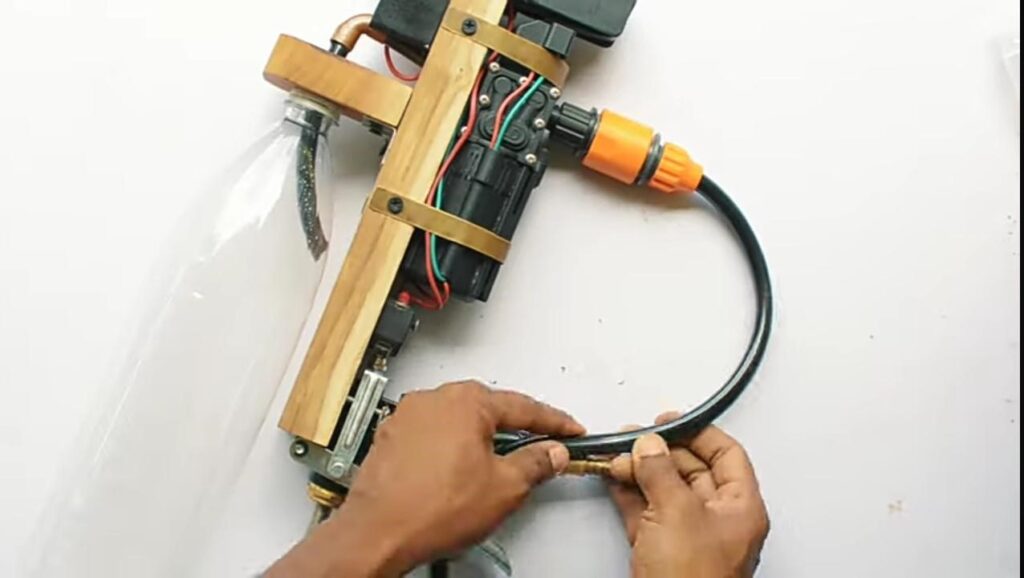
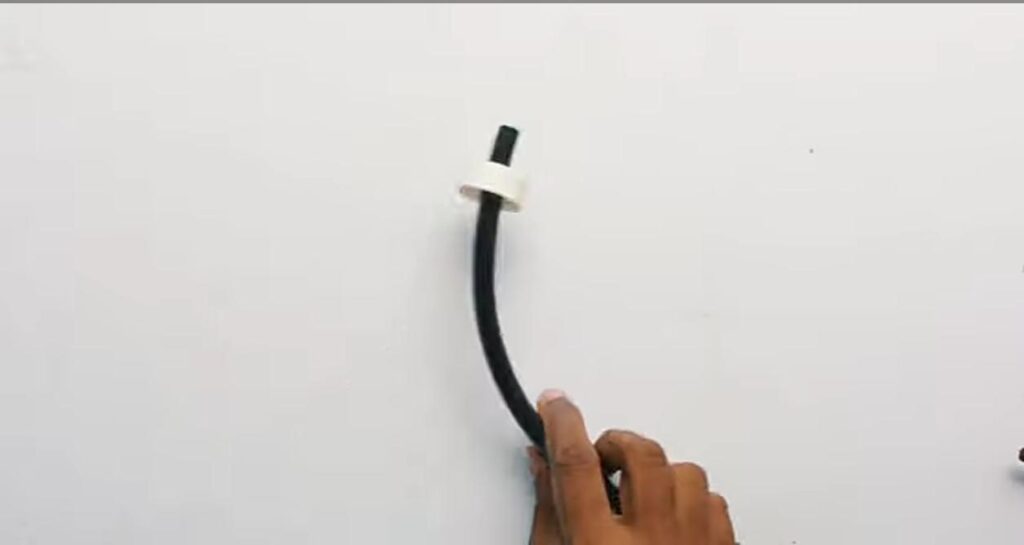
Now, we must take another piece of hose connector and a flexible hose tube to connect to the diaphragm pump.
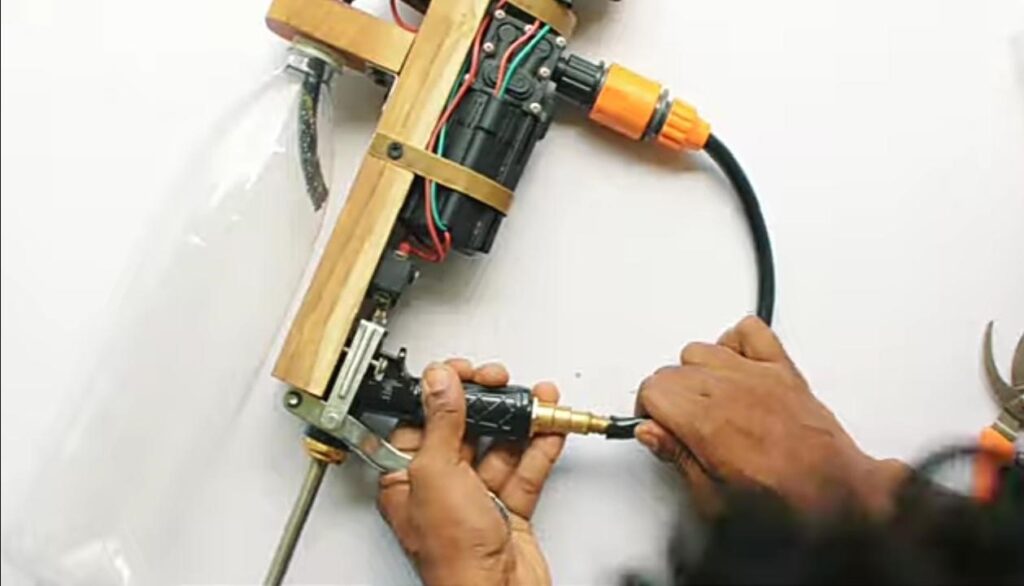
The picture above shows that the hose connector and tube must be connected. First, you have to attach the hose connector to the diaphragm pump. Then, after securing the flexible hose tube to the connector, you have to join its other end to the base of the water gun nozzle.
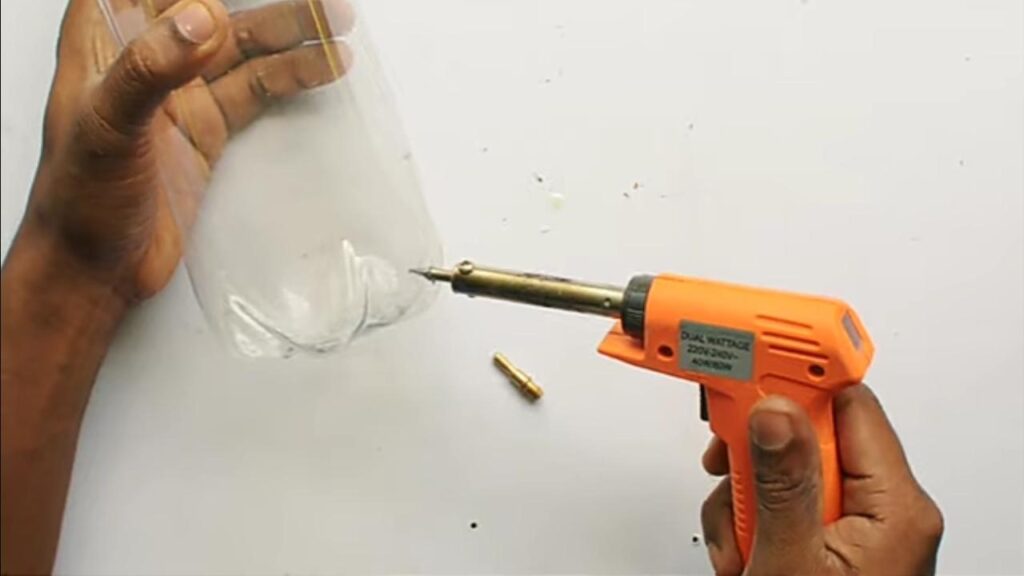
After this, we will remove the plastic water bottle from the structure and drill a hole at the bottom right corner of the bottle. We have created this hole to fix a valve that would work as a check valve.
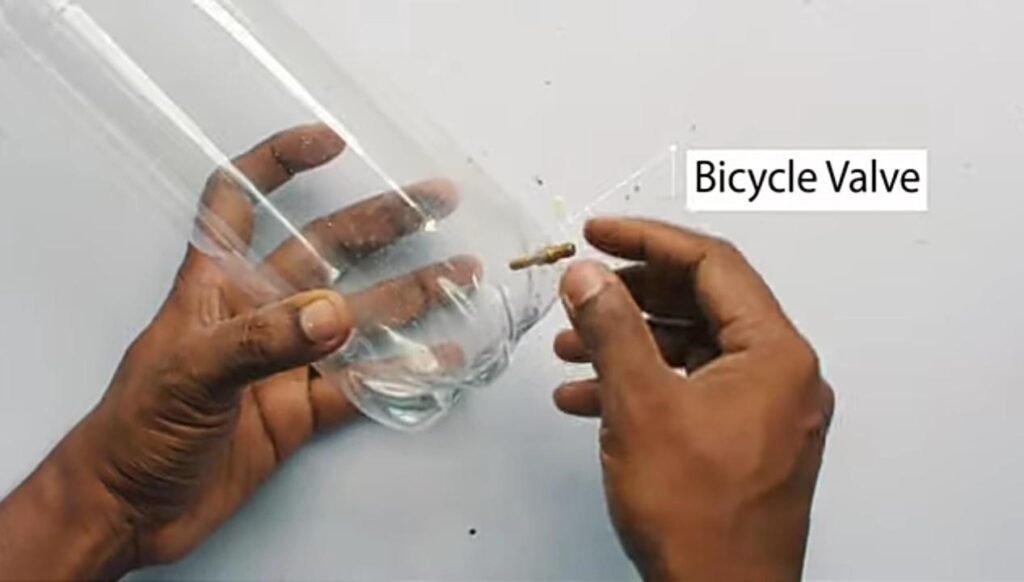
We have taken a bicycle valve for this purpose. Remember to drill the hole the same size as the valve you’re using, as the valve must fit the hole in the bottle well.
Step 8: Assemble, Color, Use!
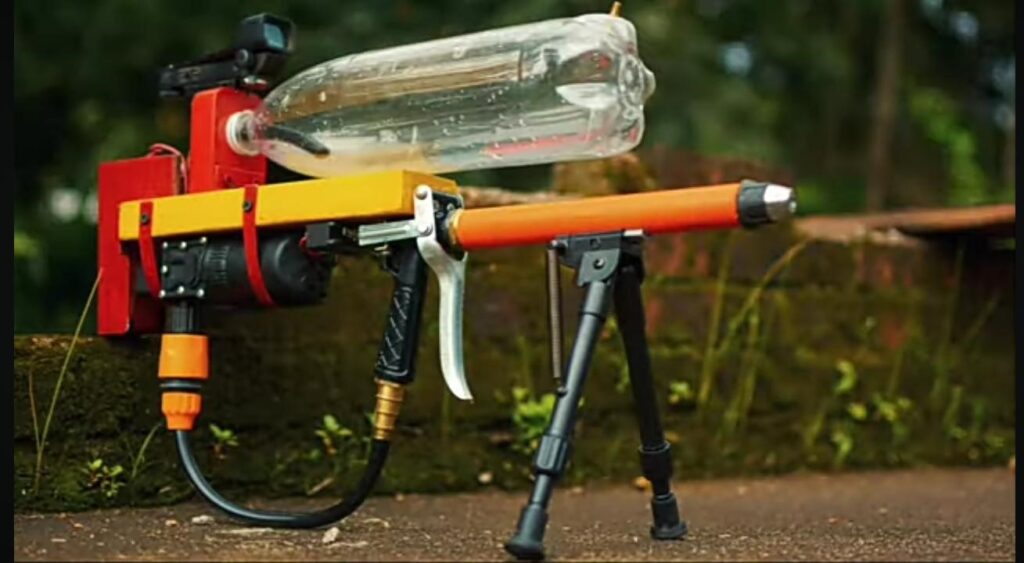
The last and final step is to fit the water bottle into the structure of the water sniper rifle. Ensure that everything works well and that each mechanism coordinates with the others.
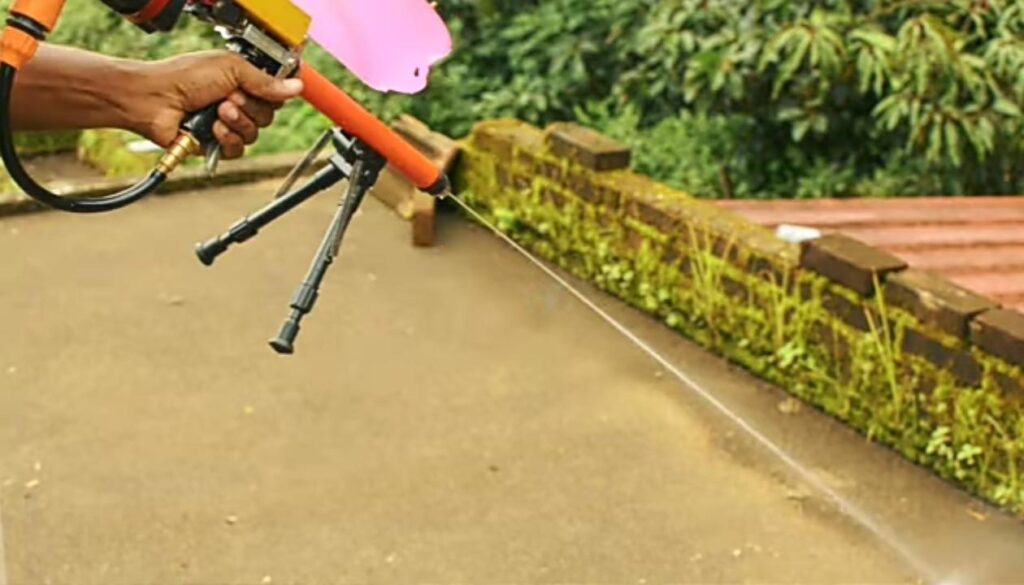
Once you are satisfied with your creation, you can paint it with your favorite colors. Now, you can enjoy throwing squirts of water at your friends while playing a water fight.


