
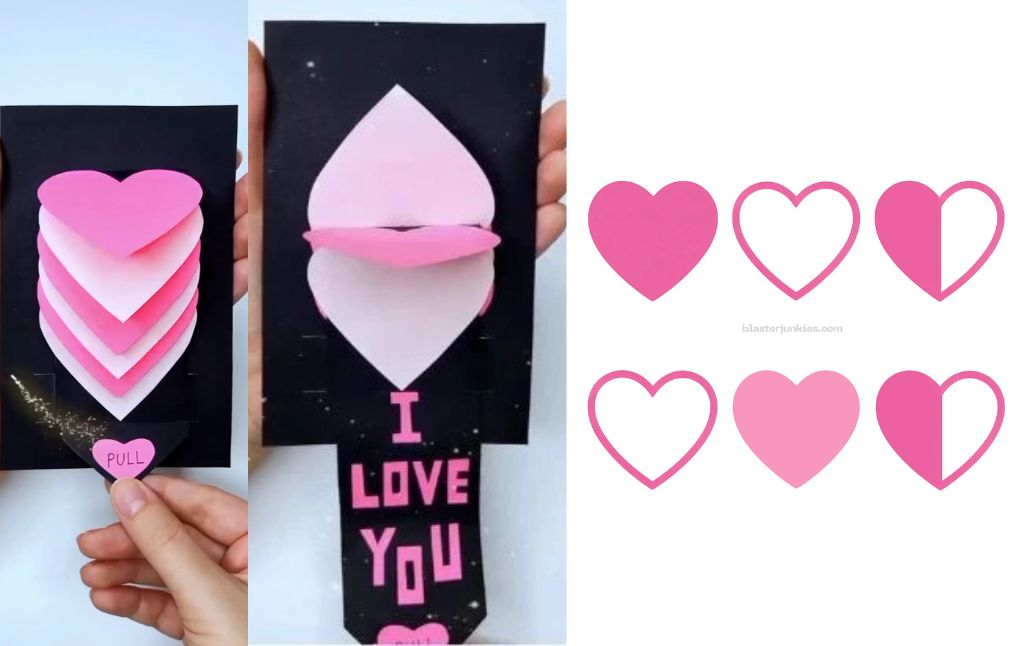
Are you ready to create a card that is as dramatic as it is adorable? This Heart Cascade Pull Out Card (a variation of the waterfall card) is the perfect “cute gift” for Valentine’s Day, anniversaries, or just because!
The cascading hearts and hidden message create a delightful surprise when the recipient pulls the tab.
This guide will walk you through recreating this simple but sophisticated interactive card, perfect for showcasing your affection.
Step 1: Preparing the Heart Pieces and Base Strip
This design relies on several hearts and a simple paper mechanism.
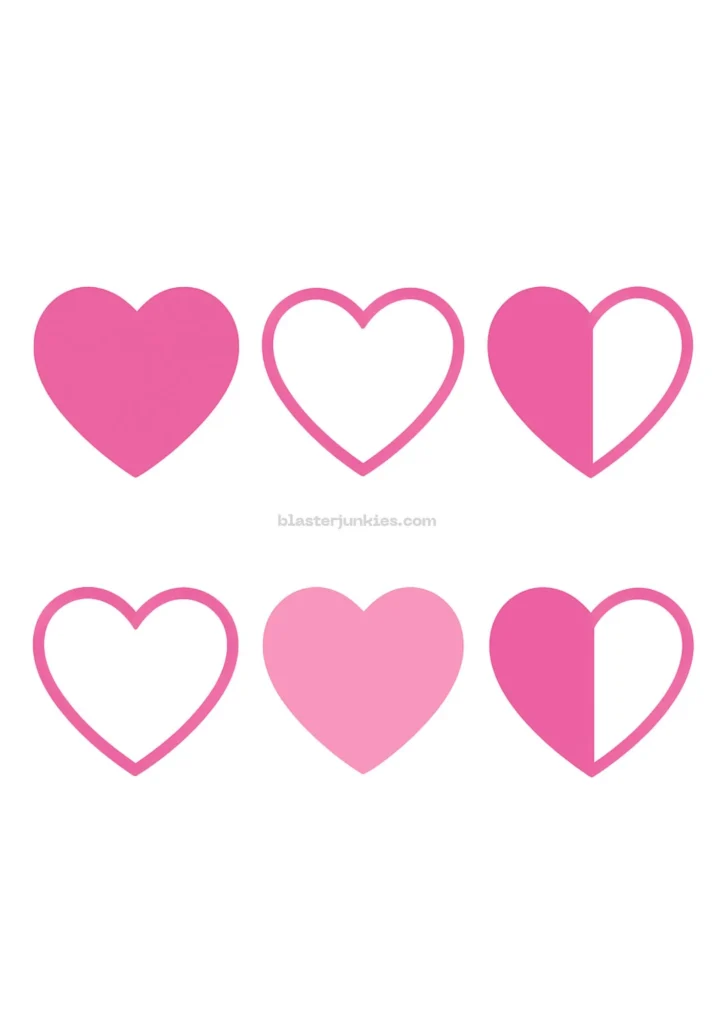
Create the Hearts: You will need several heart shapes in varying sizes and colors (you used alternating shades of pink and white for a beautiful layered look).
Use our free A4 printable heart template to ensure perfect, symmetrical shapes! You need enough hearts to stack neatly four to six works best for a cascading effect.
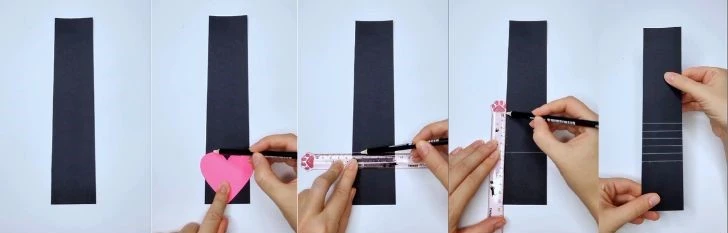
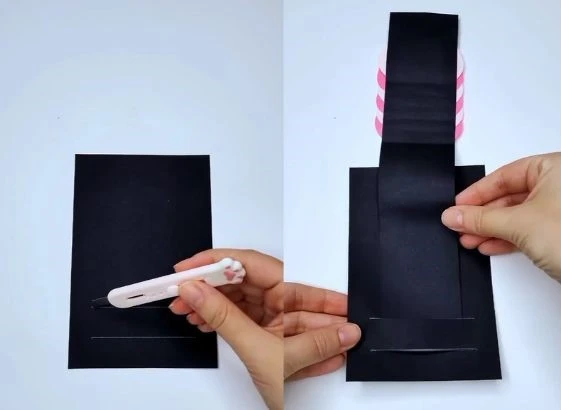
Cut the Base Strip: Take a strip of black cardstock, which will serve as the pull out message and the mechanism. The strip should be long and thin.
Score the Strip: On the base strip, lightly mark and score several horizontal lines, evenly spaced near one end.
These marks indicate where each heart will be attached, creating the staggered, cascade effect when pulled. In the image, you scored four lines about 1 cm apart.
Step 2: Assembling the Heart Cascade
This is the careful, layering step where the magic begins.
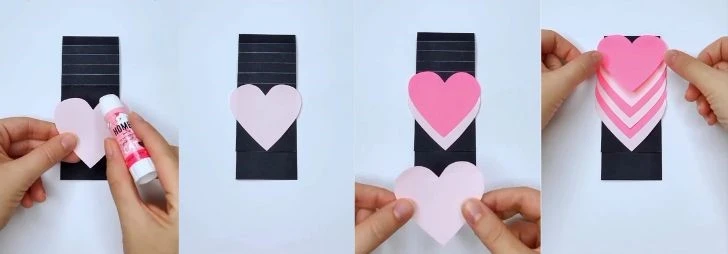
Layer the Hearts: Starting from the bottom heart you just attached, begin gluing the remaining hearts onto the scored lines. Crucially, only apply glue to the very upper point of each heart.
- Place the second heart just above the first, aligning its tip with the first score line.
- Place the third heart just above the second, aligning its tip with the second score line, and so on.
- The hearts should overlap but be glued only at the very tip, allowing the rest of the heart shape to move freely and fan out.
Finish the Stack: Continue layering until you have a stack of hearts on your pull strip. The largest heart should be at the top of the stack.
Step 3: Preparing the Outer Card Sleeve
The outer card acts as the sleeve that holds the mechanism and keeps the secret hidden.
Cut the Sleeve: Take a piece of black cardstock (slightly wider than your heart stack) and fold it in half to create the main card base.
Make the Slits: On the front panel of the card, draw two short, parallel horizontal lines towards the bottom.
Using a craft knife or sharp blade (like the cat paw cutter you used), carefully cut along these two lines. These slits should be just wide enough for your pull strip to slide through.
Create the Top Opening: Cut a slot at the top center of the card that is just wide enough for the heart cascade to hide inside.
Step 4: Integrating the Mechanism
Now, insert the heart cascade into the sleeve.
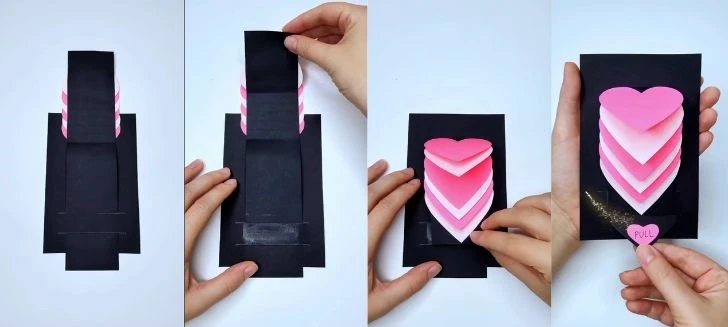
Thread the Strip: Thread the long, non heart end of your black strip up through the bottom slits and down through the top opening of the card sleeve.
Secure the Pull Tab: The heart stack should now sit neatly at the top opening. Apply a small amount of glue to the back of the strip, just between the two bottom slits, and press the upper end part of strip firmly against the inside of the card.
This is the anchor point. The strip must be glued only here to ensure the pulling motion works correctly.
Attach the Bottom Heart: Glue the smallest heart (or the bottom heart in your stack) onto the very end of the strip where you will write the word “PULL.”
Tuck the Heart: The heart cascade should now tuck neatly behind the top opening of the card when you push the strip up.
Step 5: The Reveal and Final Touches
The final steps are to add the hidden message and the finished details.
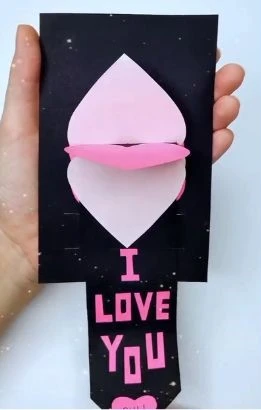
The Hidden Message: On the long, exposed section of the pull strip (the part that slides down), write your main message you wrote the classic “I LOVE YOU” in bright pink block letters.
Label the Pull Tab: Write “PULL” clearly on the heart attached to the very end of the strip.
Final Test: Push the tab up until the hearts are hidden and the “PULL” tab is visible. Give it a gentle tug! As the message slides down, the hearts should beautifully cascade open, revealing the entire stack and the message.
You have created a truly interactive and memorable love token!
How to Craft the Ultimate DIY Exploding Love Card
How to “Build A Turkey” Cut and Color Activity (Free A4 Printable Inside!)
How to Create a Fun “Shape Turkey” Math Craft (Free Printable Included!)
How to Build Your Own Thankful Turkey Craft (Free Printable Included!)
The Ultimate Thanksgiving Craft: A Step by Step Guide to Making a Textured Turkey
DIY Balloon Floats: Bringing the Thanksgiving Day Parade to Your Kids’ Table!
Creative Junk Journal Spreads from a Weekend Getaway
15 Inspiring Styles to Kickstart Your Next Junk Journal Spread


