
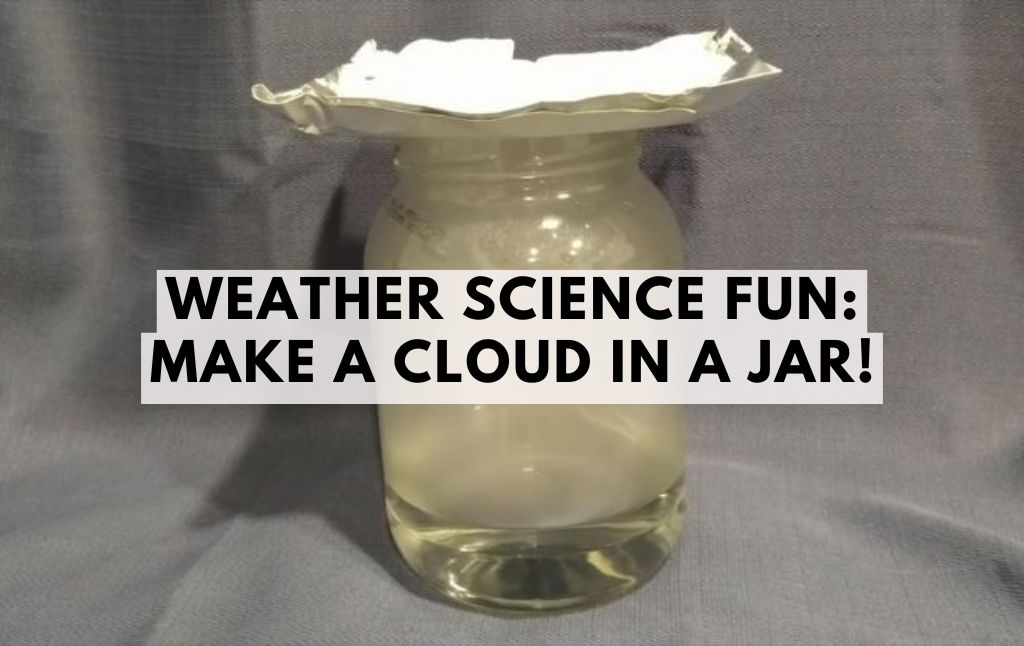
Weather science can be fascinating, especially when you can recreate natural phenomena right in your home!
One of the simplest and most exciting experiments for kids is making a cloud in a jar. This experiment helps children understand condensation, evaporation, and precipitation, demonstrating how clouds form in the sky.
Follow these easy steps and watch the magic of weather science unfold before your eyes!
Materials You Will Need:
- A large glass jar
- Boiling water (with adult supervision)
- Matches (with adult supervision)
- Ice cubes
- Aluminum foil
Step-by-Step Instructions
Step 1: Prepare the Jar
Start by shaping the aluminum foil into a small box shape to hold the ice cubes later. This will act as a cooling surface, mimicking the cold air in the atmosphere.
Step 2: Add Hot Water
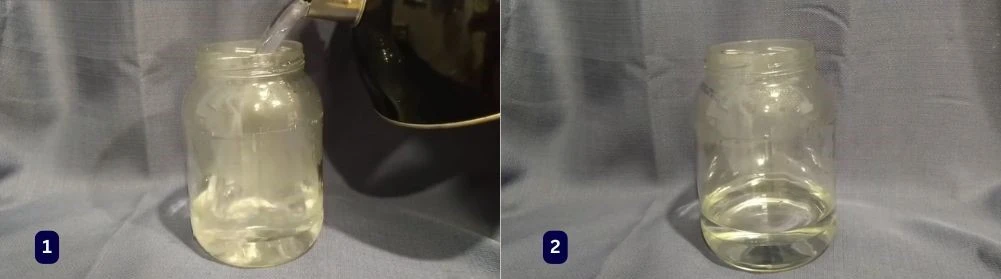
Fill the large glass jar about two-thirds to three-fourths full with boiling water. Then, carefully pour most of the water out, leaving only about one-fourth of the jar filled. Be cautious—the jar will be very hot! Use oven mitts or a towel to handle it safely.
Step 3: Create the Smoke Particles
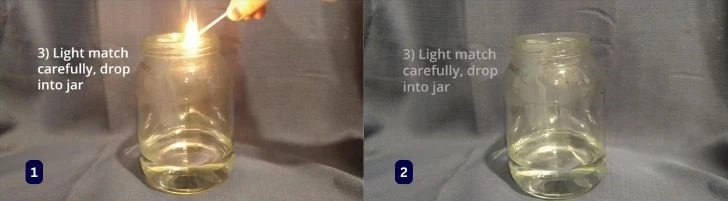
Light a match and drop it into the jar. This step is crucial because it adds tiny particles into the air, just like in real clouds where dust and smoke act as nuclei for water droplets to cling to. Ensure an adult is nearby to supervise this step, as it involves fire.
Step 4: Trap the Air and Watch the Cloud Form
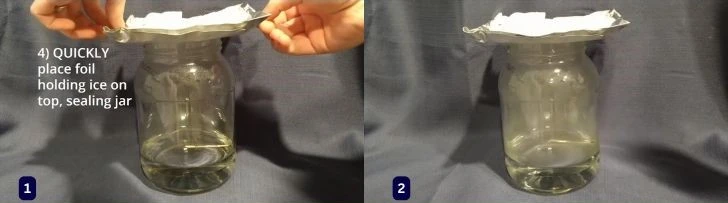
Quickly place the aluminum foil tray with ice cubes on top of the jar, sealing it completely. This setup simulates how warm air rises and meets cold air in the atmosphere.
Step 5: Observe the Cloud in Action

Within seconds, you will notice a misty cloud forming inside the jar! The warm, moist air inside the jar rises to meet the cold air from the ice cubes, causing condensation. This process mirrors how real clouds form in the sky.
The Science Behind the Cloud in a Jar
This simple experiment demonstrates an essential weather phenomenon:
Evaporation: The boiling water produces steam, warming the air inside the jar.
Condensation: As the warm air rises and meets the cold surface (ice cubes), water vapor cools and condenses into tiny droplets—forming a cloud.
Precipitation: Sometimes, if enough water droplets form and the cloud gets heavy, small droplets of water fall, mimicking rain.
This process happens in nature every day. The Sun warms the Earth’s surface, causing water to evaporate.
When the warm air meets colder air in the sky, it condenses into clouds. If the cloud becomes heavy with water droplets, precipitation (rain) occurs.
Fun Extensions to Try!
Use different temperatures of water: Try using warm water instead of boiling—does the cloud still form?
Experiment with different containers: Try a plastic jar or a smaller glass—how does the cloud’s formation change?
Add food coloring: Observe how warm and cold water interact visually by adding a few drops of blue and red food coloring.
Final Thoughts
Making a cloud in a jar is an exciting and educational way to explore weather science at home or in the classroom.
It provides a hands-on demonstration of how clouds form and why it rains. This simple yet fascinating experiment sparks curiosity and encourages kids to think like scientists!
So, gather your materials, try it out, and experience the magic of weather science today!


