
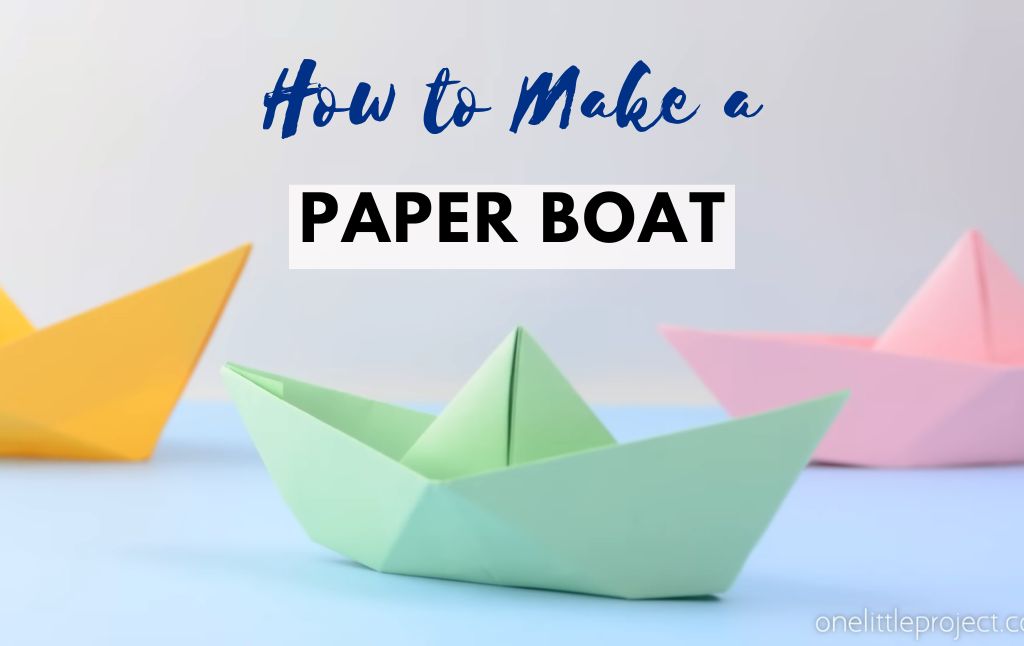
Making a paper boat is a fun and simple origami craft that requires only a single sheet of paper.
Whether you’re creating it for a fun water activity or just to enjoy the process of folding, this easy-to-follow guide will help you make the perfect paper boat. Follow these step-by-step instructions and set sail with your very own handmade boat!
Materials Needed
- One letter-sized printer paper (8.5 x 11 inches)
- A flat surface for folding
Step-by-Step Instructions
Step 1: Preparing the Paper
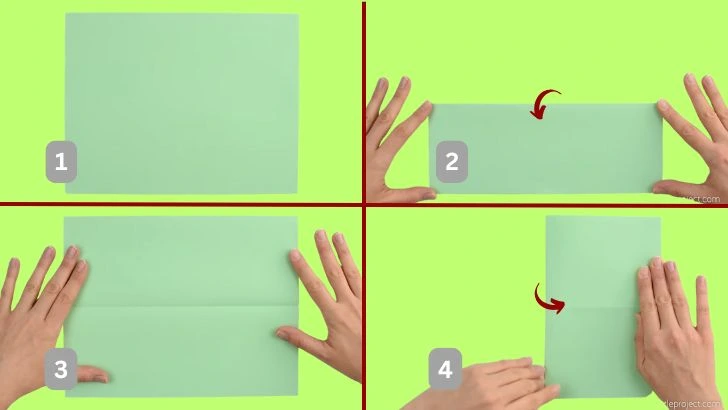
Take your sheet of paper and lay it flat on your workspace.
Fold the paper in half lengthwise and then unfold it. This crease will serve as a reference line.
Fold the paper widthwise, bringing the shorter edges together. Keep the fold at the top.
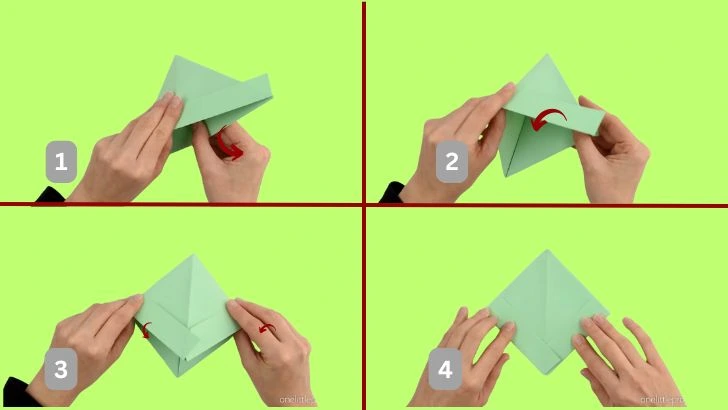
Step 2: Creating the Triangle Shape
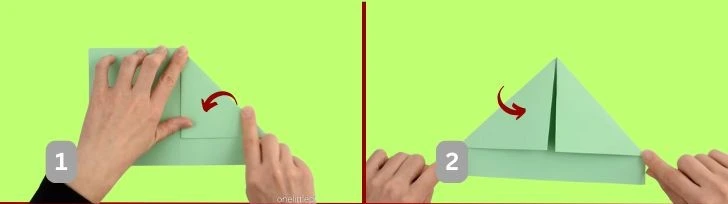
Rotate the folded paper so that the closed edge is at the top.
Take the top-left and top-right corners and fold them down towards the center line to form a triangle.
The bottom portion of the paper should remain unfolded.
Step 3: Making the Base of the Boat
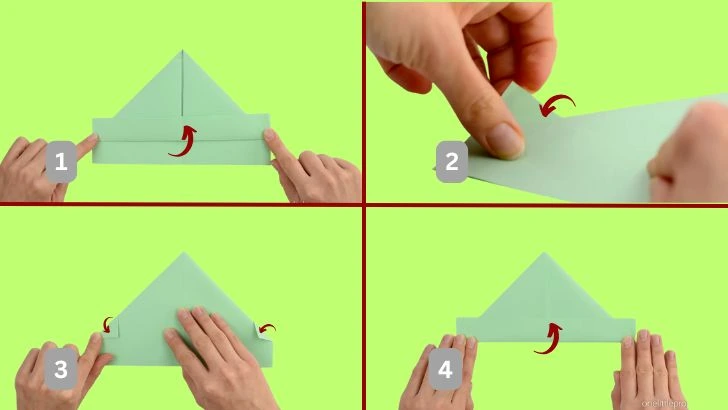
Fold the bottom flap of the paper upwards, aligning it with the bottom edge of the triangle.
Flip the paper over and repeat on the other side.
You should now have a triangle with two small folded flaps.
Step 4: Shaping the Boat
Insert your thumbs into the open bottom part of the triangle.
Gently pull the sides outward until the shape flattens into a square.
Reinforce the creases by pressing along the edges.
Step 5: Forming the Boat Structure
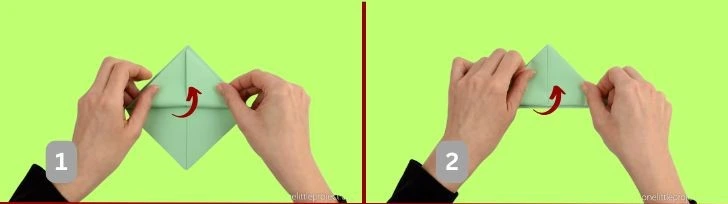
With the square shape facing you, fold the bottom corner up to meet the top corner.
Flip the paper over and repeat on the other side.
You will now have a smaller triangle.
Step 6: Expanding the Boat
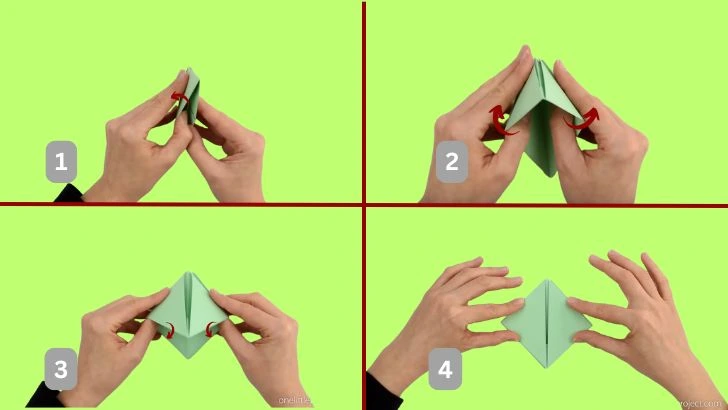
Insert your thumbs into the open bottom section again and pull the sides apart.
Flatten the paper into a square once more.
Run your fingers along the edges to secure the folds.
Step 7: Final Touches
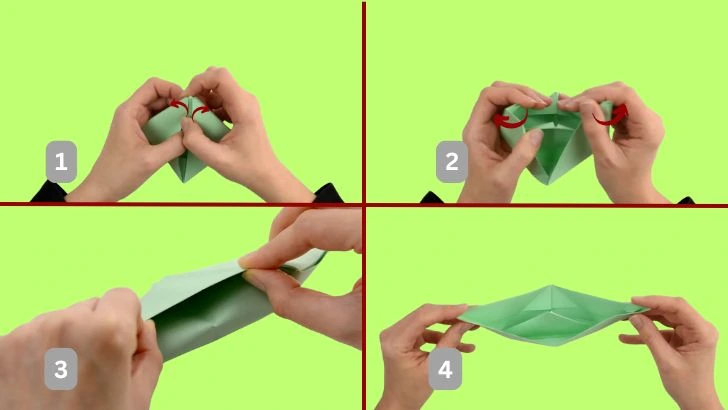
Hold the top points of the square and gently pull them apart.
The paper will naturally take the shape of a boat.
Adjust the folds and press the edges to make it sturdy.
Tips for Better Results
Use a crisp sheet of paper to ensure clean folds.
Press along each crease firmly to maintain the structure.
If your boat needs extra stability, try using a slightly thicker paper.
Decorate your boat with markers or stickers for a personal touch.
Conclusion
Now that you have successfully created your paper boat, it’s time to test it out! Place it in a bowl of water or a sink and watch it float. You can even try making different sizes and racing them with friends. Have fun folding and happy sailing!


