
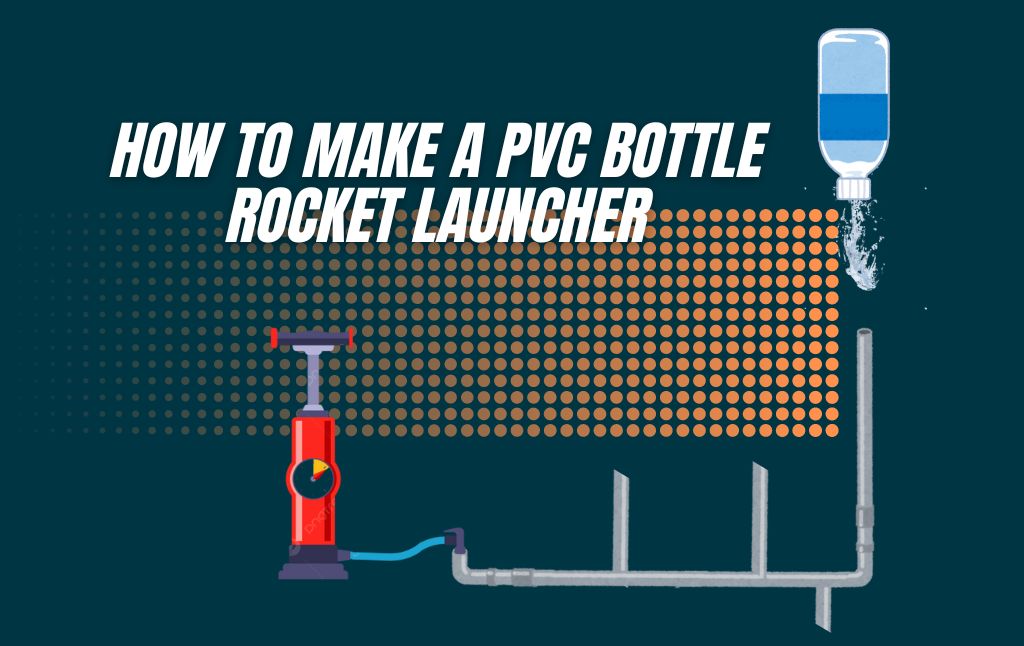
You can make a rocket launcher at home with the help of a PVC pipe and bicycle tire pump. This is going to be a DIY project that you will like.
It is very easy to make this soda bottle rocket launcher. For this, you have to gather easily available materials, the list of which is given below.
So if you want to make a water-based pressurized air bottle rocket launcher at home, then stay till the end of this article.
Materials Required:
1.) 6′ of 1/2″ Schedule 40 PVC Pipe (it is sold in 10′ lengths)
2.) One 1/4″ x 1/2″ Bushing
3.) One 1/4″ Coupling
4.) One 1/4″ x 1″ Bushing
5.) 1/2″ elbows 2
6.) 1/2″ caps 4
7.) 1/2″ t’s 3
8.) .453 rim hole tubeless tire valve (available auto parts store)
9.) Small bottle PVC cement
10.) 1/8″ steel rod 24″ long
11.) 2 liter soda bottle
12.) Drill (5/32 drill bit, 3/32 drill bit, 9/16″ drill bit)
13.) Knife
14.) Wire Cutters
15.) PVC Cutter or hacksaw
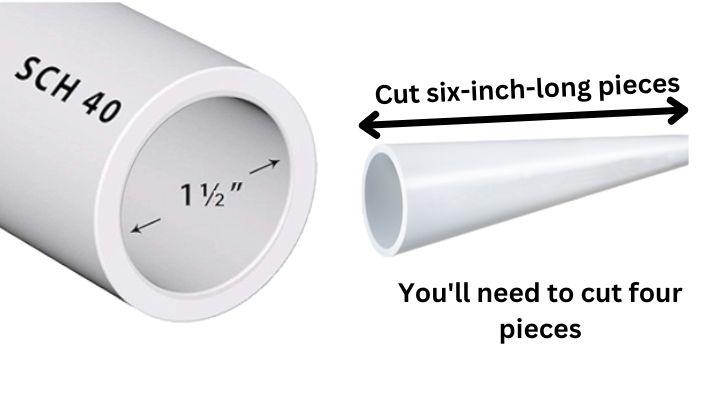
Step 1: Pieces of PVC pipe need to be cut
Cut six-inch-long pieces from the long 1/2″ Schedule 40 PVC Pipe. You’ll need to cut Five pieces, which will be used to make the long connections for the PVC Bottle Rocket Launcher.
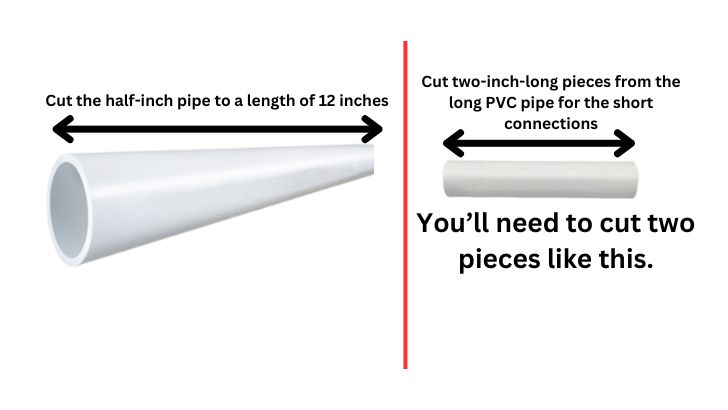
After that, cut the half-inch pipe to a length of 12 inches.
Next, cut two-inch-long pieces from the long PVC pipe for the short connections. You’ll need to cut three pieces like this.
Step 2: You need to prepare the launching mechanism for the PVC Bottle Rocket Launcher.
Take the PVC end cap and drill a hole in its center using a 3/32 drill bit. Next, enlarge the hole with a 9/16 drill bit so that the tire valve fits properly.

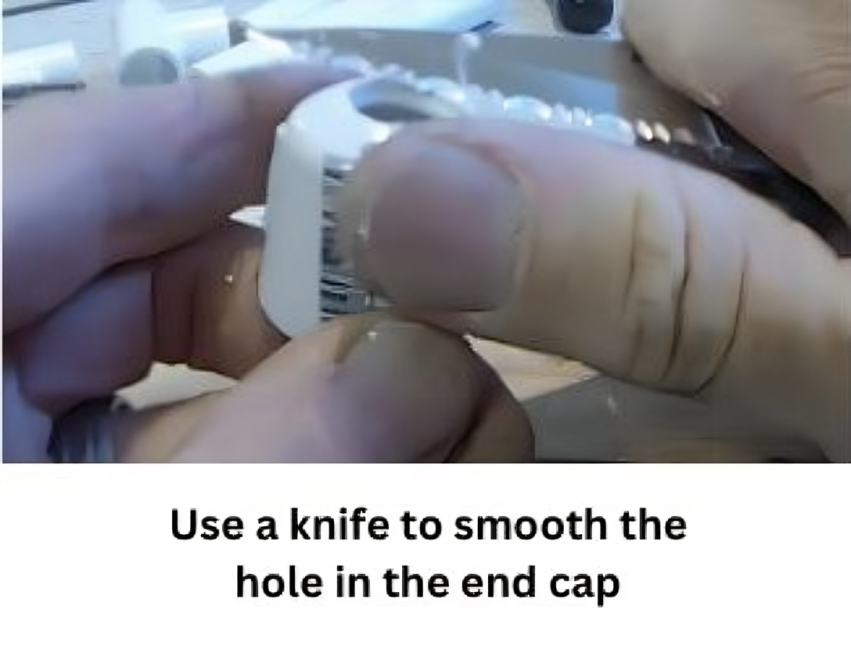
Use a knife to smooth the hole in the end cap to ensure there is no chance of leakage between the tire valve and the end cap.
Finally, insert the tire valve through the hole you drilled in the cap.
We will create the launching mechanism using three PVC fittings and 1/8-inch diameter steel wire.
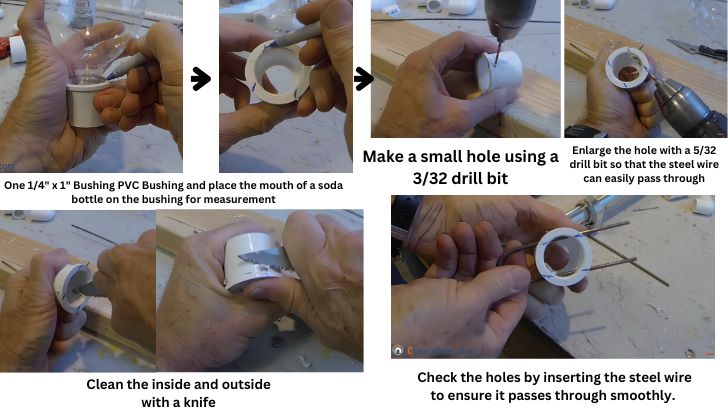
Take a One 1/4″ x 1″ Bushing, PVC Bushing and place the mouth of a soda bottle on the bushing for measurement. Mark the bushing with a pen.
Make the mark on the top inside edge of the 1/4-inch bushing so that the bottle can be secured to the bushing with the help of PVC and a steel rod.
At the marked spots, first, make a small hole using a 3/32 drill bit, then enlarge the hole with a 5/32 drill bit so that the steel wire can easily pass through.
After making four holes in the bushing, clean the inside and outside with a knife. After cleaning, check the holes by inserting the steel wire to ensure it passes through smoothly.
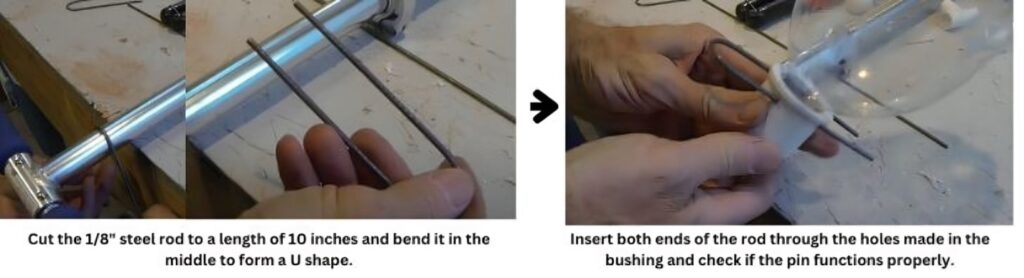
To make the launch pin, cut the 1/8″ steel rod to a length of 10 inches and bend it in the middle to form a U shape.
Insert both ends of the rod through the holes made in the bushing and check if the pin functions properly.
You can test the launch pin by fitting the mouth of a soda bottle into the bushing. Ensure that once the bottle is inserted into the bushing, it does not fall when the pin is in place.
To prepare the second bushing for the launching mechanism, you first need to remove the stopper using a sharp knife so that a one 1/4″ pipe can easily slide into the bushing.
You can also use a Dremel tool to remove the stopper inside the bushing to make the inner surface smooth.
To assemble the launching mechanism, we need to glue the bushings, coupling, and one 1/4″ pipe together.
A 12-inch long piece of 1/2-inch pipe will be used.
We need to position the 12-inch long piece of 1/2-inch pipe through the bushing for the soda bottle. To do this, mark 2 inches from one end of the 12-inch long pipe.
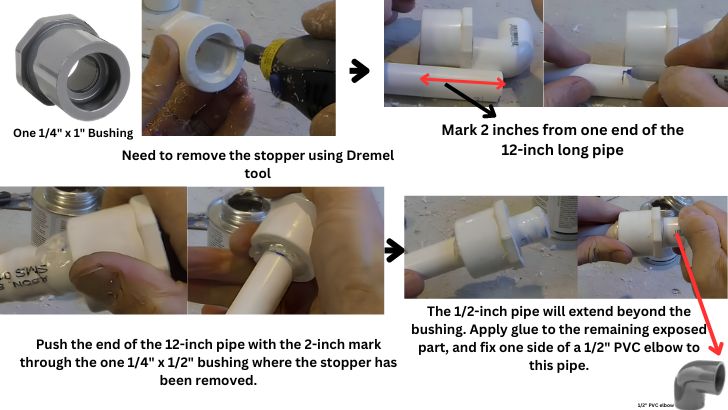
Next, push the end of the 12-inch pipe with the 2-inch mark through the one 1/4″ x 1/2″ bushing where the stopper has been removed. Apply glue to the marked end of the pipe first.
Push the bushing onto the pipe up to the 2-inch mark. Now, the 1/2-inch pipe will extend beyond the bushing.
Apply glue to the remaining exposed part of the 1/2-inch pipe and fix one side of a 1/2″ PVC elbow to this pipe.
Apply glue to the top part of the bushing and fix one end of a 1, 1/4″ coupling to the bushing.
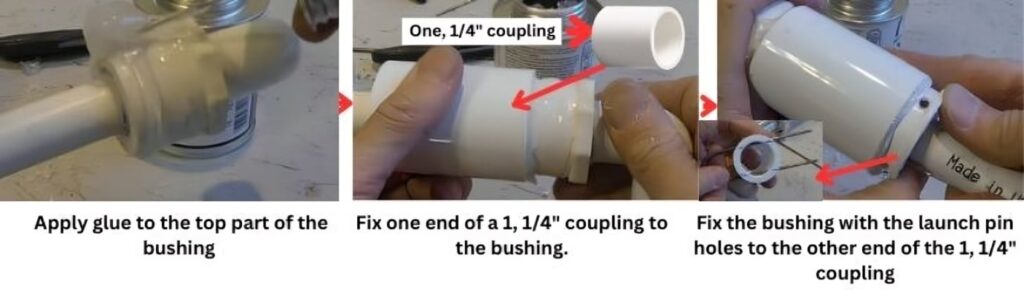
Now, fix the bushing with the launch pin holes to the other end of the 1, 1/4″ coupling.
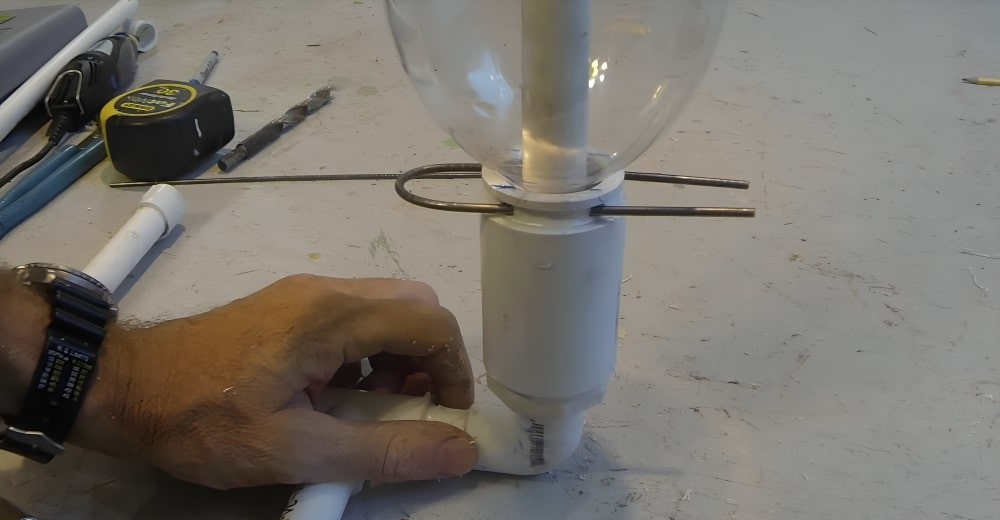
Ensure the holes on the bushing remain outside the coupling so that we can easily lock the soda bottle in place.
Step 3: Turn to assemble the PVC Bottle Rocket Launcher frame
Using the diagram provided below, you can complete the final assembly.
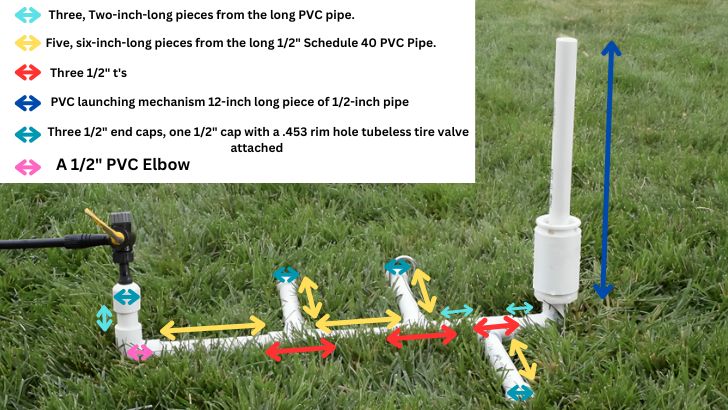
For this, you will need PVC cement, a 1/2″ elbow, three 1/2″ caps, one 1/2″ cap with a .453 rim hole tubeless tire valve attached, and the PVC launching mechanism.
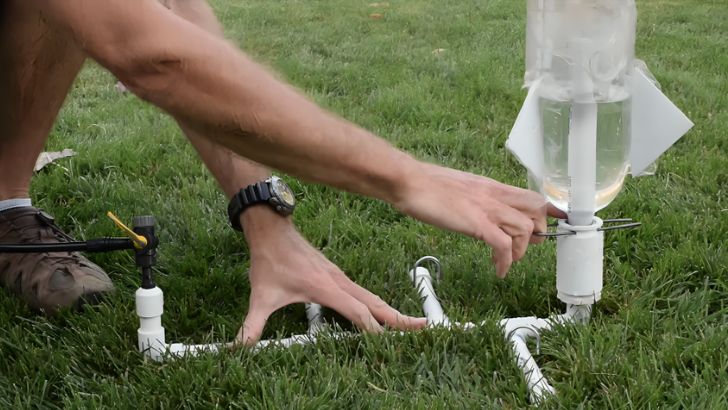
Fill the soda bottle halfway with water and secure it onto the PVC launching mechanism. Then, use a bicycle air pump to create air pressure inside the bottle. Once the pressure is built up, pull the launching pin, and the bottle will soar high into the sky like a rocket. When launching, be sure to keep your head away from above the bottle


