
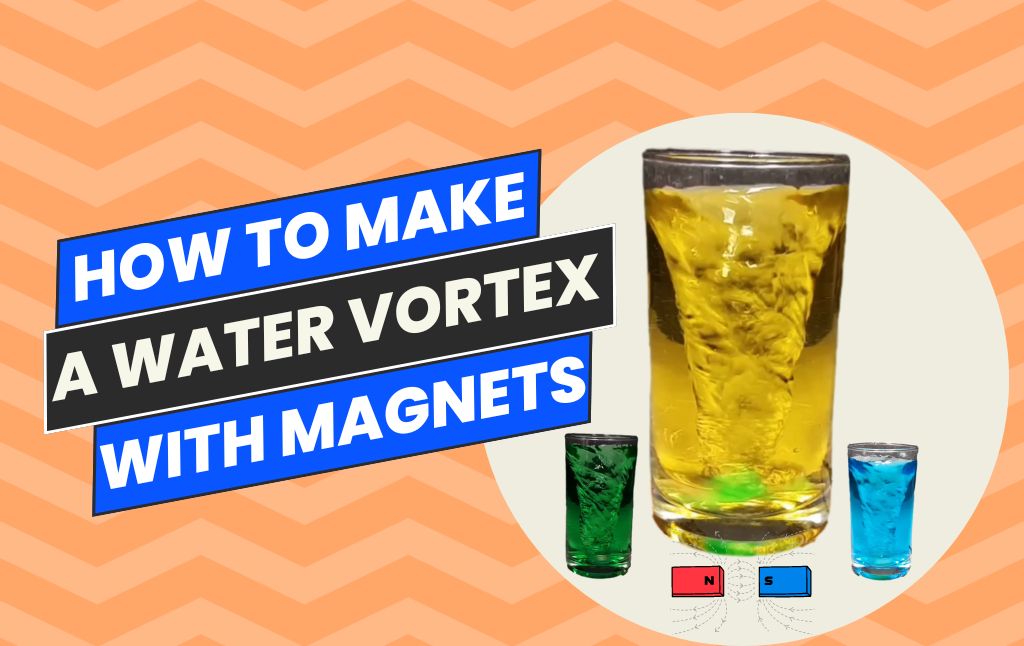
If you’re one of those people who want to create an automatic continuous water vortex using a magnet inside a jar at home, then this article is for you.
This DIY project requires only a few resources, which are easily available on online platforms.
We’ll explain how to make this project step-by-step below, so stay until the end.
Materials Required:
1.) 12 volt dc cooling fan (one piece)
2.) Neodymium Disc Magnets (four piece)
3.) Two Piece of wood
4.) 12V Female Socket PCB Mount Jack DC Socket Power Connector (one piece)
5.) DC 2-Pin ON/Off Switch (one piece)
6,) Glue Gun
7.) 12 Volt DC Adaptor
8.) One Piece of plastic
9.) Electric Soldering Iron Rod
10.) Trasparent Glass long Water Jar/Bottle (one piece)
Step 1: We need to make a bottom vortex machine for bottle vortex
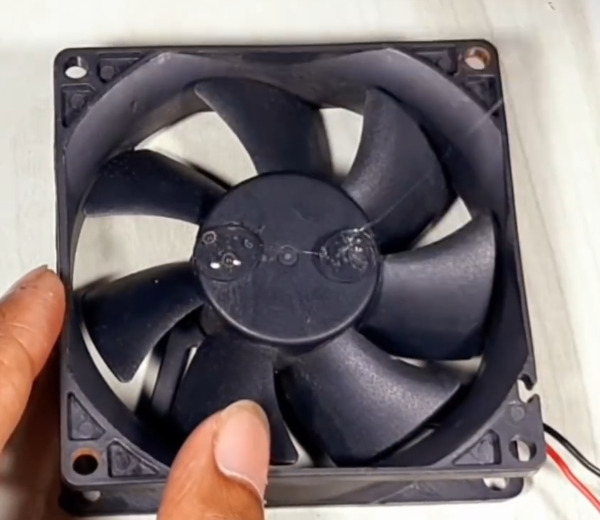
First of all, take a 12 volt DC cooling fan and spread glue in its center with the help of a glue gun so that we can fix two pairs of neodymium disc magnets on it.
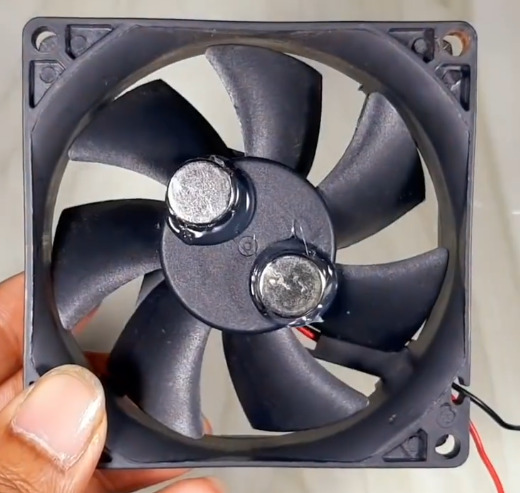
Take two Neodymium Disc Magnets and fix them against each other on the center part of the fan as shown in the image.
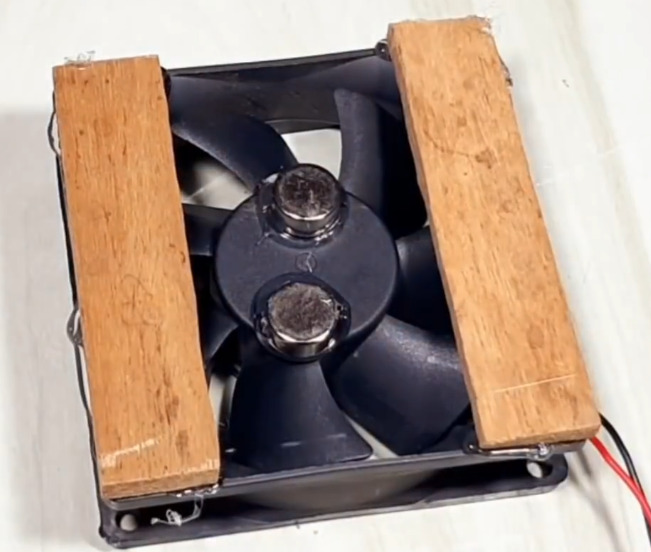
Now take two small wooden pieces, which you have to stick on both sides of the cooling fan with the help of a glue gun. The water jar will be placed on top of this wooden piece.
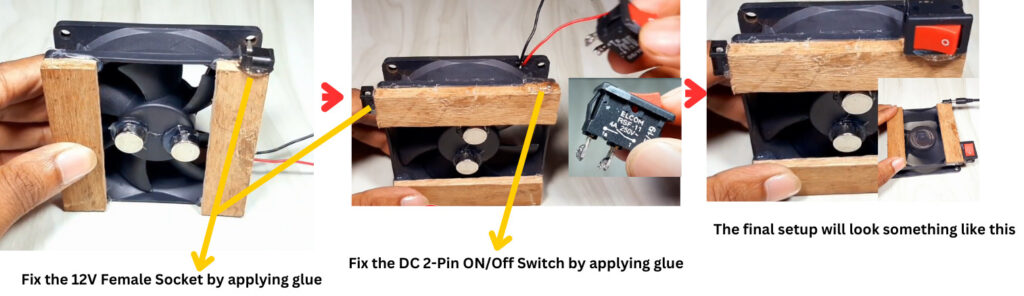
Now take the DC 2-Pin ON/OFF Switch and fix it on one side of the wooden piece with the help of a glue gun, and fix the 12V female socket on the other side of the same wooden piece with the help of glue.

Now it is time to fix the wiring of the bottom vortex machine. You can complete the wiring of the machine with the help of the given wiring diagram.
Our bottom vortex machine is ready. Now it is time to create vortex in the bottle.
Step 2: Now we have to create a vortex in the jar with the help of the vortex machine
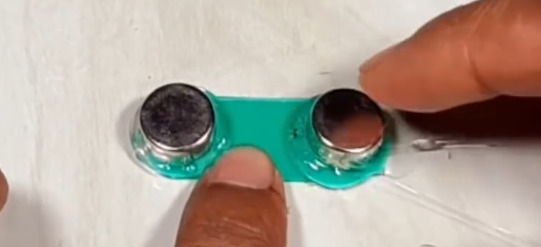
Take a plastic strip and cut it in such a way that this strip can rotate comfortably in the bottle bottom.
Now apply glue from the glue gun to both the corners of this plastic strip and fix two Neodymium Disc Magnets. Leave the glue to dry. Keep in mind that you have to choose waterproof Neodymium Disc Magnets.
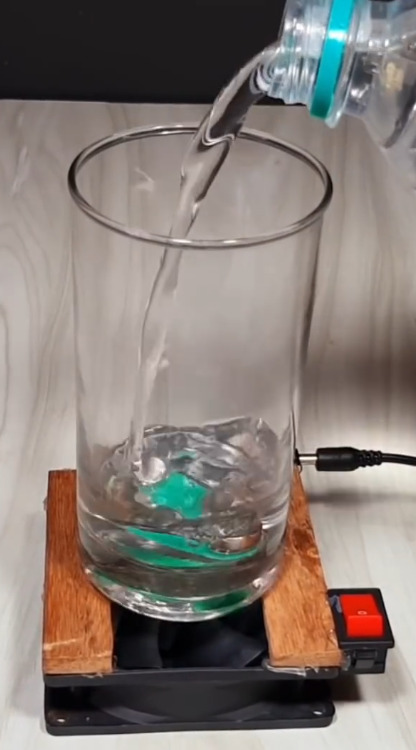
Now take a transparent glass bottle or jar and place the magnet plastic strip assembly inside it, and then fill the jar with water. Keep in mind that you do not have to fill the jar completely with water.
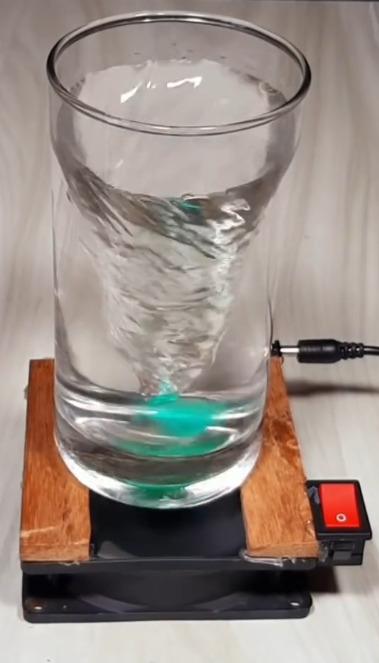
Now place the jar filled with water on the bottom vortex machine and turn on the machine with the help of a 12 Volt DC adaptor. As soon as the fan starts rotating, you will see a beautiful vortex forming in the water inside the jar.
You can add water color to the water in the jar to make the vortex more attractive.


