
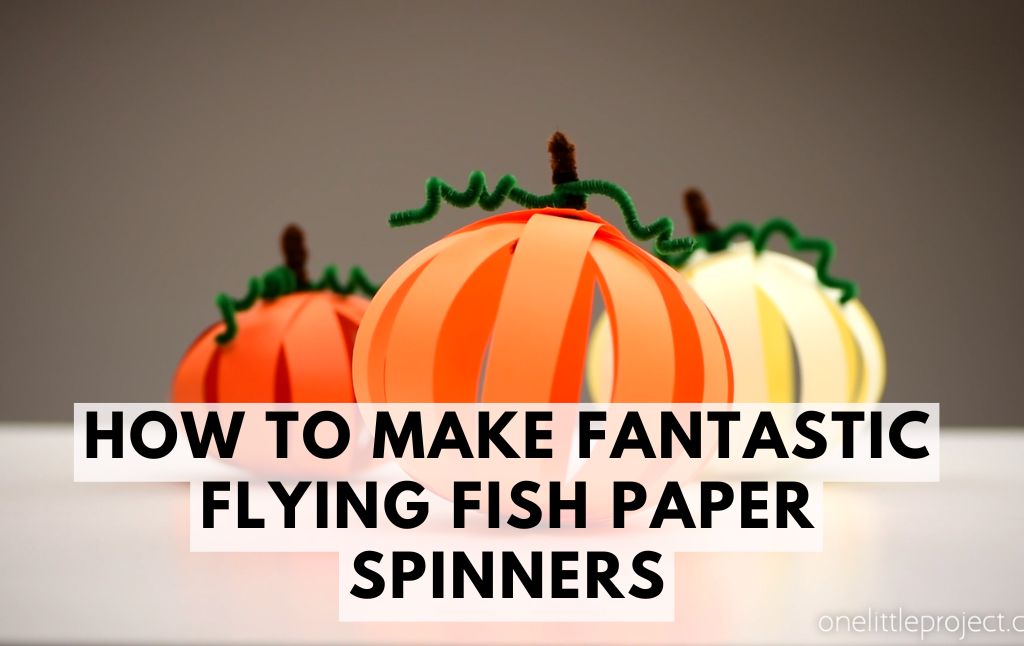
Creating a Paper Pumpkin is a fun and simple DIY craft that’s perfect for decorating your home during Halloween, Thanksgiving, or fall-themed events.
Using basic craft supplies, you can make a charming paper pumpkin that adds a festive touch to any space. Follow this step-by-step guide to craft your own beautiful paper pumpkin!
Materials Needed
- 1 sheet of orange cardstock (8.5 x 11 inches)
- 1 paper fastener (brad)
- 1 brown pipe cleaner (12 inches)
- 1 green pipe cleaner (12 inches)
- Ruler
- Pencil
- Scissors
- Hole puncher
Step-by-Step Instructions
Step 1: Cut and Prepare the Paper Strips
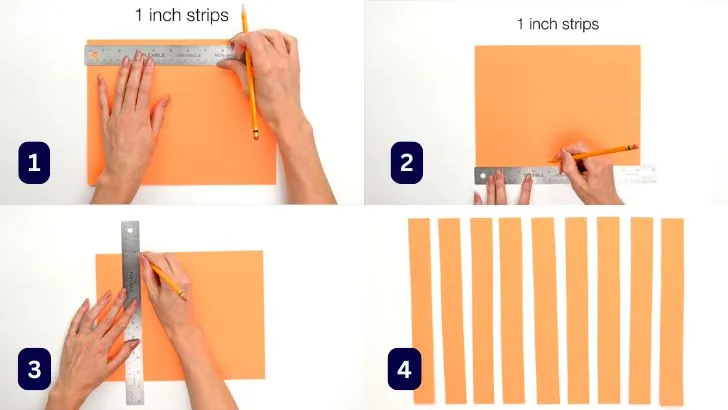
- Take the orange cardstock and mark 1-inch intervals along the top and bottom edges.
- Use a ruler to draw straight lines connecting the marks.
- Cut along these lines to create 11 paper strips.
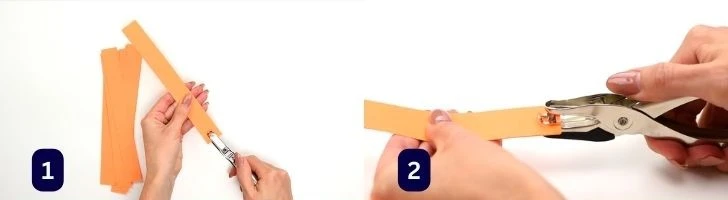
- Stack all the strips evenly together.
- Use a hole puncher to create holes at both ends of the strips. You can punch multiple strips at once to save time.
Step 2: Secure One End of the Pumpkin
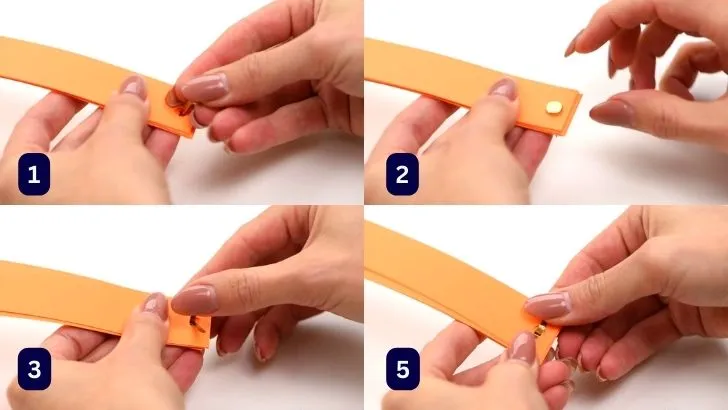
- Insert a paper fastener through one end of the stacked strips.
- Close the fastener tightly to secure the strips together.
Step 3: Form the Pumpkin Shape
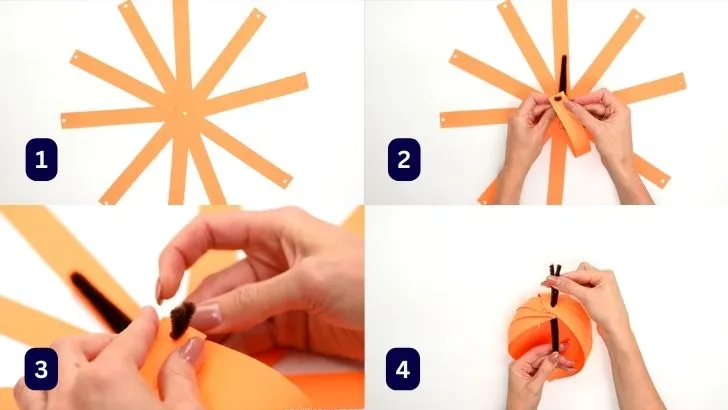
- With the fastened end facing down, spread out the paper strips evenly to create a circular shape.
- Fold the brown pipe cleaner in half to make it sturdier.
- Bend the pipe cleaner into an L-shape, leaving two ends pointing upwards.
- Thread the loose ends of the pipe cleaner through the holes on the other end of the paper strips.
- Pull the pipe cleaner up, ensuring that about 1 inch remains inside the pumpkin to hold it together.
Step 4: Make the Pumpkin Stem and Vines
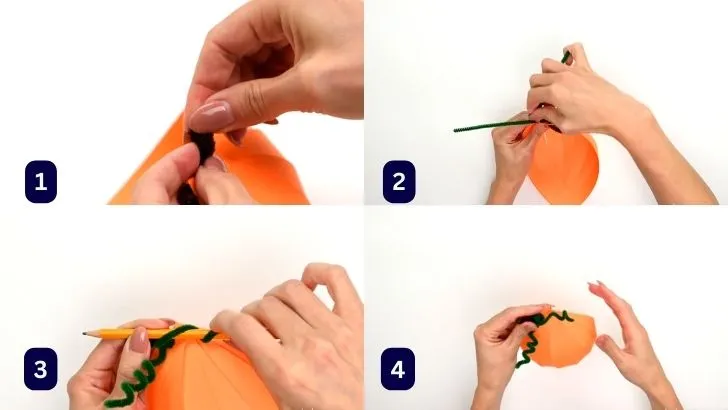
- Twist the brown pipe cleaner into a loop inside the pumpkin and bend it at 90 degrees to keep the structure stable.
- Fold the stem at the top and wrap any extra length around itself to thicken the stem.
- Take the green pipe cleaner, center it at the base of the stem, and wrap both ends around the stem a couple of times.
- To create vine curls, wrap each end of the green pipe cleaner around a pencil and gently slide it off.
Step 5: Final Adjustments

- Carefully adjust the paper strips so they are evenly spaced around the pumpkin.
- Press down gently in the center a few times to help the pumpkin stand upright and curve naturally.
- Make any final tweaks to the vine curls and stem to achieve your desired look.
Helpful Tips & Variations
- Customize Your Pumpkin Size: Use longer or shorter paper strips to create different-sized pumpkins. Cutting thinner or thicker strips will also change the look of your pumpkin.
- Alternative Materials: If you don’t have pipe cleaners, you can use another paper fastener and glue on a rolled-up brown paper stem with paper vines.
- Jack-O’-Lantern Design: Draw a spooky or silly face on a few strips before assembling the pumpkin for a fun Halloween twist!
- Color Variations: Try using white, gold, or dark orange cardstock for a stylish seasonal decor piece.
Final Thoughts
This Paper Pumpkin Craft is an easy and engaging project for kids and adults alike. It’s a fantastic way to celebrate the fall season with creativity and style. Whether you’re decorating your home, making classroom crafts, or preparing for a holiday party, these charming paper pumpkins will add the perfect touch of autumn magic!
Happy crafting! 🎃✨


