

Are you searching for a Thanksgiving activity that seamlessly blends festive fun with important educational lessons?
This Shape Turkey Math Craft is a fantastic hands on project for younger students, reinforcing their knowledge of basic geometry and counting skills while creating adorable holiday decor.
Using a simple printable template (perfect for A4 or US Letter size), you can guide your students or children through building a turkey entirely out of shapes. Here is your step by step guide to this educational and engaging craft.
Step 1: Preparation Printing and Prepping the Shapes
The key to a smooth crafting session is having all the shape pieces ready to go.
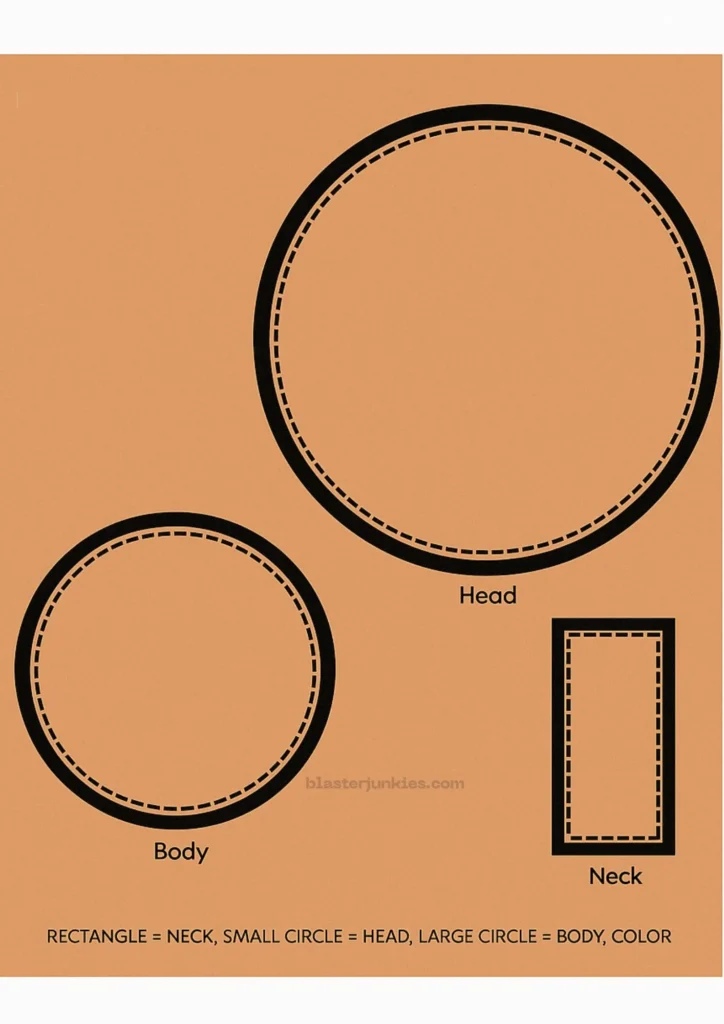

Download and Print the Template: Download our free Shape Turkey Math Craft printable. This template provides all the necessary turkey body parts and geometric shapes. You’ll need a few sheets:
- One sheet for the turkey body parts (head, body, legs, neck usually printed on brown/tan paper).
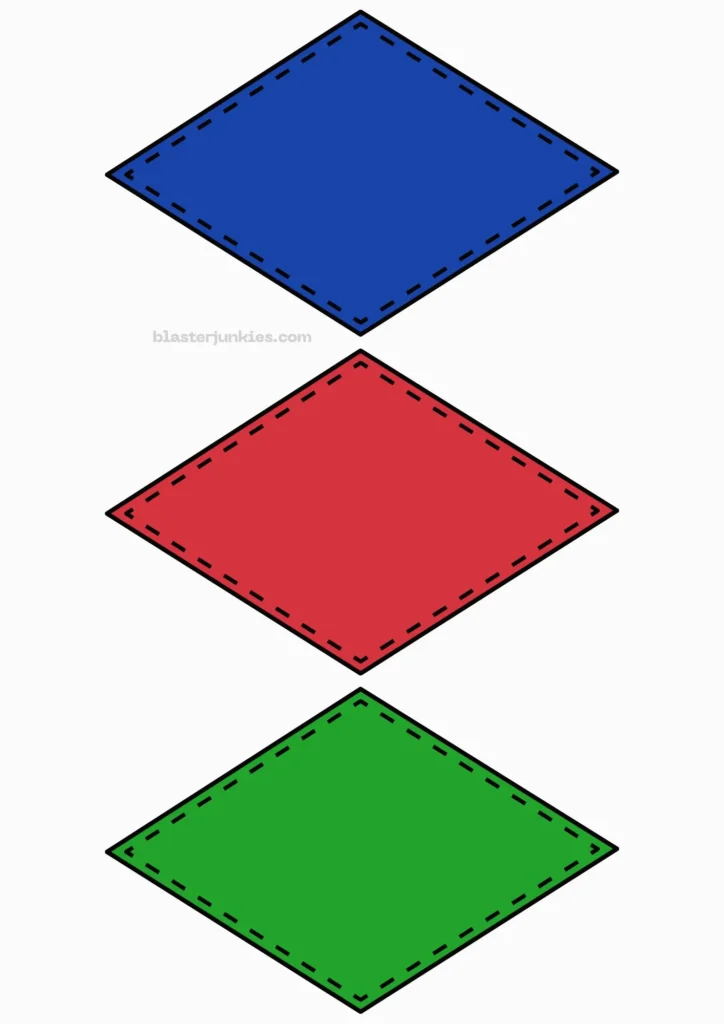
- One sheet with the various feather shapes (rectangles, trapezoids, etc.), ideally printed on different colored papers (red, yellow, blue, green) to make the shapes easier to identify.
- One sheet for the final counting worksheet.
Cut the Pieces: Carefully cut out all the pieces. For younger children (Pre K/Kindergarten), you should pre cut the pieces. For older children (1st/2nd Grade), let them practice their scissor skills by cutting out the geometric shapes themselves.
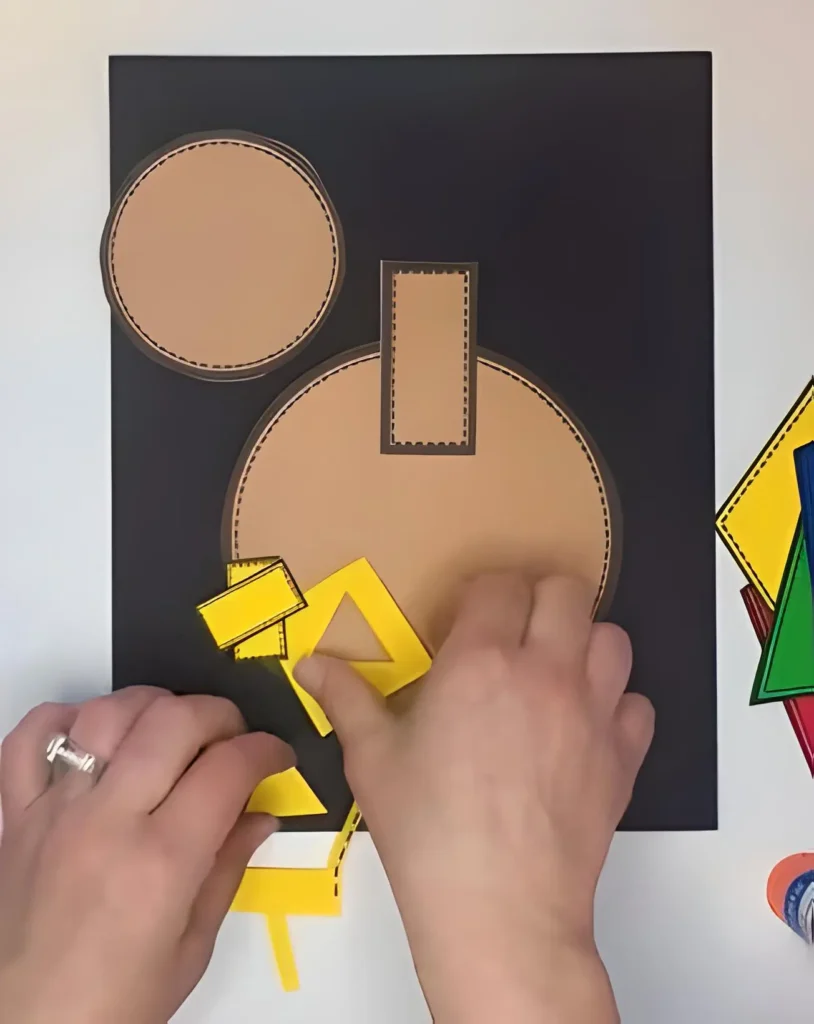
Choose the Base: Select a sturdy piece of dark colored cardstock (like the black cardstock you used) to serve as the background, which will make the colorful shapes stand out.
Step 2: Building the Turkey Body
Begin by establishing the main structure of the turkey on the base paper.
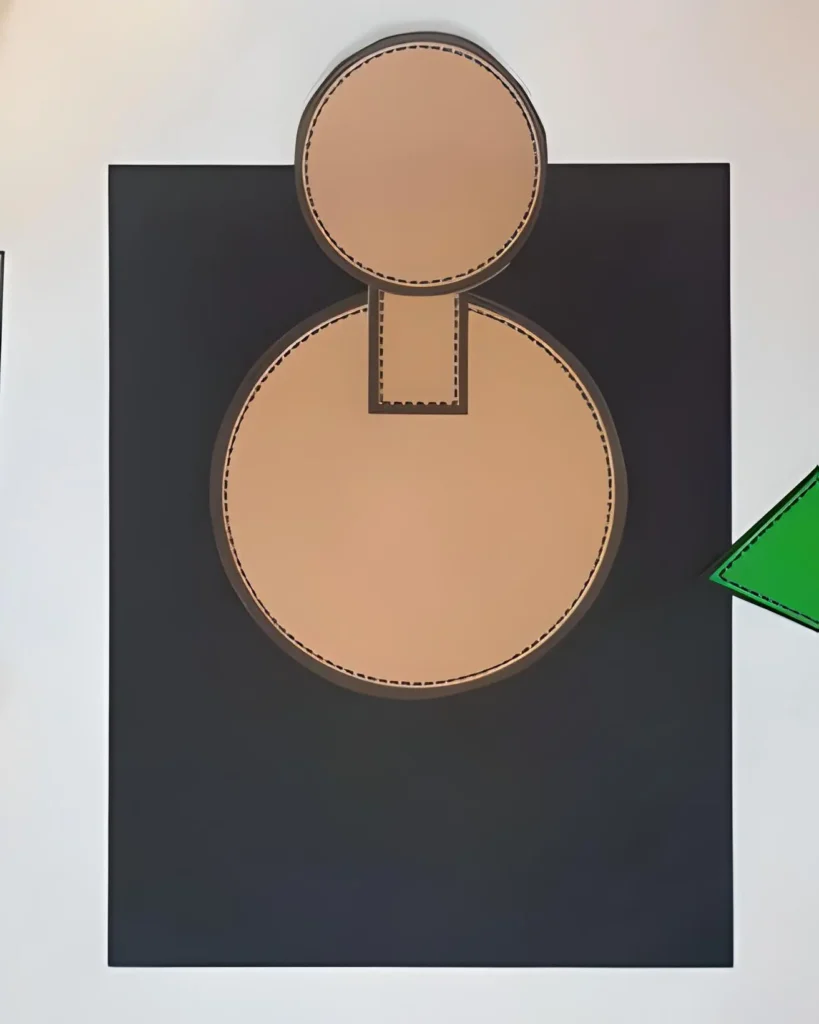
Place the Body: Take the largest circle shape (the turkey’s body) and glue it near the center of your background paper.
Add the Neck and Head: Place the small rectangle (the neck) directly above the body, and then top it with the smaller circle (the head). Glue these securely using a glue stick.
Step 3: Creating the Geometric Feather Fan
This is where the math lesson truly comes into play!
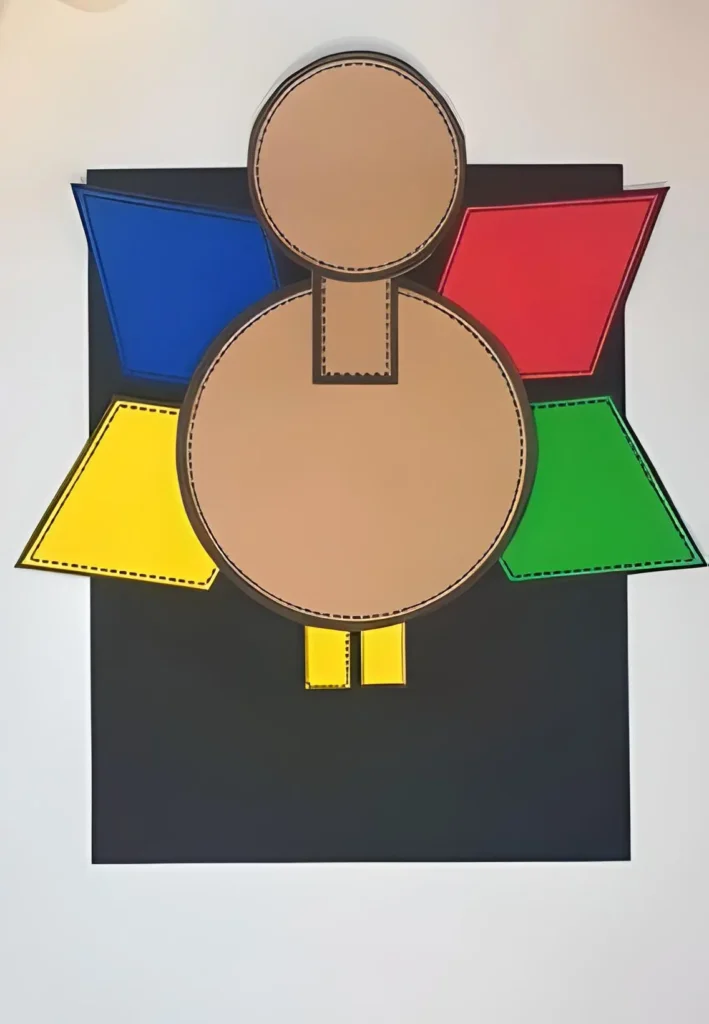
Identify the Shapes: Before gluing, have the children identify each feather shape. You used two rhombuses (yellow and red/maroon) and four trapezoids (blue, red, yellow, green).
Arrangement Practice: Demonstrate how to arrange the colorful shapes around the turkey’s body, radiating outward like a fan. This ensures the kids understand spatial awareness and symmetry.
Secure the Feathers: Once the arrangement is correct, glue the feather shapes onto the back of the turkey’s body circle. The colorful, overlapping geometric shapes make a vibrant display.
Attach the Legs: Affix the yellow rectangular shapes to the bottom of the body to form the legs.
Step 4: Adding Facial Details
Finish the turkey by adding the important final details.
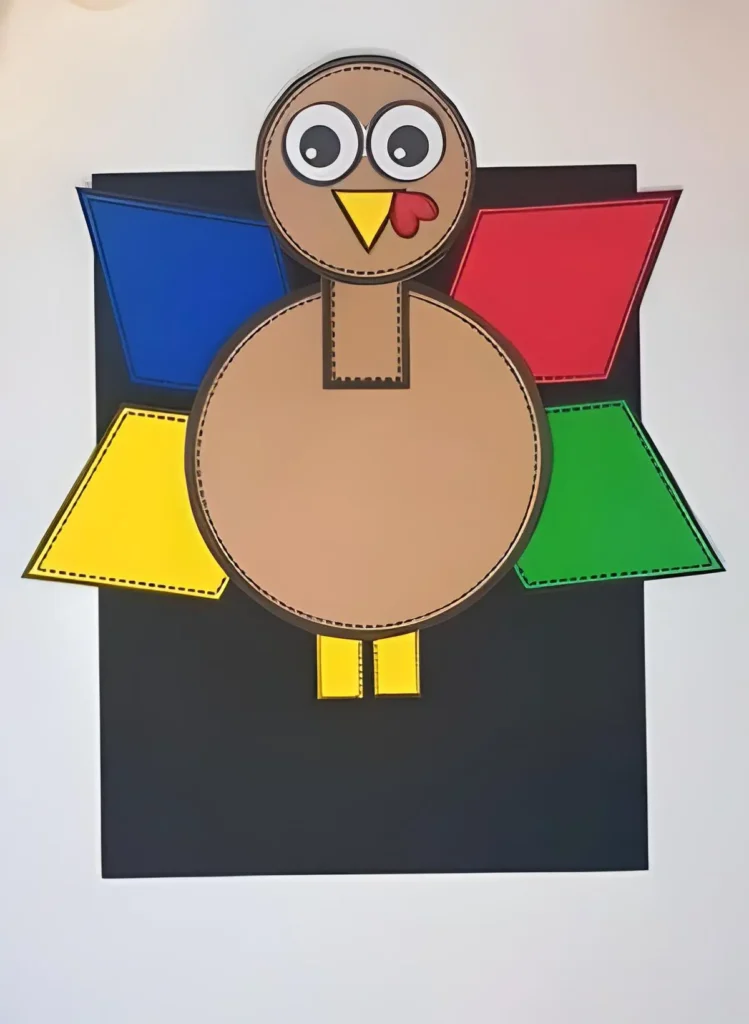
Add the Eyes: Glue the two large white circle cutouts (the eyes) onto the head.
Attach the Beak and Wattle: Glue the small yellow triangle for the beak and the tiny red heart for the wattle (the red flap of skin hanging from the chin).
Step 5: The Math Review and Documentation
The last step is to use the final worksheet to document which shapes were used.

Glue the Worksheet: Glue the small, black-and-white worksheet titled “My shape turkey has…” onto the bottom of the black background paper.
Count and Record: Have the students count how many of each shape they used on their turkey. In the video, you demonstrated counting:
- 2 rhombuses (the diamond shapes)
- 1 rectangle (the neck)
- 4 trapezoids (the feather sides)
- 1 heart (the wattle)
Practice Writing Numbers: The students write the corresponding number next to each shape name on the worksheet.
This comprehensive activity provides great practice in cutting, gluing, shape identification, and counting all wrapped up in an adorable Thanksgiving turkey!
How to Build Your Own Thankful Turkey Craft (Free Printable Included!)
The Ultimate Thanksgiving Craft: A Step by Step Guide to Making a Textured Turkey
DIY Balloon Floats: Bringing the Thanksgiving Day Parade to Your Kids’ Table!
How to Craft the Ultimate DIY Exploding Love Card
Immortalizing Your Closest Bonds: Creating the Ultimate Aesthetic Friendship Journal
Crafting the Ultimate Personalized Gift: Heartfelt Scrapbook Layout Ideas
15 Inspiring Styles to Kickstart Your Next Junk Journal Spread
10 Inspiring Junk Journal Spreads to Try Today
Create a Spooktacular Light Up Halloween Card: A Step by Step Guide


