
Autumn is my absolute favorite season for crafting, and there’s nothing better than a cute project to celebrate the cozy vibes.
Today, I’m excited to share how you can create an adorable paper pumpkin treat box, perfect for party favors, small gifts, or as a charming addition to your Thanksgiving table setting.
This project turns simple paper into a delightful 3D pumpkin that holds a sweet surprise inside. Let’s get started!
What You’ll Need:
- Cardstock in orange, brown, and green
- A ruler and a bone folder (or a similar tool for scoring)
- Scissors
- Craft glue
- An oval paper punch (optional, but helpful)
- A quilling tool or a thin needle for curling paper
- A small leaf paper punch (optional)
Step-by-Step Instructions
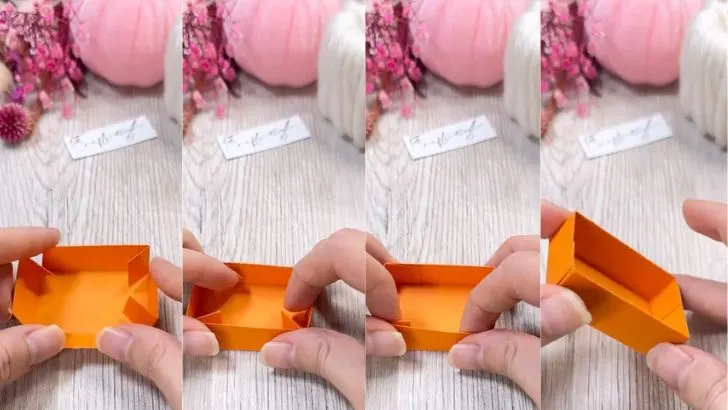
Step 1: Construct the Box Base
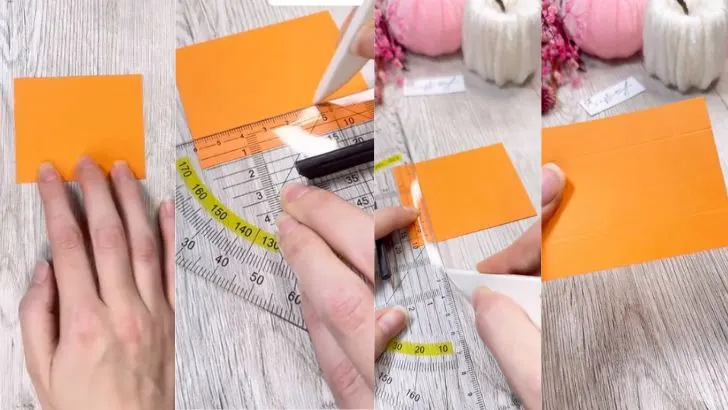
First, let’s create the small box that will hold your treats. Cut a small rectangle from your orange cardstock. Using your ruler and bone folder, score two parallel lines lengthwise down the paper, dividing it into three even sections. Then, score two parallel lines widthwise, creating flaps on the top and bottom.
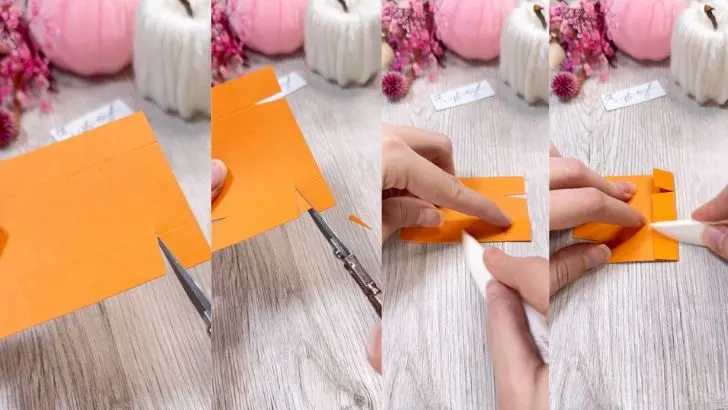
Cut small slits along the shorter score lines to create the folding tabs for the box.
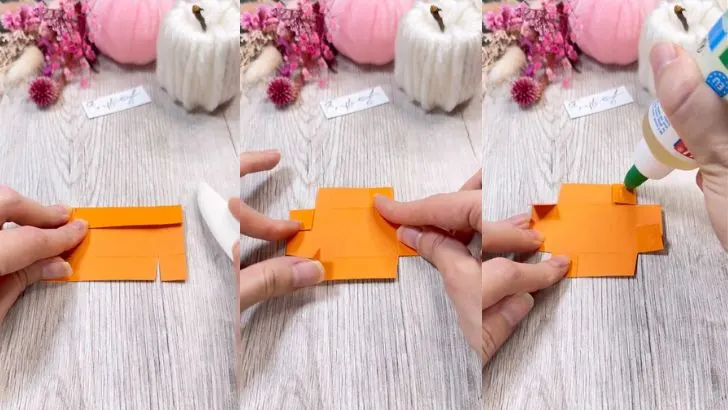
Fold along all your score lines, apply a little craft glue to the small tabs, and assemble your open topped box.
Step 2: Create the Paper Pumpkin Sides
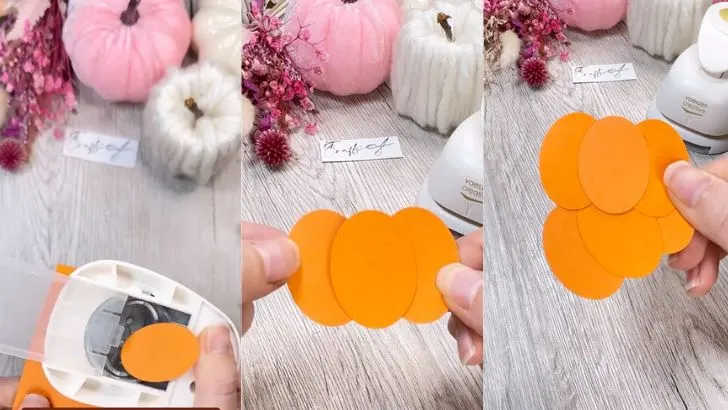
Now for the pumpkin itself! If you have an oval paper punch, use it to punch out six ovals from your orange cardstock. If not, you can simply trace and cut them by hand.
To assemble one side of the pumpkin, take three ovals and glue them together in an overlapping row, with the center oval slightly higher than the two on the sides. Repeat this to create a second identical pumpkin side.
Step 3: Add the Finishing Touches
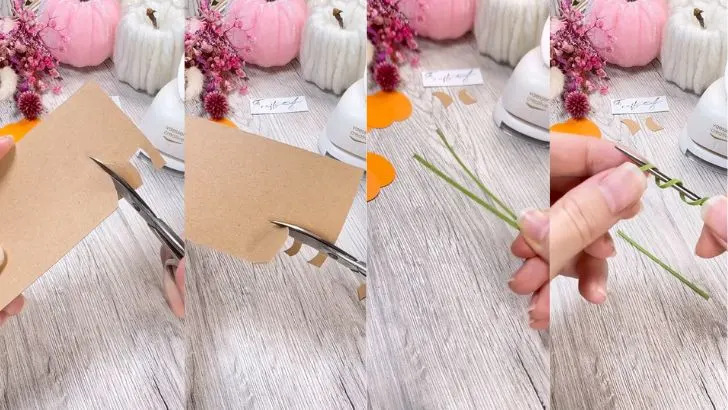
Every pumpkin needs a stem, leaves, and curly vines!
- Stem: Cut a rustic, slightly curved stem shape from your brown cardstock.
- Leaves: Use a small leaf punch or cut out a tiny leaf from your green cardstock.
- Vines: To create the adorable curly vines, cut a very thin strip of green paper. Tightly wrap this strip around your quilling tool or a needle, then slide it off. It will spring back into a perfect little curl.
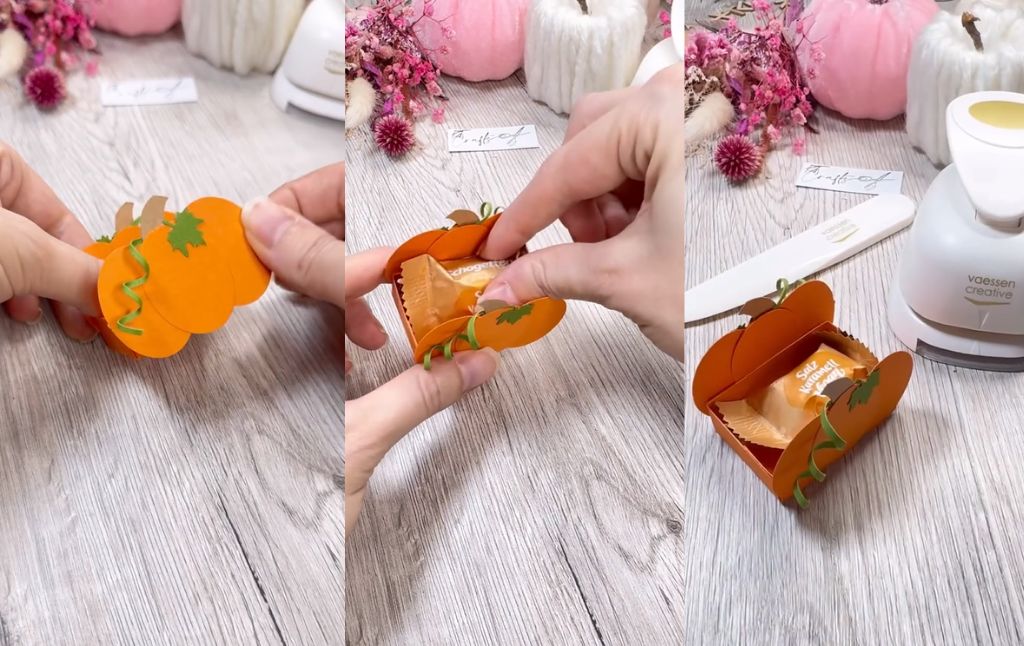
Step 4: Assemble Your Pumpkin

Take one of your pumpkin sides and begin adding the details. Glue the brown stem to the top center. Add the tiny green leaf next to it, and then carefully glue on one of your curly green vines. It already looks so cute!
Step 5: Put It All Together
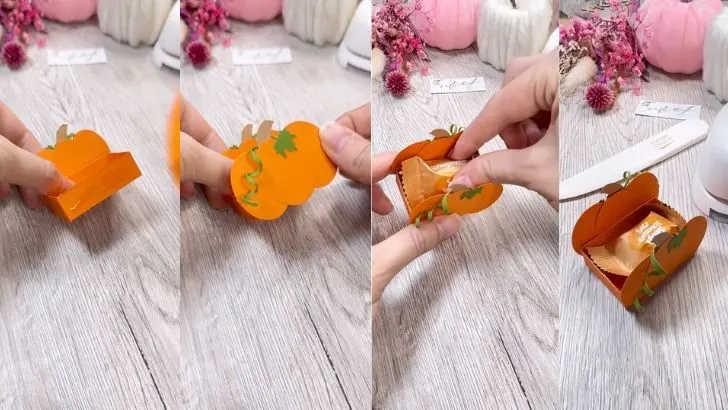
It’s time for the final assembly! Take your finished paper pumpkins and glue one to each of the long sides of the box you made in the first step.
Your charming little pumpkin treat holder is now complete! It’s the perfect size for holding a small chocolate or candy. Fill it with a sweet treat and place it on your autumn table to delight your guests. Happy crafting.
Create a Colorful Paper Turkey for Thanksgiving!
Make This Adorable Paper Turkey Hat
Craft a Wicked Animated Eyeball Spellbook for Halloween
Create Adorable Upcycled Ghost Portraits for Halloween
Create Your Own Spooky & Glowing Ghost Family This Halloween!
Create Your Own Spooky Glowing Ghosts
How to Fold a Glowing Origami Petal Sphere
DIY a Surprise I Love You This Much Pop-Up Card!
Create a Dazzling Color Explosion with the Magic Milk Experiment!


