
Ever wanted to see images and animations leap off your screen and float in mid air?
With just a few simple materials you probably have lying around the house, you can build your own stunning 3D hologram projector.
This simple device uses a clever optical illusion to create a magical, floating image that will wow your friends and family.
Ready to bring your screen to life? Let’s get started!
What You’ll Need:
- Corrugated cardboard
- A clear plastic sheet (a clear report cover, an old CD case, or stiff plastic packaging works great)
- A ruler
- A pencil or marker
- A craft knife or strong scissors
Step-by-Step Instructions: Building Your Projector
Step 1: Create the Side Supports
First, you’ll create the angled walls that will hold your reflector screen. Cut two identical square pieces of cardboard, each measuring 10 x 10 cm.
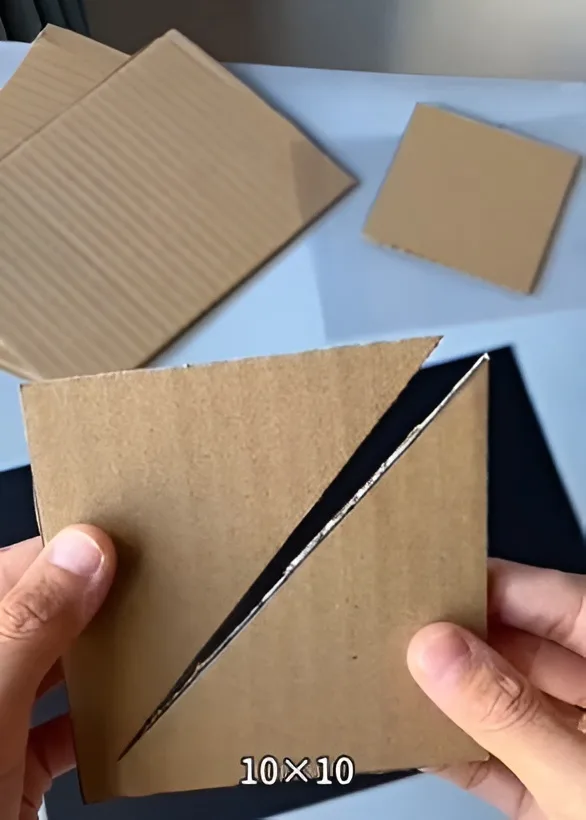
On each square, use your ruler to draw a straight line diagonally from one corner to the opposite corner.
Carefully cut each square along the diagonal line. Be careful not to cut all the way through.
Step 2: Assemble the Base Structure
Now you’ll build the stage for your hologram. Cut a rectangular piece of cardboard to serve as the base. A good size is 13 x 18 cm.
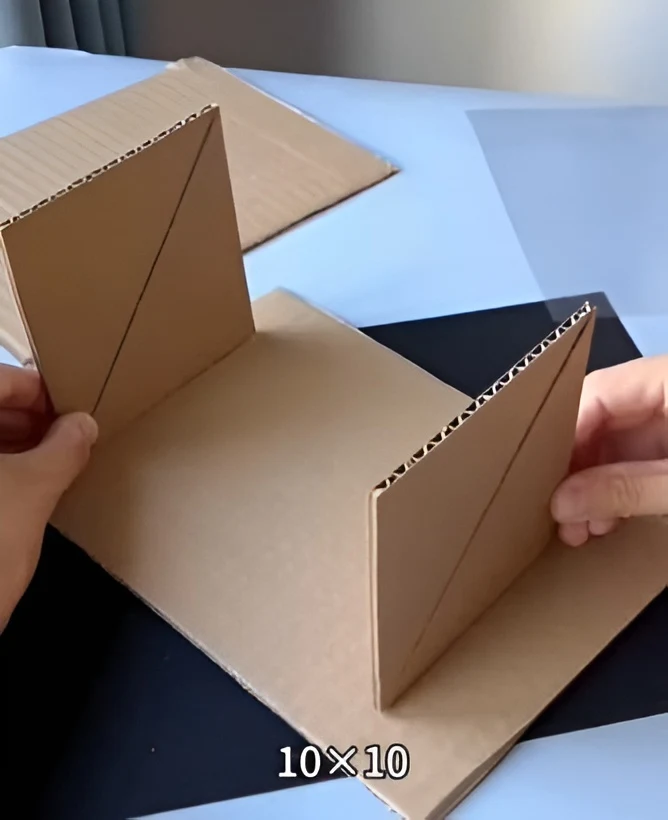
Place your two folded supports onto the base, standing them up so they form two walls facing each other. Position them evenly apart. Make sure that the opening created by the diagonal cut is positioned at the top side.
Step 3: Prepare the Reflector Screen
This clear sheet is the key to the entire illusion. Cut your clear plastic sheet into a rectangle measuring 13 x 18 cm.
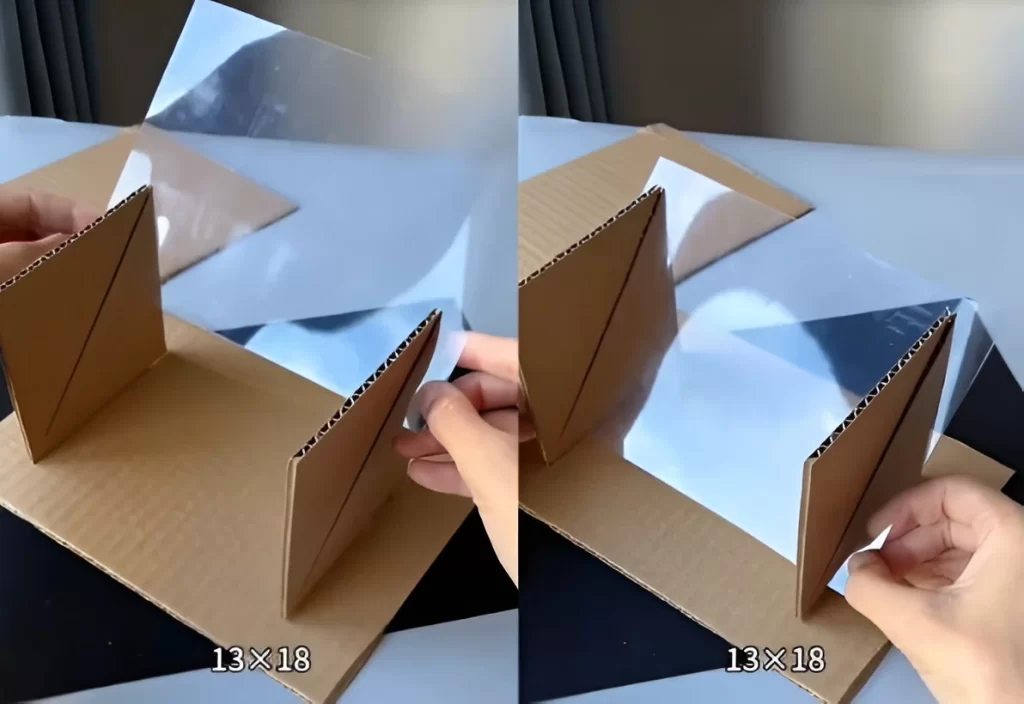
Gently place this plastic sheet inside your structure, leaning it against the diagonal folds of your two cardboard supports. It should now be resting at a 45-degree angle.
Step 4: Construct the Top Frame
The final piece holds everything together and provides a platform for your phone.
Cut a larger piece of cardboard measuring 15.5 x 21.5 cm.
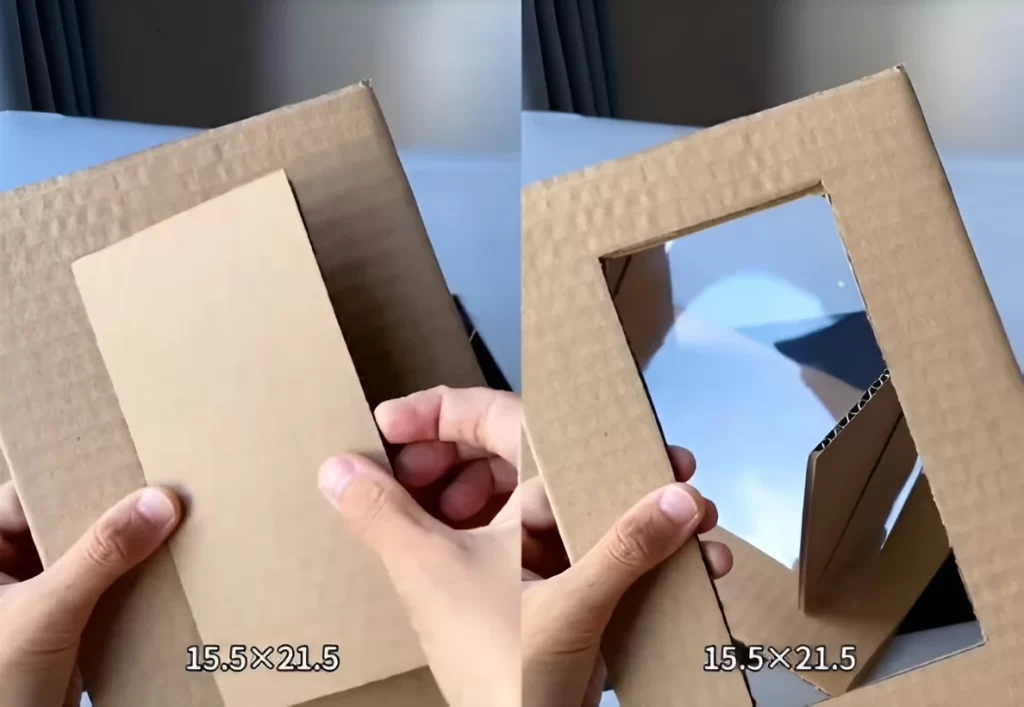
In the center of this piece, carefully cut out a rectangular window. This window should be slightly smaller than your phone’s screen.
Place this frame on top of your side supports. It should fit snugly, holding the angled plastic screen securely in place.

Your hologram projector is now built! Bringing Your Hologram to Life Now for the fun part!
On your smartphone, go to a video platform like YouTube and search for “hologram video” or “hologram pyramid video.”
You’ll find thousands of specially designed animations with a black background. For the best effect, dim the lights in your room.
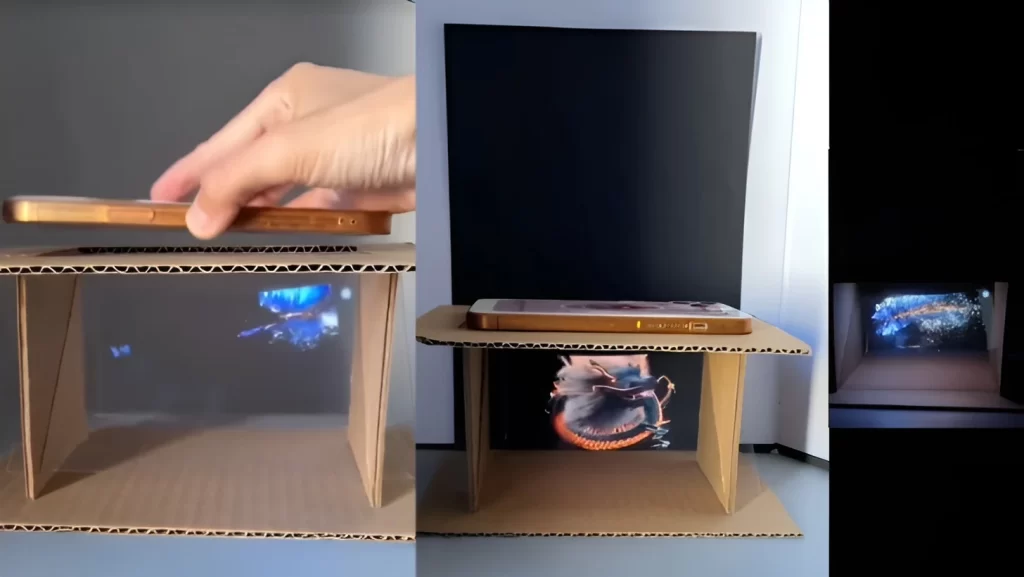
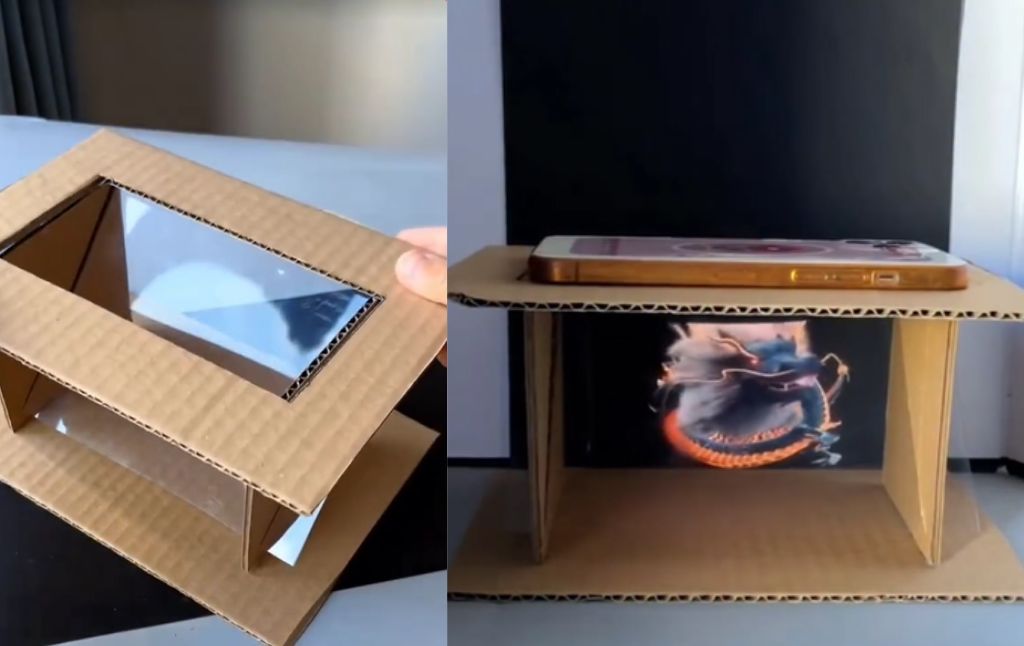
Place your smartphone screen-down on the top frame, with the video playing directly over the central opening.
Look into the front of your projector and watch as a vibrant, 3D image appears to float magically inside the box!
You’ve just created an amazing piece of DIY tech. Enjoy the show.
Kids Activities
Looking for more fun kids activities and other ideas to keep kids engaged, learning, and having fun? Check out these:
Create an Amazing Rainbow Bubble Snake: A Fun and Easy DIY Toy!
Unleash Your Child’s Inner Artist with this Magical DIY Projector!
A Sprinkle of Magic Create a Blooming Paper Flower Garden!
Galaxy Jars DIY: A Complete Guide
How to Make an Origami Fish: A Step-by-Step Guide


