Looking for a fun, easy, and virtually free activity to keep your little ones creatively engaged?
Look no further! We’ve brought you a wonderful article that explains how to turn a simple Pringles can into a magical art projector,
This DIY project is perfect for a rainy afternoon or a quiet evening. It not only sparks creativity but also helps develop fine motor skills as your child traces and colors their favorite characters. Best of all, it uses items you probably already have around the house!
Let’s get started.
What You’ll Need:
- An empty Pringles can (or any similar cardboard tube with a plastic lid)
- The clear plastic lid from the can
- A black permanent marker
- A smartphone with a flashlight function
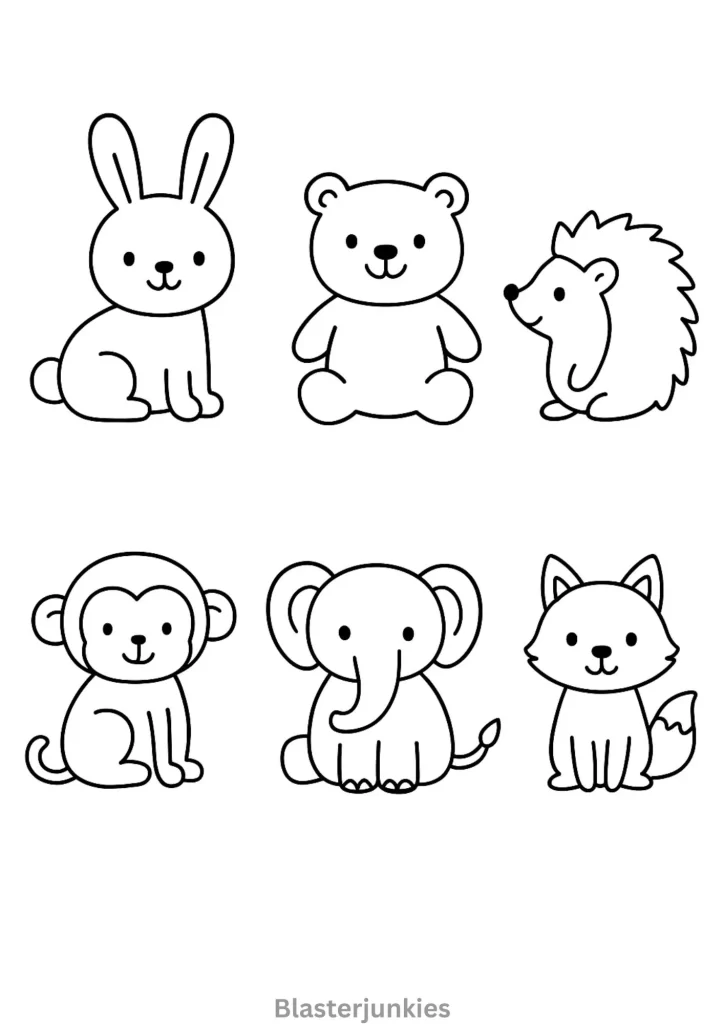
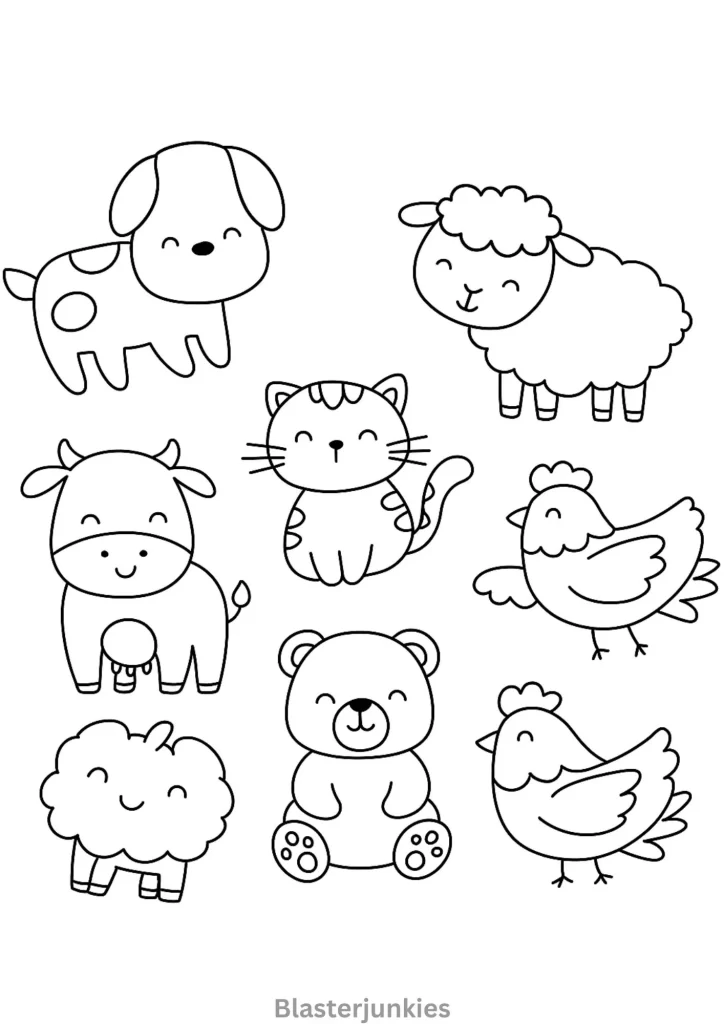
- Simple drawings or images to trace (coloring book pages work great!)
- White paper for your child to draw on
- Pencils, crayons, or colored markers
(Optional)
- Decorative paper and tape/glue to cover the can for a cleaner look.
Step-by-Step Instructions:
Step 1: Prepare Your Projector Tube
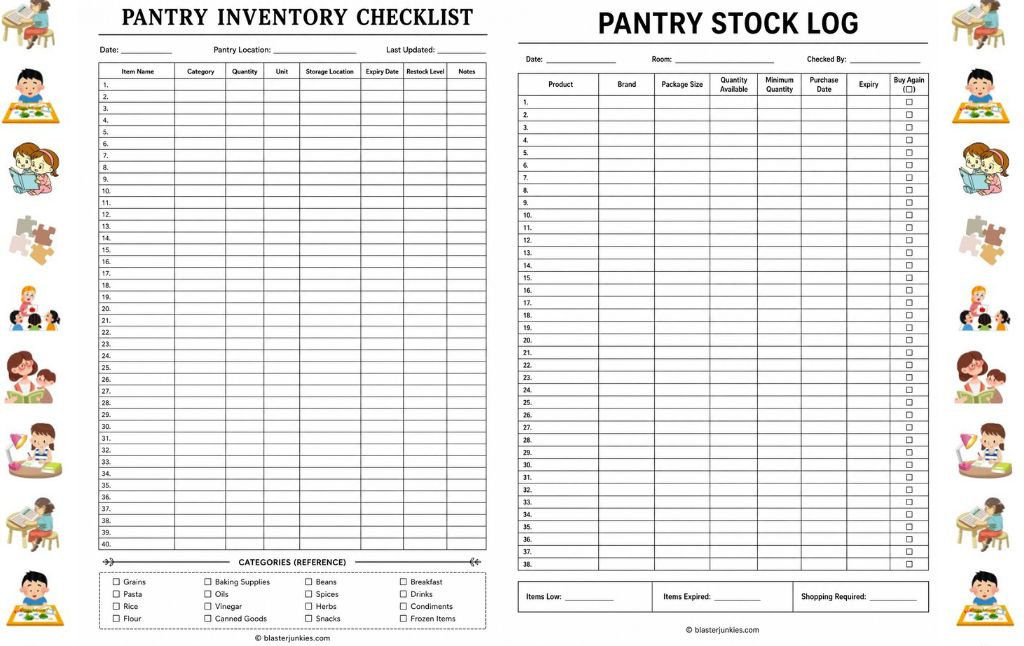
First, make sure your Pringles can is empty and clean. you can wrap the outside of the can with colored or plain paper to give it a more finished look.
Take a knife and carefully cut off the bottom part of the Pringles can so that the flashlight from your smartphone can shine through from this side.
This step is optional but makes the final product look a bit more like a cool gadget!
Step 2: Create Your Projector “Slides”
This is where the magic begins! Take the clear plastic lid from the Pringles can. Place it over a simple drawing you want to project like cute farm animals like a cat, a sheep, and a pig.
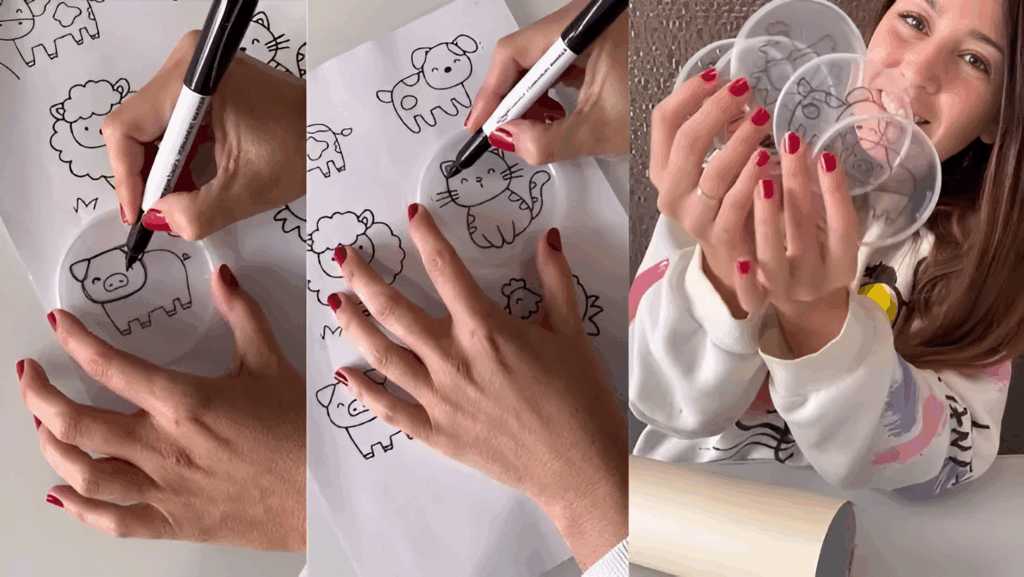
We’ve prepared a collection of Animal Coloring Pages for you, available as printable PDFs. You can also use these pages for your this project.
Using your black permanent marker, carefully trace the outline of the drawing directly onto the plastic lid.
Create as many of these “slides” as you like with different characters or shapes!
Step 3: Set Up Your Projection Station
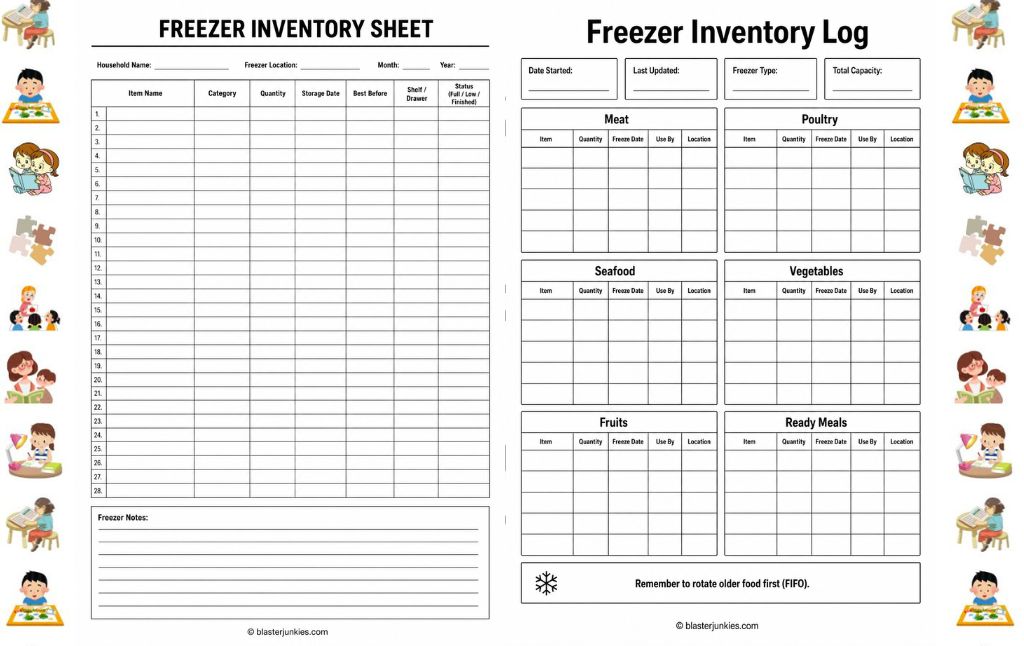
Find a suitable spot, like under a table or a chair, in a dimly lit room. The darker the room, the clearer your projection will be.
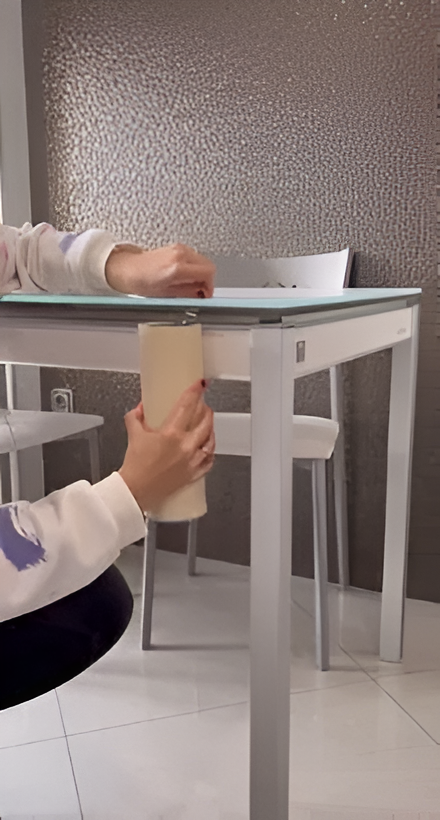
As shown in the image, the woman wedges the can under the edge of a table so it hangs vertically, pointing down towards the floor.
Step 4: Project the Image
Place one of your custom-drawn plastic lids on the bottom opening of the can. Now, take your smartphone, turn on the flashlight, and place it on the top opening of the can, with the light shining down into the tube.
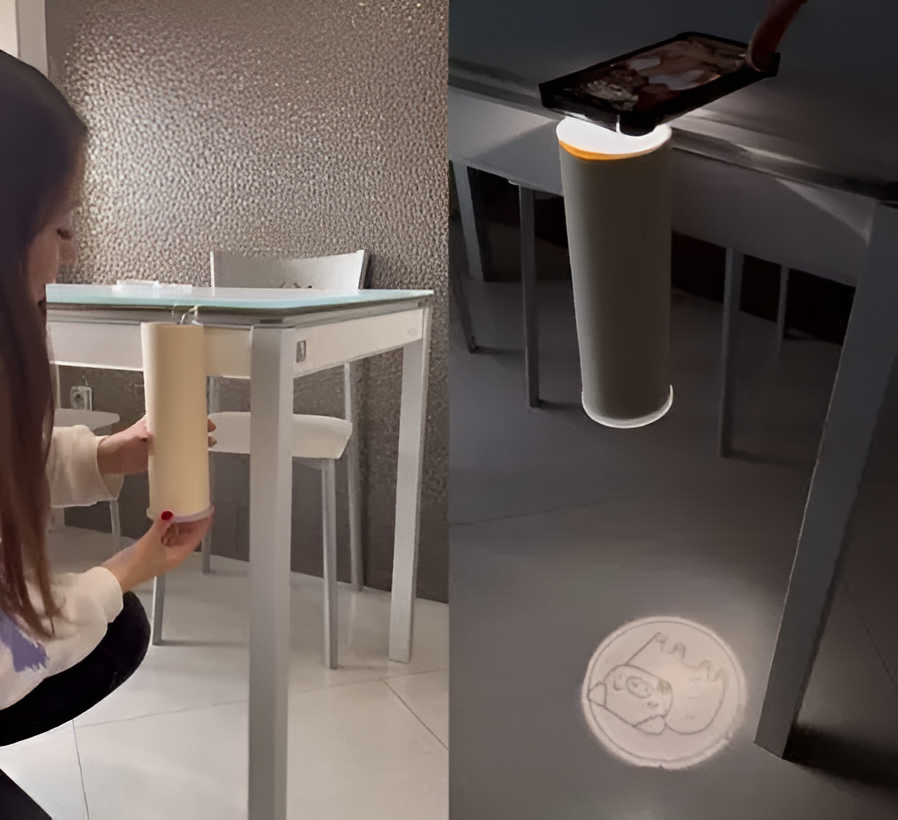
Voilà! A bright, clear image of your drawing will be projected onto the floor below.
Step 5: Trace and Create!
Place a blank sheet of paper on the floor directly under the projection. Now, your child can easily trace the projected image with a pencil.
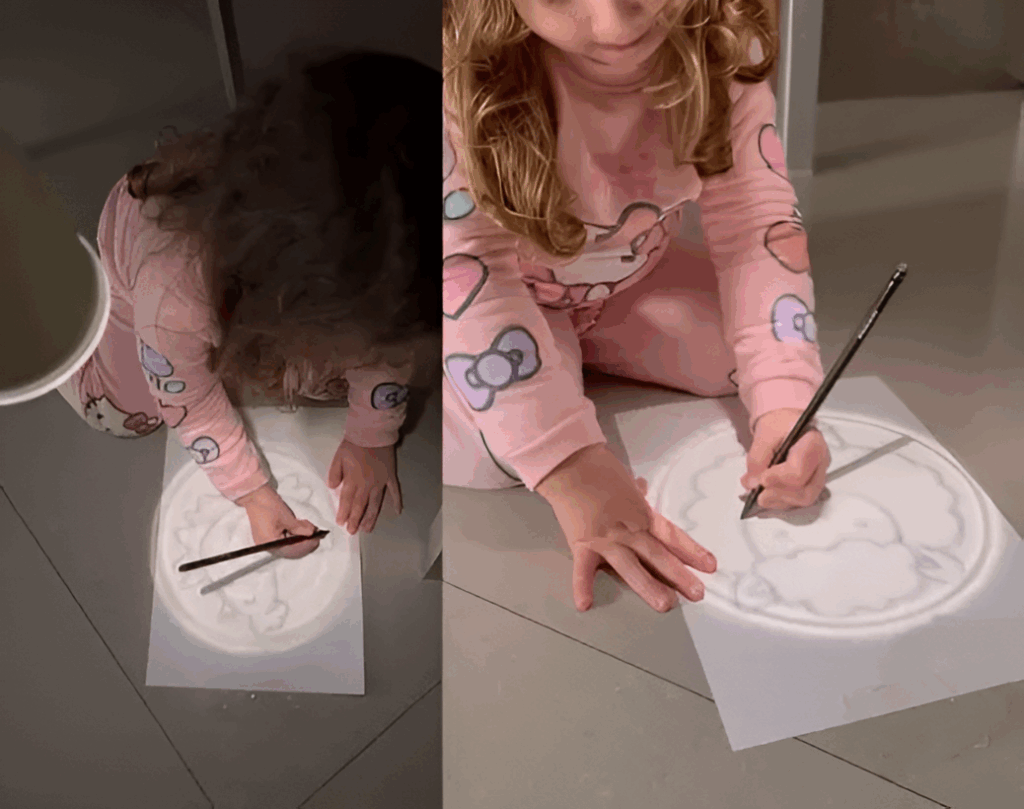
It’s a fantastic way for them to practice drawing shapes and characters they love.
Step 6: Bring it to Life with Color
Once the tracing is done, the fun continues! Move to a table and let your child color in their newly drawn masterpiece.
This is a wonderful opportunity for them to express their creativity with different colors and bring their characters to life.
This simple DIY projector is more than just a craft; it’s an experience. It combines recycling, art, and a little bit of science to create a memorable activity for you and your child. Give it a try and watch their face light up as their drawings appear like magic.
Kids Activities
Looking for more fun kids activities and other ideas to keep kids engaged, learning, and having fun? Check out these:
How to Make a DIY Popping Fish Fidget Toy
How to Make Ninja Stress Balls
How to Make a Paper Cup Phone: A Fun and Educational STEM Activity
Simple Bernoulli Principle Experiment for Kids
DIY Rain Stick Craft That Actually Sounds Like Rain!
Egg Drop Inertia Science Project: A Fun Physics Experiment for Kids!
How to Make a Kids Bottle Rocket: A Fun & Explosive DIY Experiment!
Toilet Roll Easter Bunnies – Adorable DIY Craft for Kids & Parents
Melting Ice in Salt Water – A Cool Science Experiment for Kids