
Looking for a fun and colorful craft to delight the kids? Get ready to turn some simple household items into the most incredible bubble maker you’ve ever seen!
This DIY project is not only easy and inexpensive, but the result is a fantastic “bubble snake” that creates a cloud of tiny, beautiful bubbles.
Let’s make some magic!
What You’ll Need:
- A handful of colorful plastic straws
- Scissors
- Double-sided tape
- Tweezers (optional, but very helpful for precision)
- A small, clear plastic bottle
- A wooden skewer or a thin stick
- For the super bubble solution: Water, dish soap, and sugar
Let’s Get Crafting: Step-by-Step Instructions
Step 1: Prep Your Rainbow Pieces
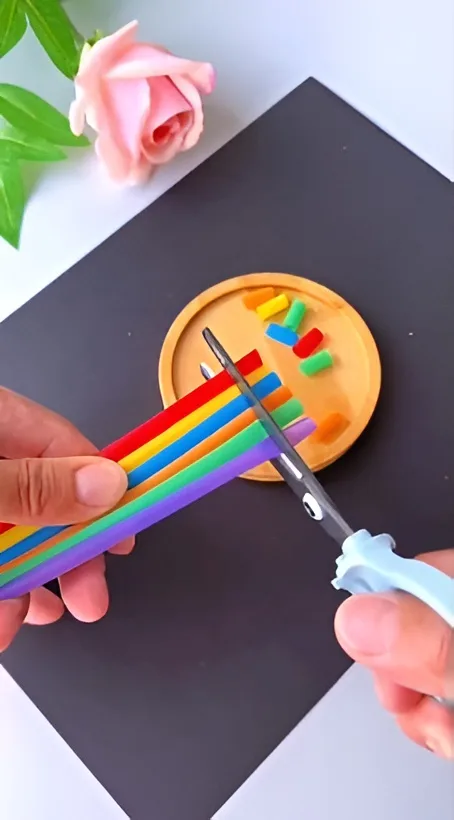
First, gather your colorful straws. Holding them together in a neat bunch, use your scissors to cut them into small, uniform pieces, about half an inch long.
The more colors you have, the more vibrant your bubble maker will be!
Step 2: Build the Rainbow Core
Take a strip of double sided tape and lay it sticky side up. Now, begin placing your small straw pieces side by side along the tape.
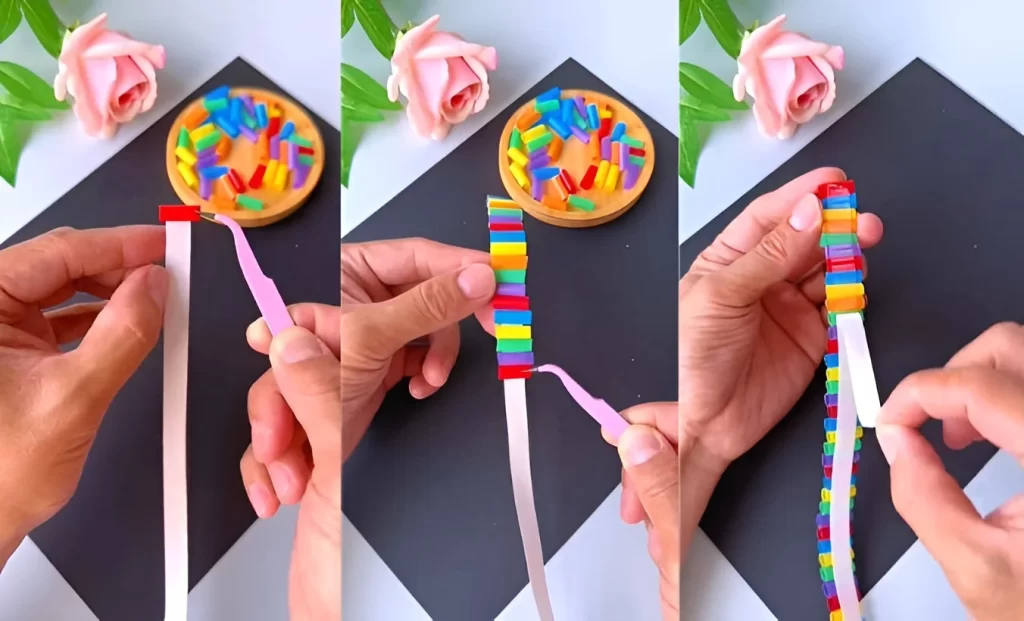
You can use tweezers for better control. Create a long, colorful strip of straws, all stuck together in a line.
Step 3: Create the Honeycomb Disc
Once your strip is complete, carefully peel it off your work surface. Begin rolling it up tightly into a flat, circular disc, like a snail’s shell.
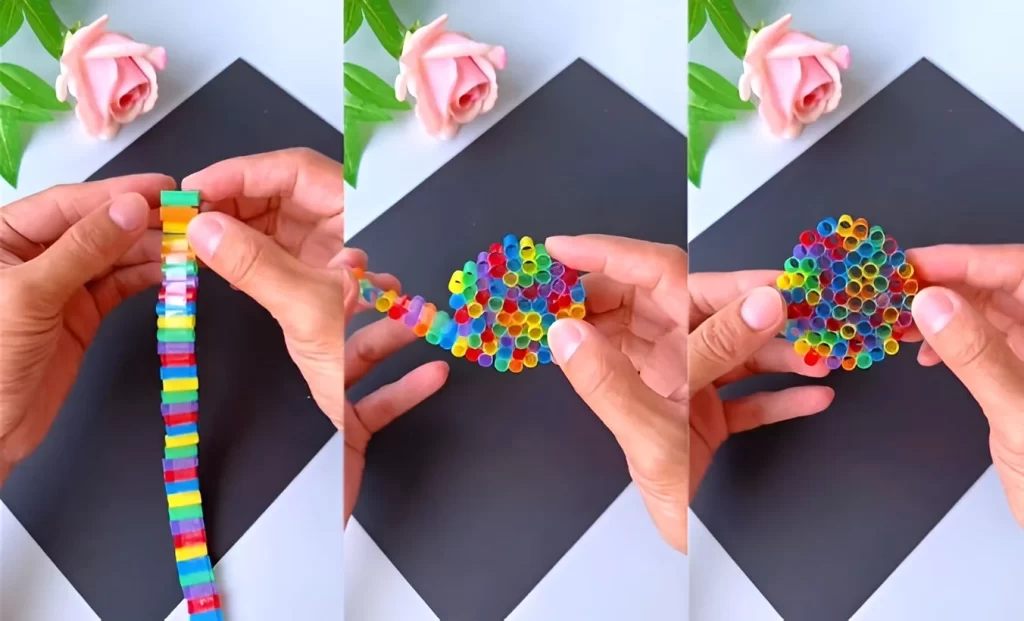
The double sided tape will hold all the pieces together, forming a beautiful honeycomb pattern.
Step 4: Make the Frame
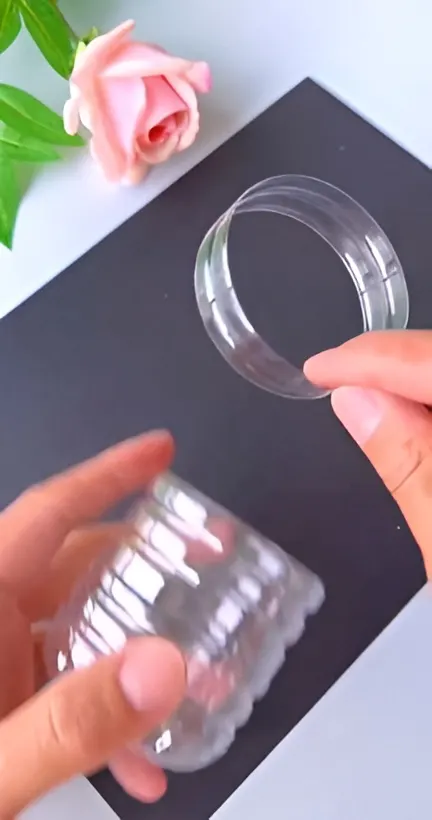
Take your small plastic bottle and carefully cut a ring from the bottom section. You only need a thin circular band that will act as the frame for your bubble wand.
Step 5: Assemble Your Bubble Wand
Gently press your colorful straw disc into the plastic ring you just cut. It should fit snugly inside.
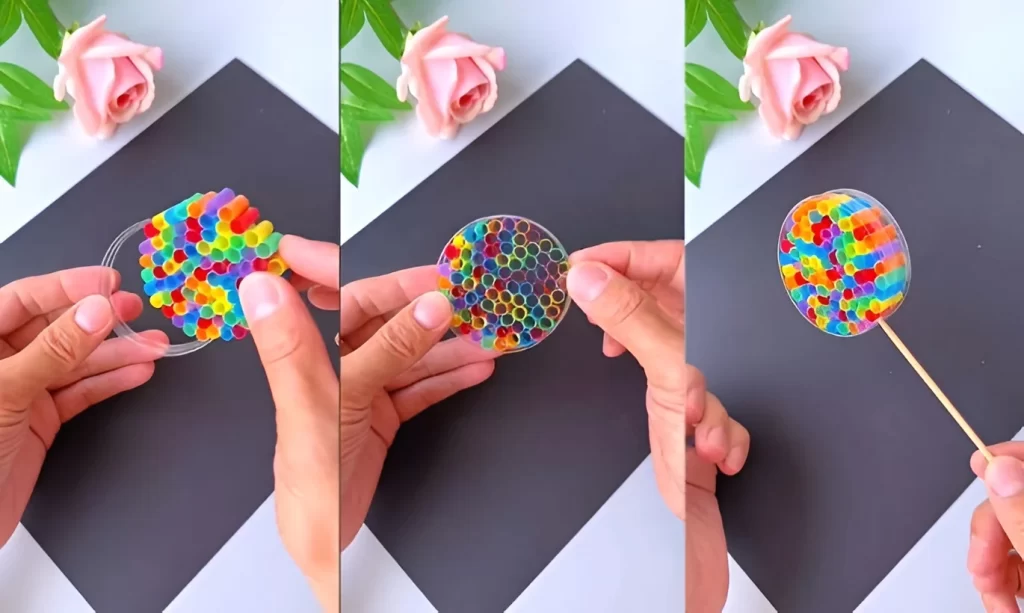
To finish, carefully insert a wooden skewer into the side of the straw bundle to create a handle. It should now look like a vibrant, oversized lollipop!
Step 6: Mix the Magic Bubble Solution
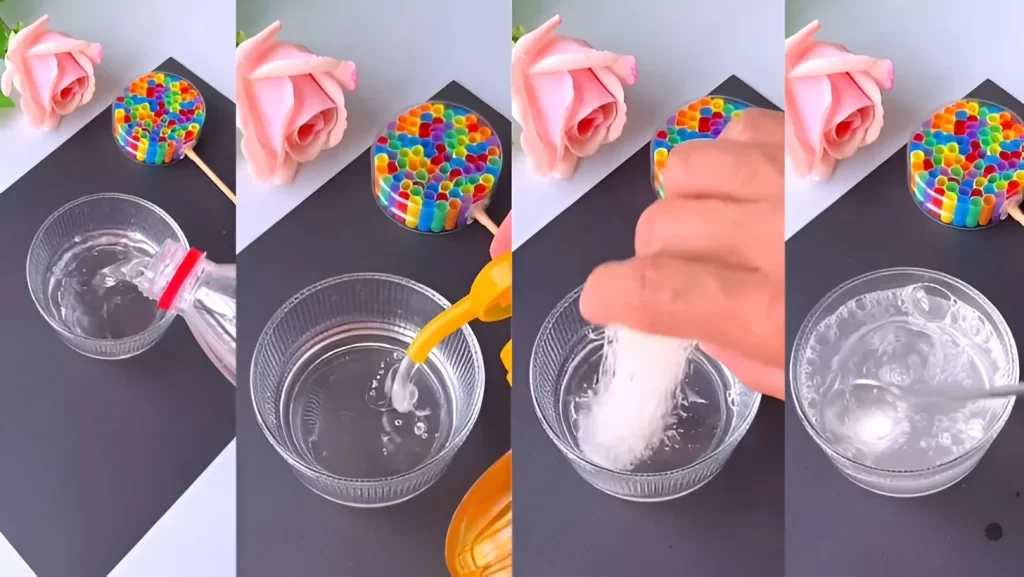
This is the secret to amazing bubbles! In a small bowl, mix your bubble solution using this simple ratio:
4 parts Water
1 part Dish Soap
1 part Sugar
The sugar is the key ingredient—it helps make the bubbles stronger and last longer! Stir gently until the sugar is dissolved.
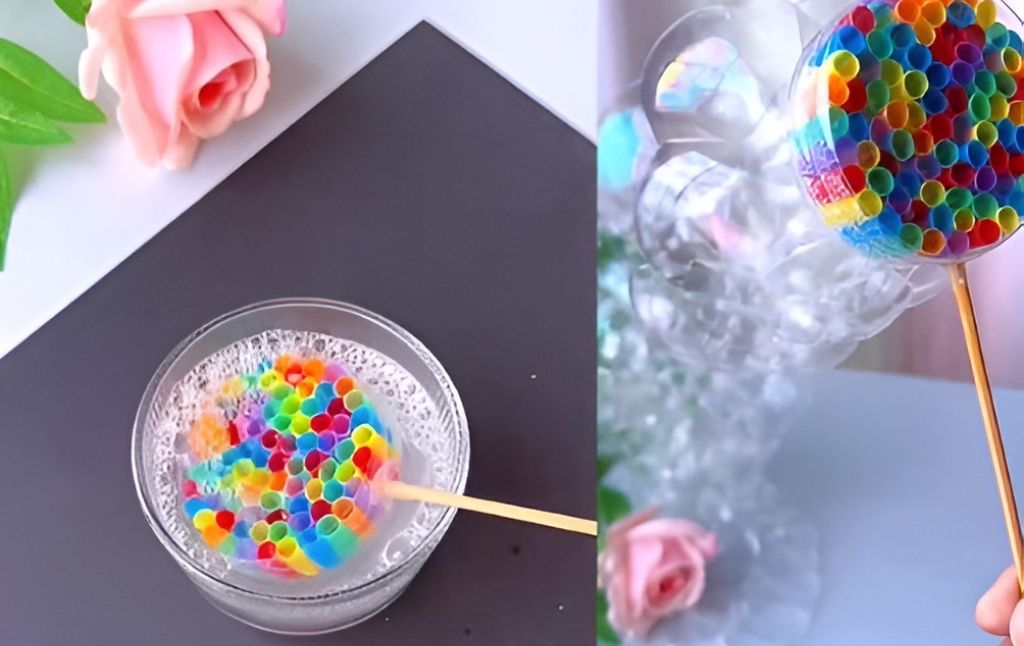
Step 7: Time for Bubbles!
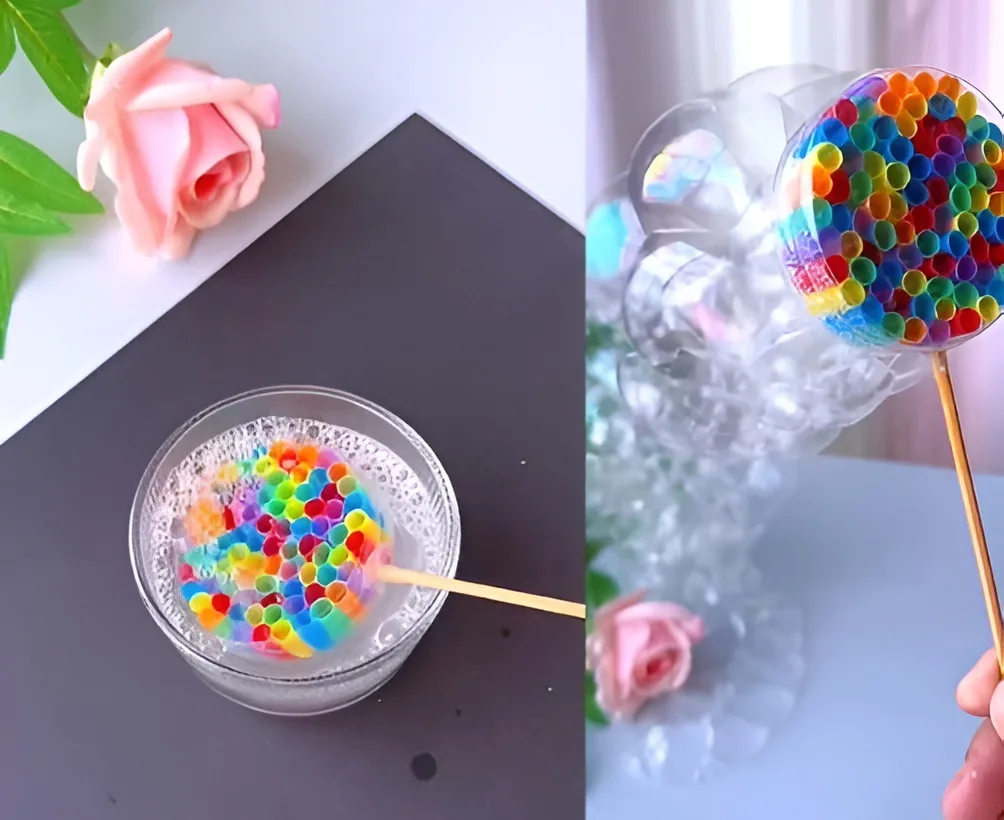
You’re all set! Dip the honeycomb end of your wand into the bubble solution, making sure all the little straws are coated. Lift it out, take a deep breath, and blow gently through the back of the straws.
Enjoy hours of fun with your homemade rainbow bubble snake. It’s a perfect activity for a sunny day in the backyard. Happy bubbling
Kids Activities
Looking for more fun kids activities and other ideas to keep kids engaged, learning, and having fun? Check out these:
Struggling with Brushing Time? This 5-Minute DIY Activity is a Game-Changer!
Splat! Create a Hilariously Fun Poppable Bug Craft
How to Make a Mini Crossbow with Pencils
How to Make a PVC Bottle Rocket Launcher
How to Build a Catapult from Popsicle Sticks


