
Ready to add a touch of ethereal spookiness to your Halloween decor? These cheesecloth ghosts look like they’re floating right through your home, and they are so much easier to make than you might think!
This is a classic Halloween craft that is perfect for an afternoon of spooky fun. You can customize them with their own unique personalities and create an entire ghostly family to haunt your mantel, piano, or entryway table. Let’s bring these spirits to life!
What You’ll Need:
- Balloons (small to medium size)
- Glass jars of various sizes to act as stands
- White school glue (like Elmer’s)
- Water
- A large bowl for mixing
- Cheesecloth
- Black felt for the eyes
- Scissors
- Optional: Hot glue gun, black pipe cleaners, mason jar rings, accessories (mini pumpkins, ribbons), and battery-powered fairy lights.
Step-by-Step Instructions
Step 1: Build Your Ghost Forms
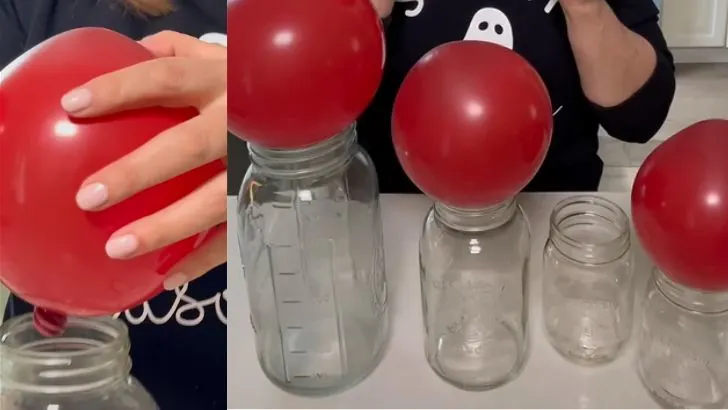
Start by blowing up your balloons to different sizes to create ghosts of varying heights. Place each balloon, knot-side down, on top of a mason jar.
The jars will act as a sturdy base to hold your ghosts while they dry.
Step 2: Mix Your Fabric Stiffener
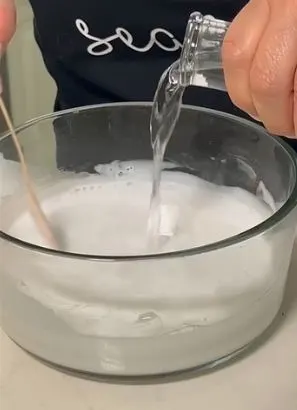
In a large bowl, create your stiffening mixture. Pour in a generous amount of white school glue and mix it with an equal amount of water.
Stir until you have a smooth, milky consistency.
Step 3: Soak the Cheesecloth
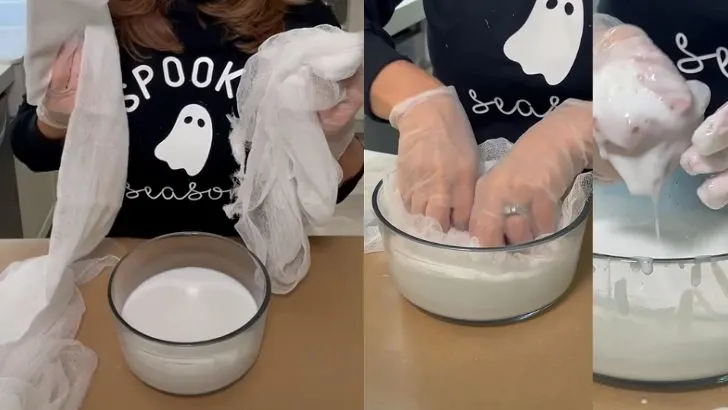
Now for the messy but fun part! Cut your cheesecloth into large squares, big enough to drape over your balloon forms with some extra fabric to pool at the bottom.
Submerge the cheesecloth pieces into the glue mixture, making sure they are completely saturated. Squeeze out the excess liquid so they are damp but not dripping heavily.
Step 4: Drape and Shape Your Ghosts
Carefully open up a piece of the soaked cheesecloth and drape it over one of your balloon forms.
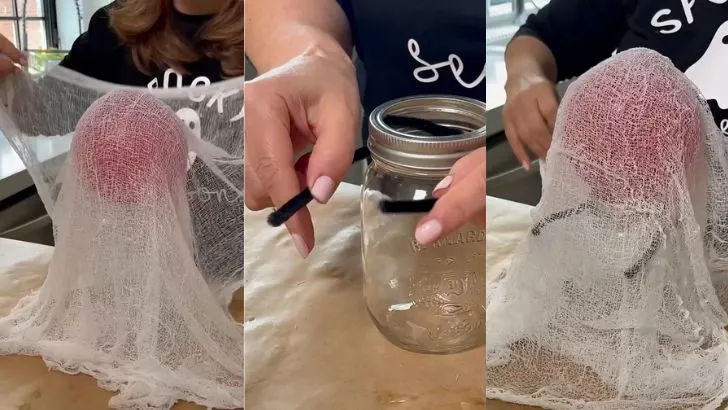
Use two layers of cheesecloth for each ghost to make them more solid and opaque. Arrange the fabric, creating spooky folds and ripples that will give your ghosts a flowing, ethereal look.
- Pro-Tip for Arms: To give your ghosts poseable arms, bend a black pipe cleaner through a mason jar ring and tuck it under the cheesecloth layers.
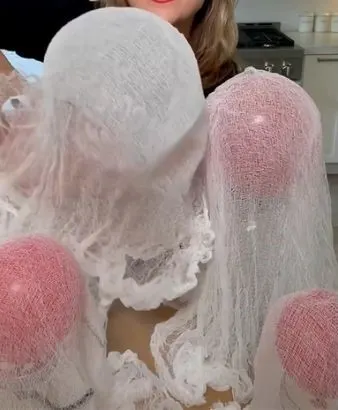
Step 5: Let Them Dry
This step requires patience! Let your ghosts sit undisturbed until they are completely dry and stiff to the touch. This can take up to 24 hours, depending on the humidity.
Step 6: The Grand Reveal
Once your cheesecloth is fully hardened, it’s time to release the form. Carefully pop the balloon with a pin or scissors and gently peel it away from the inside of your hardened ghost.
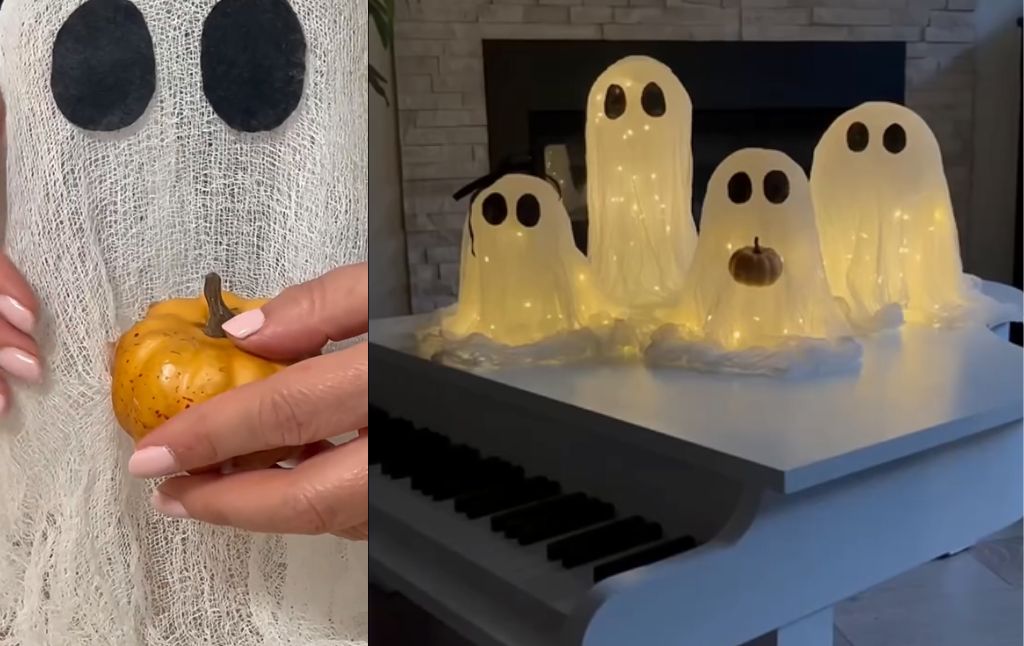
Step 7: Give Them Some Personality
Your ghosts are now solid, but they need to see! Cut out two oval shapes from the black felt and glue them on as eyes.
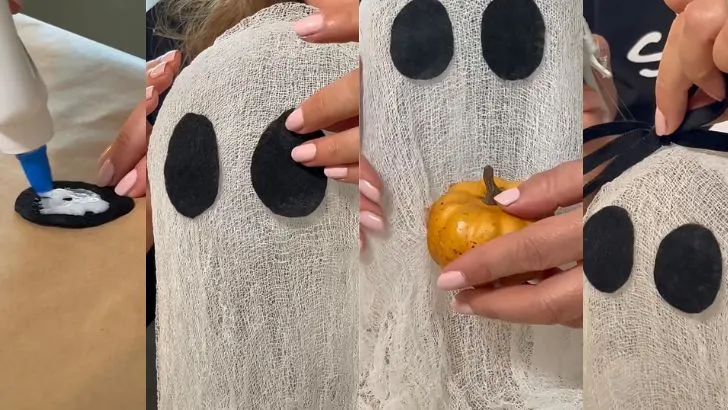
This is where you can get really creative! Use a hot glue gun to attach fun accessories like a tiny pumpkin for one ghost to hold, or a little black bow for another.
Step 8: Let There Be Light!
To take your ghosts from spooky to spectacular, carefully tuck a string of battery-powered fairy lights up inside each one.
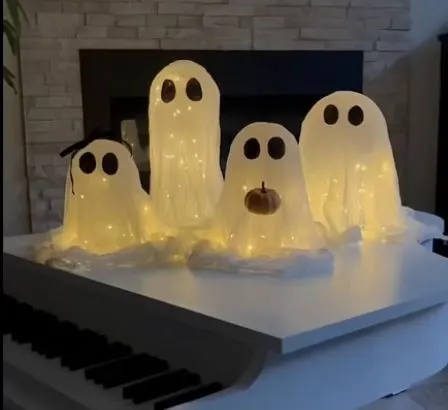
The warm glow from within creates a truly magical and haunting effect. For safety, be sure to only use cool-to-the-touch LED lights.
And there you have it—your very own boo-tiful family of glowing ghosts, ready to enchant all your Halloween guests!
Happy Haunting
Craft a Vampire Candy Holder for Halloween
Create Your Own Spooky Glowing Ghosts
Create a Magical DIY Heart Bottle Lamp
Making Flying Tea Bag Ghosts: A Spooky & Fun Science Experiment
How to Make a Beautiful Paper Pumpkin Craft
How to Make Balloon Squish Monsters


