
Get ready for one of the easiest and most charming Halloween crafts you’ll ever make! This project turns a simple piece of paper into a whimsical, three-dimensional ghost that can stand on its own.
It’s a perfect activity for kids and adults alike, and the final glowing effect is absolutely magical.
You can make a whole family of these little spirits to decorate your mantel, shelves, or party table. Let’s get haunting!
What You’ll Need:
- A sheet of white paper (standard printer paper works perfectly)
- Scissors
- A spray bottle with water
- A small, sturdy bottle (like a pill bottle or spice jar)
- A small styrofoam ball
- A black permanent marker
- Optional: Battery-powered LED tea lights for a spooky glow
- Optional: A hot glue gun and small decorations (like a mini foam pumpkin)
Step-by-Step Instructions
Step 1: Prepare Your Paper
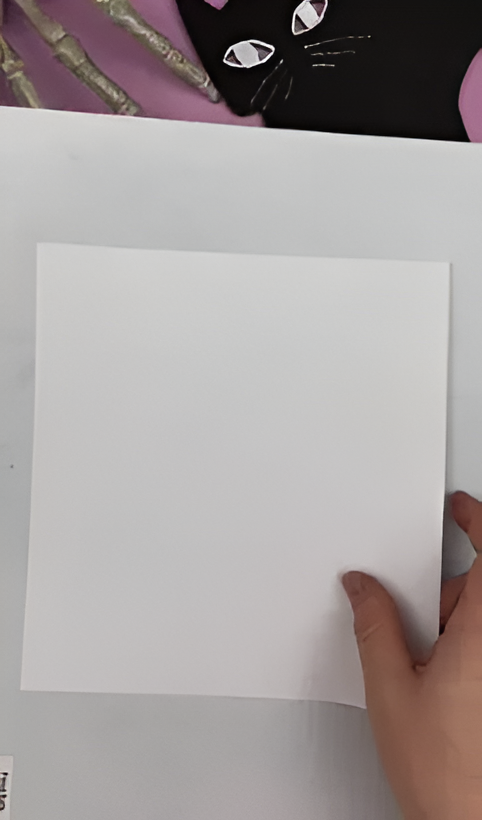
Start by taking your rectangular sheet of white paper and cutting it into a perfect square. A simple way to do this is to fold one corner down to meet the opposite edge, creating a triangle, and then cutting off the excess rectangle.
Step 2: Dampen the Paper

Lay your square paper on a protected surface. Using your spray bottle, lightly mist the paper with water until it’s damp and pliable, but not soaking wet. This will help it hold its shape once it dries.
Step 3: Create the Ghost Form
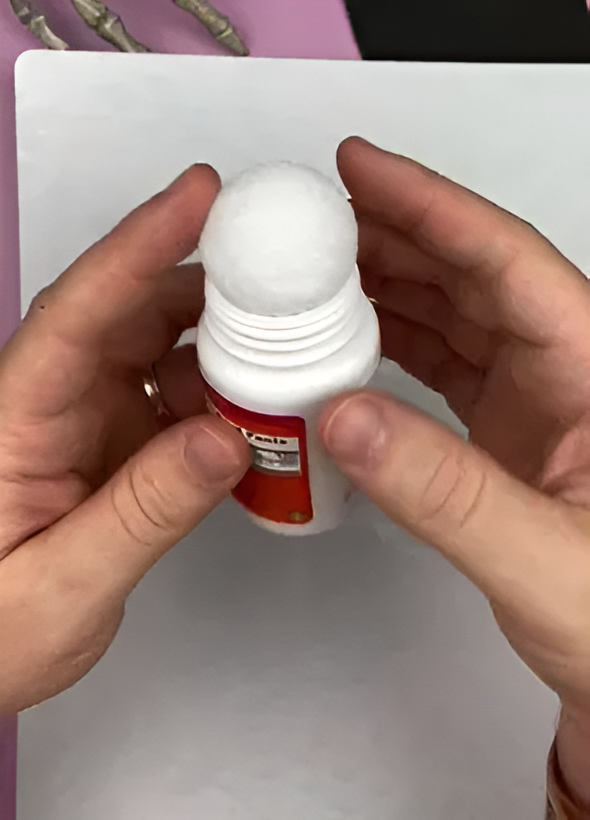
To give your ghost its shape, you’ll need a simple stand. Place the styrofoam ball right on top of the opening of your small bottle. This will serve as your ghost’s “head” and “body.”
Step 4: Drape and Shape Your Ghost
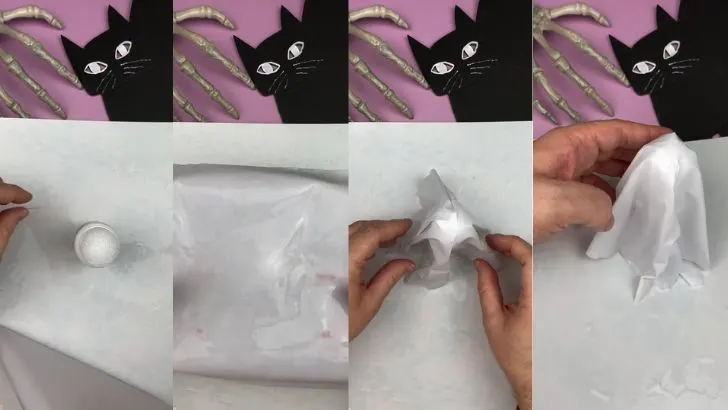
Carefully lift your damp square of paper and center it over the styrofoam ball. Let the paper drape down naturally around the bottle.
Now, you can get creative by gently pinching and arranging the folds to look like a flowing, ghostly sheet.
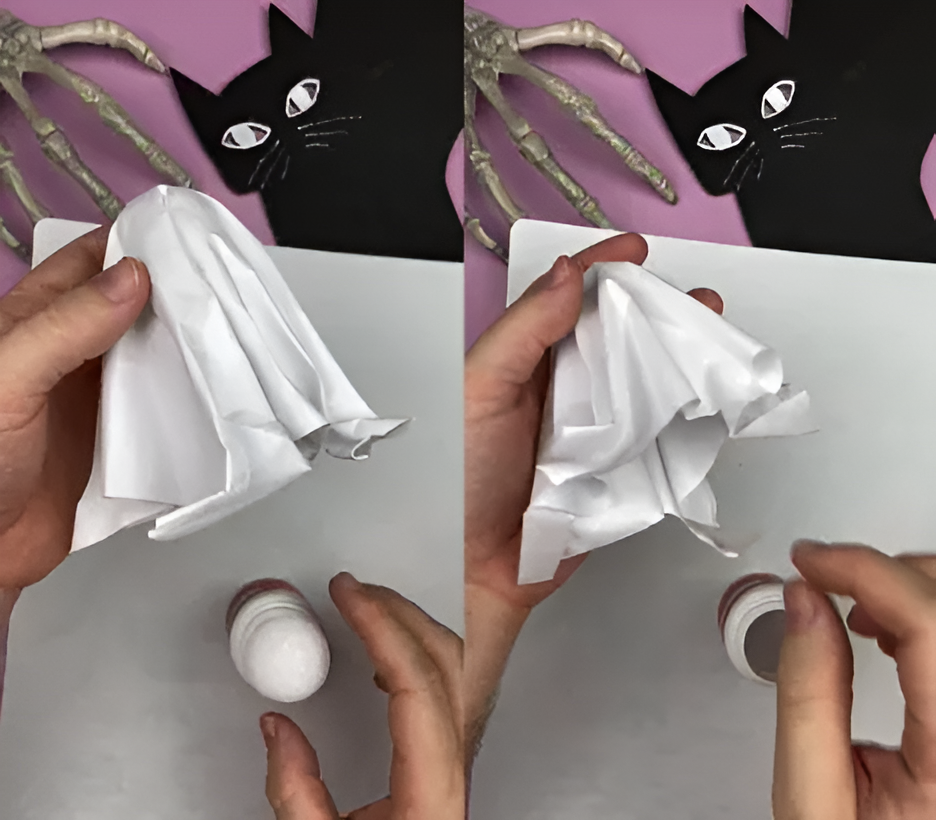
This step requires a little patience! Leave your paper-draped form in a safe place to air dry completely. This could take a few hours. As the paper dries, it will become stiff and hold the ghostly shape you created.
Step 5: Bring Your Ghost to Life!
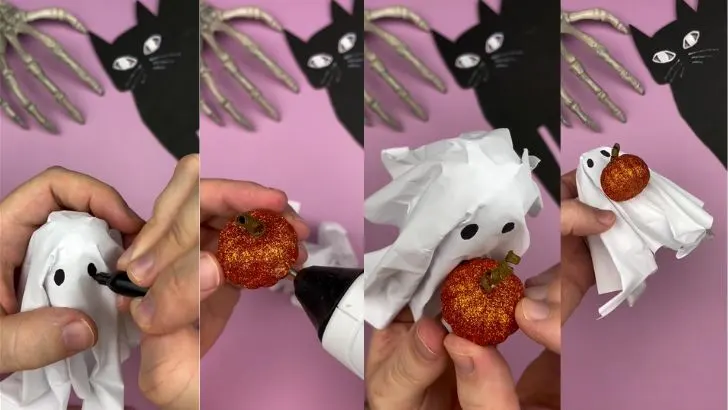
Once your paper is completely dry and rigid, gently lift it off the stand. It’s a ghost! Now, grab your black permanent marker and draw two simple ovals for eyes. Feel free to give your ghost any expression you like—spooky, happy, or surprised!
Step 6: Add a Magical Glow
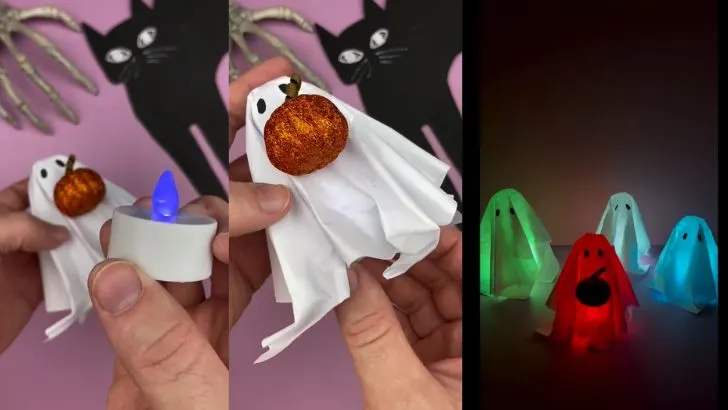
For the final, enchanting touch, place a battery-powered LED tea light on the table and pop your finished paper ghost right over it. Turn off the lights and watch your creation glow with an eerie, colorful light! (Important: For safety, only use flameless LED lights for this project.)
You’ve just made an adorable Halloween decoration. Now, go ahead and create a whole ghostly crew! Happy Haunting.
Create a Magical DIY Heart Bottle Lamp
DIY Rainbow Projector Phone Flashlight Rainbow Hack
Craft a Magical Color-Reveal Card to Wow Your Loved Ones!
Create Magic Color-Reveal Art with This Simple Trick!
DIY Magic Flashlight: Reveal Hidden Pictures with this Fun Craft!
Create an Amazing Rainbow Bubble Snake: A Fun and Easy DIY Toy!
Unleash Your Child’s Inner Artist with this Magical DIY Projector!


