
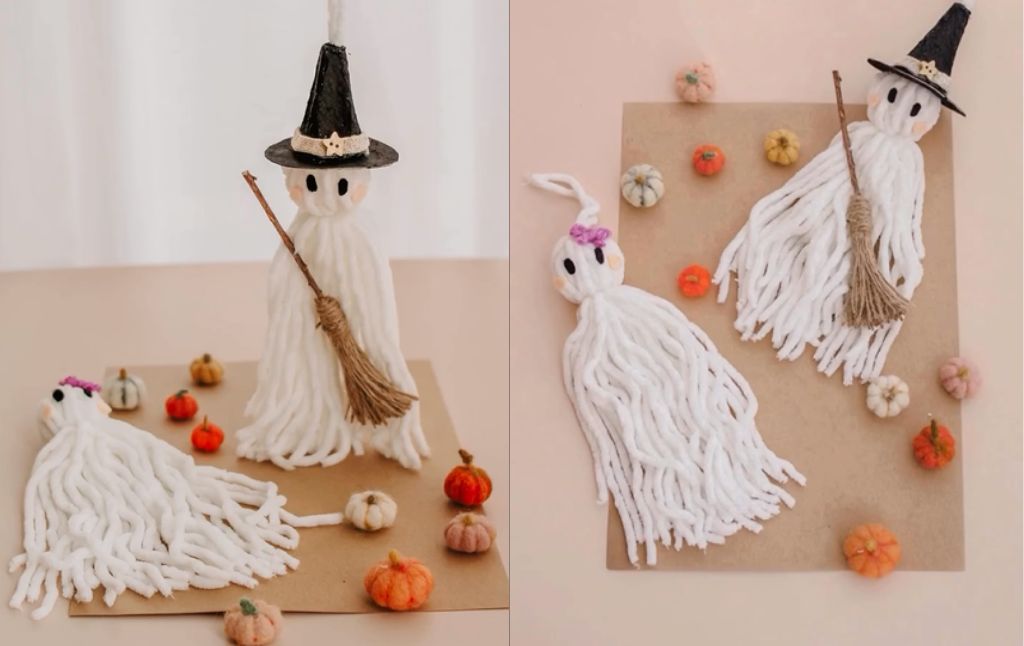
Get ready to create the sweetest little spirits to haunt your home this Halloween! These fluffy yarn tassel ghosts are incredibly easy to make and offer a wonderful, rustic charm that’s perfect for any autumn decor.
They can be hung as ornaments, strung together to make a garland, or simply placed on a shelf for a touch of handmade spookiness.
This craft is a fantastic way to use up leftover yarn and upcycle some common household materials. Let’s start crafting!
What You’ll Need:
- Thick, fluffy white yarn (chenille or blanket yarn works great)
- A hardcover book or a piece of cardboard
- Scissors
- Small wooden beads or balls for the heads
- A black marker for the eyes
- For the Witch Ghost:
- Cardboard and an egg carton cone
- Black paint or a marker
- A small twig and twine for a broom
- Hot glue gun
Step-by-Step Instructions
Step 1: Create the Yarn Tassel
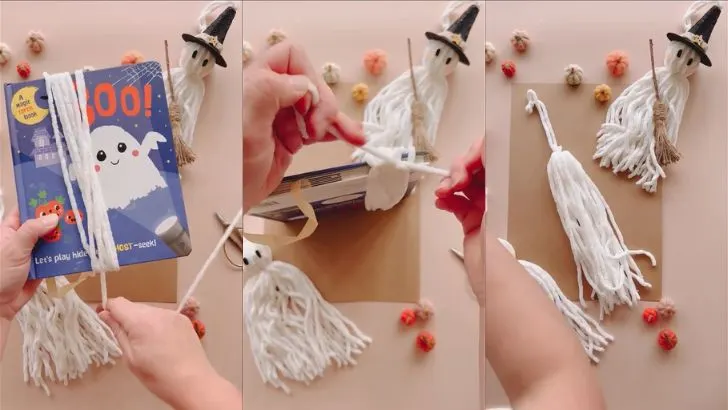
To make the ghost’s body, you’ll first create a thick yarn tassel. Take your hardcover book (the height of the book will determine the length of your ghost) and start wrapping the white yarn around it vertically. Keep wrapping until you have a nice, thick bundle.
Once you’re happy with the thickness, carefully slide the yarn bundle off the book, keeping all the loops intact.
Take your scissors and cut through all the loops at the bottom of the yarn bundle. Trim the ends so they are even, giving your ghost a clean, flowing bottom edge. You now have a basic ghost tassel!
Step 2: Form the Ghost’s Head
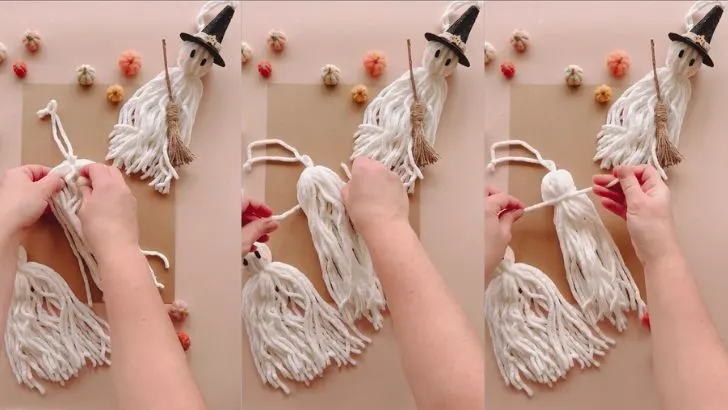
Take your yarn bundle and pinch it together at the top. Slide a wooden bead onto a separate, short piece of yarn.
Thread this piece of yarn through the top loops of your tassel and tie it tightly to secure the wooden bead inside as the head.
Next, take another piece of yarn and tie it snugly around the bundle just underneath the bead. This creates a defined neck for your ghost.
Step 4: Craft the Witch’s Accessories (Optional)
If you want to create a witch ghost, you’ll need a hat and a broom.
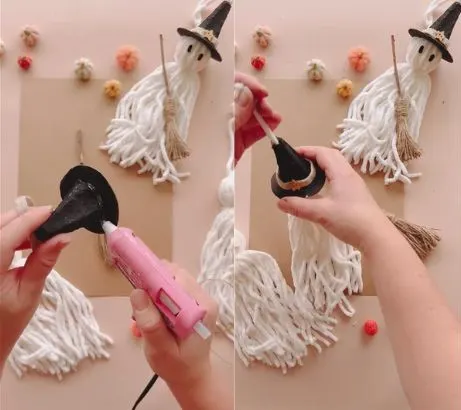
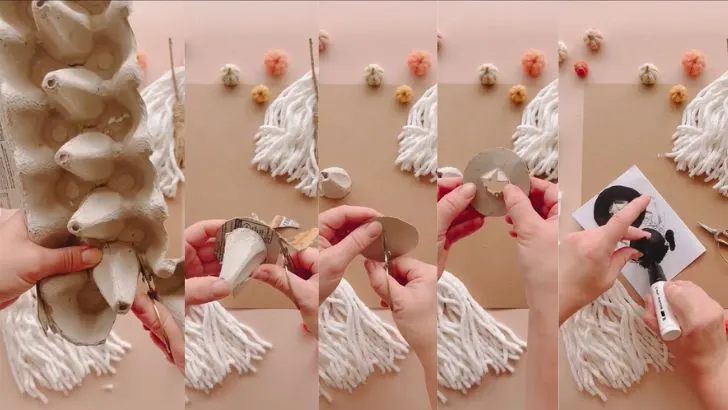
- For the Hat: Cut a circle out of cardboard for the brim. From an egg carton, cut out one of the cone-shaped dividers. This will be the pointed part of the hat. Paint both pieces black and let them dry. Once dry, glue the cone to the center of the brim to form the hat.

- For the Broom: Find a small, straight twig. Take a small bundle of twine, fold it over the end of the twig, and tie it tightly with another piece of twine to create the broom bristles.
Step 5: Assemble and Decorate Your Ghost
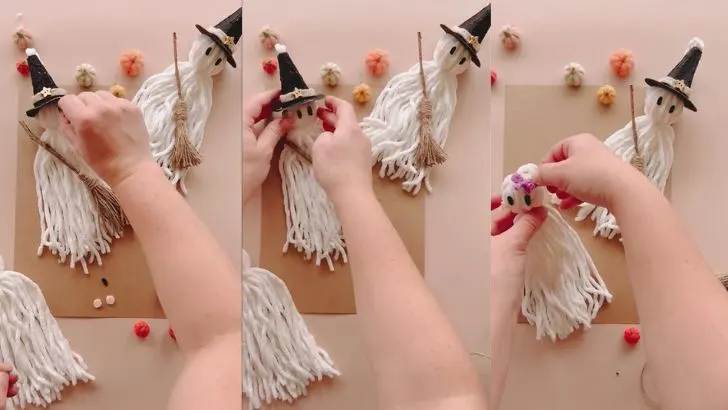
Now it’s time to bring your ghost to life!
- For all Ghosts: Use a black marker to draw two simple dots on the wooden bead for eyes.
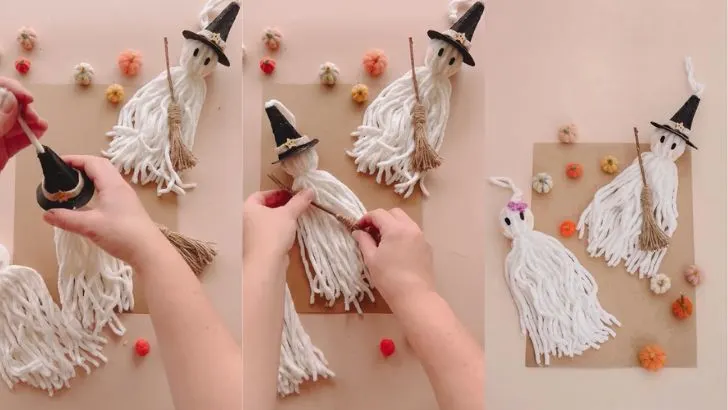
- For the Witch Ghost: Use a hot glue gun to attach the hat to the top of its head and glue the broomstick to its “body” so it looks like it’s holding it. You can also add other little details like a ribbon around the hat or a tiny pumpkin sticker.
Your charming yarn ghost is now complete! Create a whole family of them and let their spooky-sweet presence enchant your home all season long.
Create Adorable Upcycled Ghost Portraits for Halloween
Get the Pottery Barn Look for Less: DIY Glowing Ghost Cloche
Create Your Own Spooky & Glowing Ghost Family This Halloween!
Craft a Vampire Candy Holder for Halloween
Create Your Own Spooky Glowing Ghosts
Create a Magical DIY Heart Bottle Lamp


