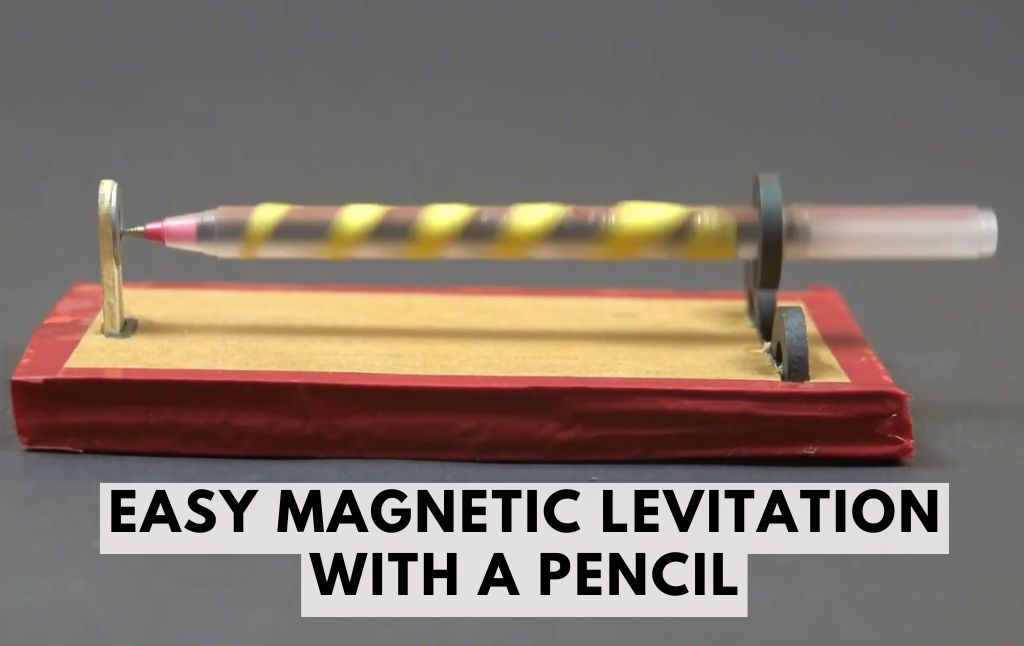
Have you ever wondered how objects can float in mid-air using just magnetism? Today, we’ll explore an amazing DIY magnetic levitation toy using a pencil and three ring magnets!
This simple yet fascinating science experiment demonstrates the concept of magnetic levitation —a force that allows objects to float using magnetic repulsion and attraction. Ready to create some magic? Let’s go!
What is Magnetic Levitation?
Magnetic levitation (or maglev) occurs when objects are suspended in the air using only magnetic forces.
Magnets have two poles—North and South. Opposite poles attract, while similar poles repel each other.
By correctly arranging the magnets, we can create a force that cancels gravity, making objects hover or spin in mid-air! ✨
Supplies You’ll Need
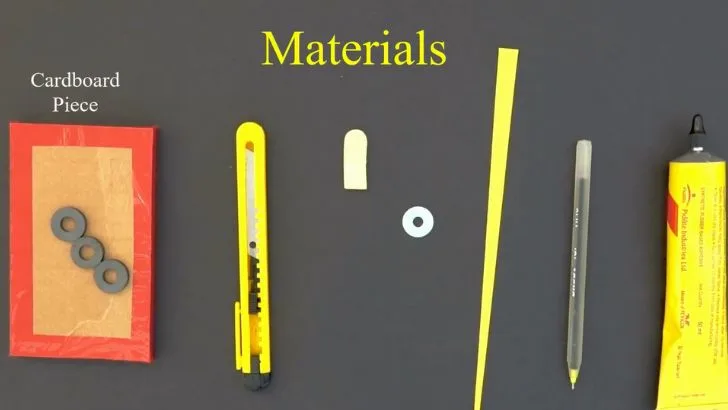
- 3 ring magnets (must be the same size)
- A pencil or ball pen
- Cardboard
- Ice cream sticks
- Glue
- A cutter (for cutting the cardboard)
- Paper strips (optional, for decoration)

Step-by-Step Guide to Creating Magnetic Levitation
Step 1: Preparing the Pencil

Take a ball pen or pencil and wrap it with a strip of triangular paper using glue. This step is optional but makes your toy look cool!
Step 2: Placing the Magnets

Stack two ring magnets in one slot on the cardboard.
Slide the third magnet onto the pencil and position it so that it repels the bottom magnets.
This is the key to achieving levitation!
Step 3: Setting Up the Base
Cut a rectangular cardboard piece to use as the base.
Cut two slots into the cardboard—one for holding the magnets and the other for placing the ice cream stick upright.
Step 4: Assembling Everything

Take the flat washer and stick it to the cream stick using glue Secure the ice cream stick upright in its slot.

Hold the pencil above the bottom magnets, making sure the poles are aligned properly.
Gently release the pencil and give it a spin. You’ll see it float and spin for a while!
The Science Behind It
The North and South poles of the magnets create an attraction force, while similar poles create a repulsion force.
The combination of these forces balances the pencil in mid-air, allowing it to float.
Lower friction plays a big role here—since the pencil is not touching a surface, it continues spinning for a longer time!
This is the same principle used in maglev trains, where powerful magnets help reduce friction and increase speed.
Fun Variations & Challenges!
Try different magnet sizes—does a bigger magnet work better?
Experiment with different pencils—which ones spin the longest?
Add more magnets—can you make the pencil float higher?
Final Thoughts: Science Meets Magic!
Creating a magnetic levitation toy is not just fun but also an exciting way to learn about magnetism and physics. With just three magnets and a pencil, you can make objects float like magic!
So, grab your supplies and give it a try! Let me know in the comments how your maglev pencil experiment turned out!
Kids Activities
Looking for more fun kids activities and other ideas to keep kids engaged, learning, and having fun? Check out these:
Easy Inertia Science Experiments with Pennies
Balloon Air Pressure Bottle Experiment: A Fun & Fizzy DIY Drink Dispenser!
Exploding Bag Experiment: A Fun & Fizzy Science Activity for Kids!
Salt Volcano: A Groovy Liquid Density Science Experiment
Ice Cube Painting: A Fun and Cool Summer Art Activity for Kids
How to Make a Paper Cup Phone: A Fun and Educational STEM Activity


