
Looking for an exciting and refreshing way to keep the kids entertained this summer? Ice Cube Painting is the perfect solution!
This easy and engaging activity not only sparks creativity but also provides a sensory experience that little ones will love.
Best of all, it requires only a few simple ingredients that you likely already have at home.
Why Kids Will Love Ice Cube Painting
It’s a fun and hands-on sensory activity.
Helps improve fine motor skills and creativity.
A great way to explore color mixing and patterns.
Provides a cooling effect on hot summer days!
Supplies Needed:
- Water
- Ice cube tray
- Popsicle sticks (or plastic stir sticks)
- Neon food coloring
- Paper (a thicker paper works best to absorb the color)
- Silicone mat (to protect surfaces from food coloring stains)
How to Make Ice Paint:
Step 1: Add Food Coloring
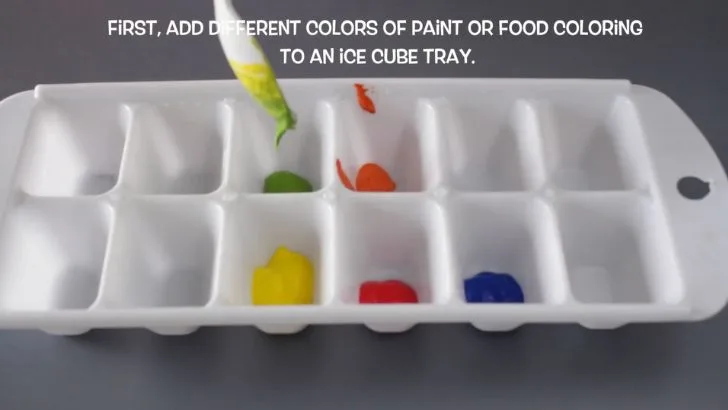
Add a few drops of food coloring into each section of the tray. Let the kids mix and match colors to create different shades! You can experiment by adding one drop of color in some sections and more in others to see how the intensity changes.
Step 2: Fill the Ice Cube Tray
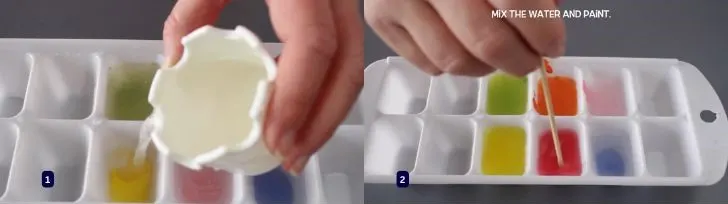
Start by filling each compartment of your ice cube tray with water, leaving a small gap at the top. Let the kids help with this step to practice their hand-eye coordination!
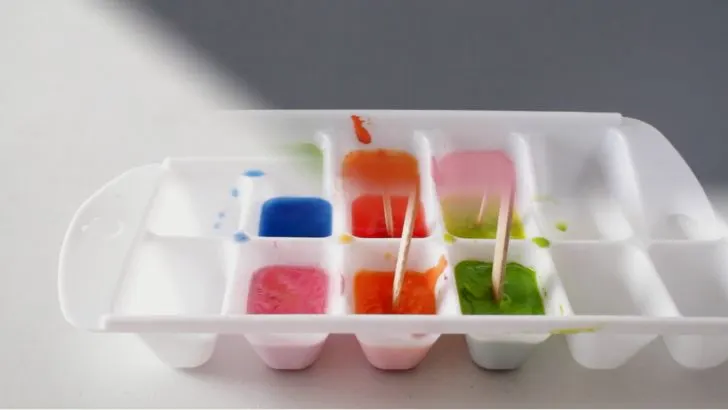
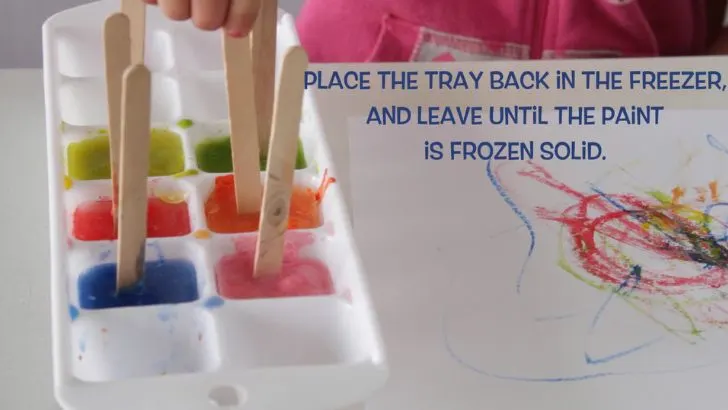
Step 3: Insert Popsicle Sticks
Place a popsicle stick into each section. The sticks will act as handles, making it easy for kids to hold the ice cubes while painting. If the sticks don’t stay upright, cover the tray with plastic wrap and poke the sticks through to hold them in place.
Step 4: Freeze the Ice Cubes
Place the ice cube tray in the freezer and let it freeze completely. This may take a few hours, so plan ahead!
Time to Paint!
Once the ice cubes are fully frozen, it’s time to get creative!
Step 5: Set Up the Painting Area
Lay out a protective covering for the work surface and place a sheet of paper on top. If painting outside, the sidewalk or pavement can also be used as a canvas!
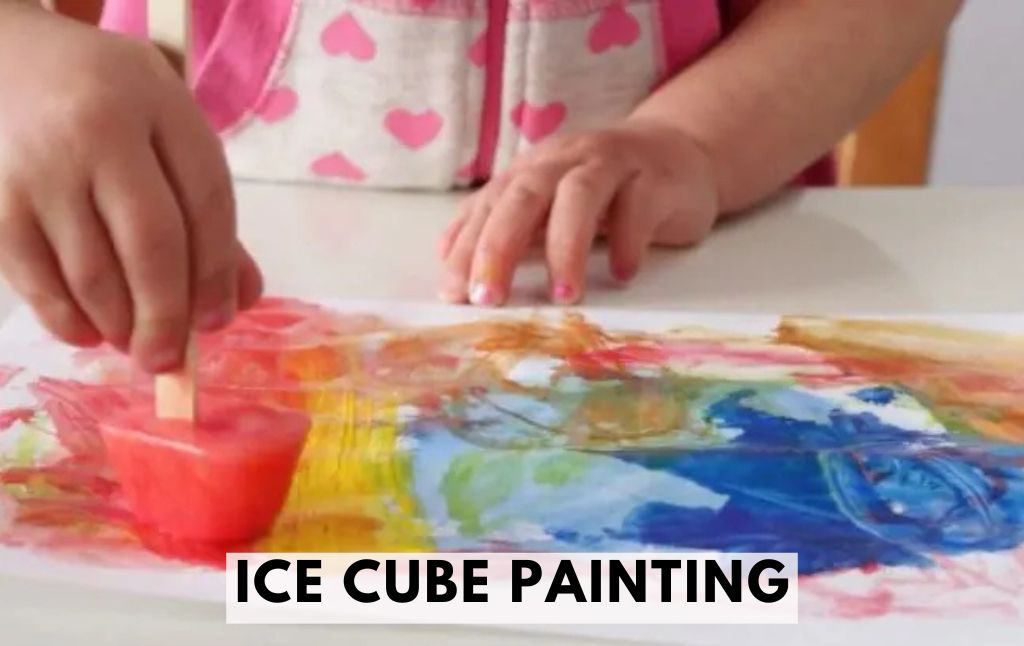
Step 6: Start Painting
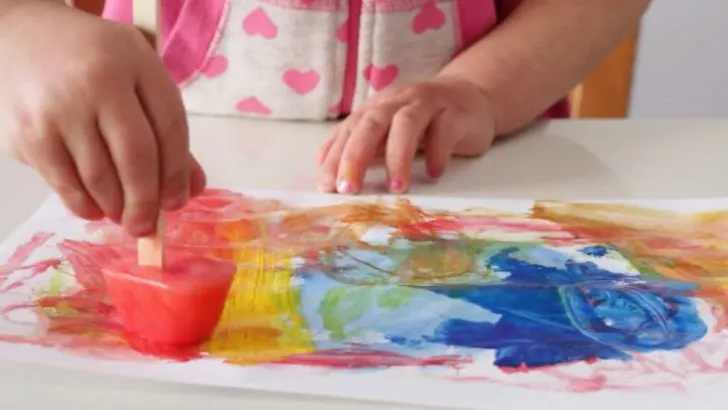
Remove the ice cubes from the tray and let the kids grab their colorful ice cubes by the sticks. As the ice begins to melt, vibrant colors will appear on the paper, creating beautiful watercolor-like designs.
Step 7: Let Creations Dry
Once the artwork is complete, set it aside to dry. The colors will blend beautifully as the paper absorbs the melting ice.
Tips for Best Results:
Use a thicker type of paper to prevent tearing from excess moisture.
Let kids experiment with layering colors to create unique effects.
If the ice is too hard to paint with, let it sit for a minute to start melting before use.
Take pictures of their artwork before it dries for a fun keepsake!
Why This Activity is Great for Kids
This simple yet engaging activity encourages creative expression, sensory play, and exploration of colors.
Whether you do it indoors or outdoors, Ice Cube Painting is sure to be a hit with kids of all ages. Plus, it’s a great way to cool off on a hot day!
Final Thoughts
Ice Cube Painting is an excellent summer art activity that will keep your little ones entertained while also stimulating their imagination.
It’s fun, easy, and a fantastic way to create beautiful artwork while staying cool. Try it today and watch your kids have a blast with their colorful, icy masterpieces!
Kids Activities
Looking for more fun kids activities and other ideas to keep kids engaged, learning, and having fun? Check out these:
Elephant Toothpaste Experiment: A Fun & Foamy Science Activity!
How to Make Borax Crystals: A Fun and Easy DIY Science Experiment
Fizzing Moon Rocks Activity: A Fun and Easy Science Experiment
How to Make a Pellet Drum | Chinese Rattle Drum
Lava Lamp Experiment with Oil and Water: A Fun DIY Science Project
Easy Steps to Make Magic Sand at Home
Easy Steps to Make New Year’s Poppers: A Fun DIY Celebration Craft


