
A Cute and Creative DIY Springtime Project for All Ages!
If you’re looking for a fun, textured, and totally unique Easter craft this season, Macrame Bunnies are the way to go!
These adorable little creatures are made using macrame cord and a few simple supplies — perfect for adding handmade charm to your Easter decor or gifting to friends and family.
Whether you’re a DIY enthusiast or a crafting newbie, this easy-to-follow tutorial will help you make your very own macrame bunny buddy in no time. Let’s get hopping!
What You’ll Need:
- Macrame cord (in soft, bunny-like colors like cream, beige, or gray)
- Paper mache egg (this will be the bunny’s body)
- Hot glue gun or strong craft glue
- Pom-poms (small ones for the feet and one for the nose)
- Googly eyes
- Solomon’s Shell sticks (or toothpicks, cut into ~5 cm pieces for whiskers)
- Scissors
How To Make Macrame Bunnies – Step-by-Step
Step 1: Wrap the Body
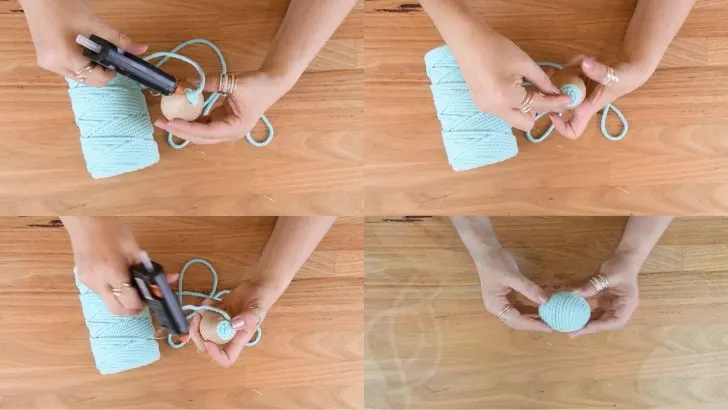
Start by applying glue to the paper mache egg and carefully wrapping your macrame cord all the way around it. Make sure you cover the entire surface so the egg looks cozy and fully “bunny-fied.”
Tip: Wrap tightly and evenly for a smooth finish. Let the glue dry before moving to the next step.
Step 2: Make the Feet & Ears
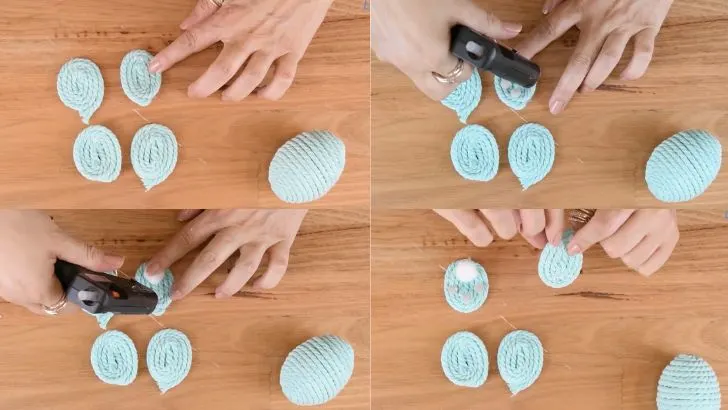
Feet: Roll the macrame cord into two small circles and glue the ends to hold their shape. These will become your bunny’s feet.
Ears: Roll two ovals from the cord for ears. Pinch the tip of each oval to give the ear a realistic shape, then glue the pinched end to hold.
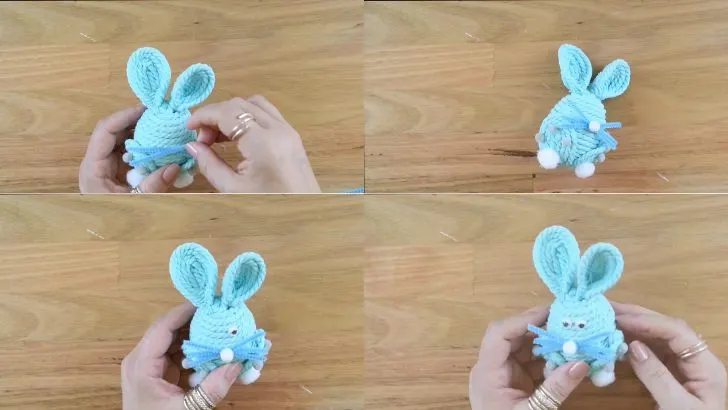
Step 3: Assemble the Bunny

Glue the feet to the bottom of the bunny body.
Attach pom-poms to the feet as adorable little bunny toes.
Glue the ears to the top of the bunny’s body.
Now your bunny is starting to take shape!
Step 4: Add Whiskers and Nose
Cut three pieces of Solomon’s Shell sticks (or toothpicks) to about 5cm each.
Glue them in a star-like pattern where the nose should be — these are your bunny whiskers!
Glue a pom-pom to the center of the whiskers for the nose.
Step 5: Final Touches
Stick on two googly eyes to bring your bunny to life.
Optional: Add a tiny bow or ribbon for extra charm!
Customize Your Bunny!
Use pastel-colored cord for a spring vibe
Add a mini cotton ball tail to the back
Make a whole bunny family with different egg sizes
Use twine or jute for a rustic farmhouse look
Perfect For:
Easter table centerpieces
DIY Easter baskets
Handmade gifts
Crafting with older kids or teens
Cute shelf or mantel decor
Final Thoughts:
Macrame bunnies are a sweet mix of texture, charm, and creativity. This easy DIY is perfect for Easter, and the end result is a cuddly-looking bunny that brings joy wherever it sits. With just some cord, glue, and a little love, you’ll have a handmade friend ready to hop into springtime.
Happy Crafting & Hoppy Easter!
For more Easter fun and creative craft ideas, check out the rest of our DIY holiday projects!
Easy DIY: How to Make an Easter Bunny Lollipop for Young Kids
DIY Easter Bunny Ears Headband
Adorable Bunny Paper Chain Craft for Easter
The Easiest Easter Bunny Craft Using Unmatched Socks
Toilet Roll Easter Bunnies – Adorable DIY Craft for Kids & Parents
Easter Paper Plate Crafts for Kids – DIY Bunny Baskets & Rocking Rabbits!
Easy and Fun Easter Crafts for Kids – DIY Potato Stamp Easter Eggs!


