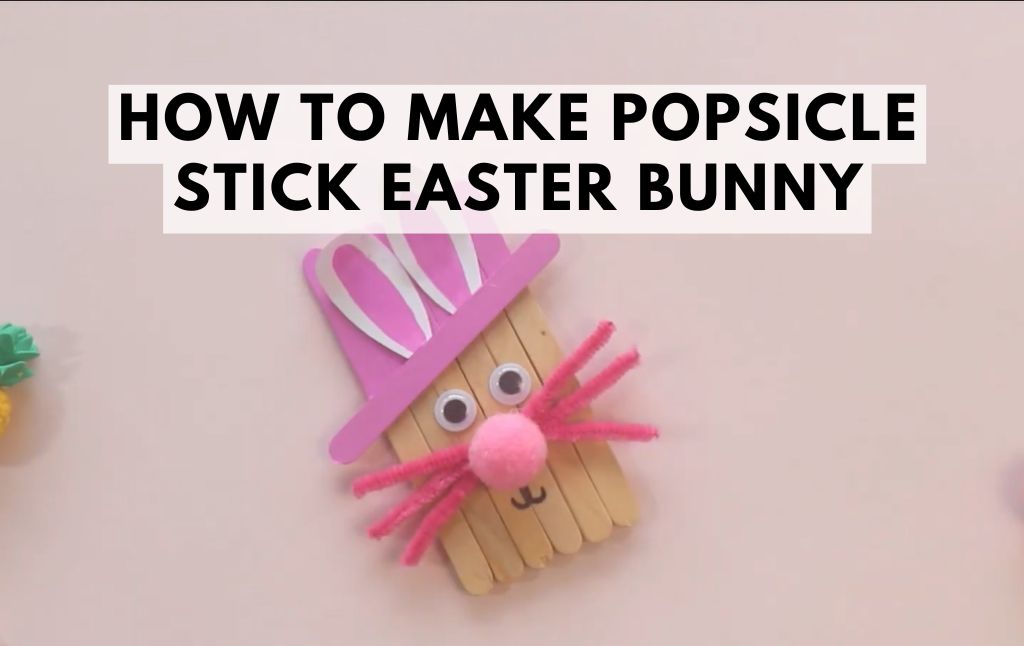
Easter is the perfect time for fun and creative crafts, and this Popsicle Stick Easter Bunny is a delightful project for kids and adults alike! With just a few simple supplies, you can create a charming bunny that makes a great decoration or gift for Easter.
Follow these easy step-by-step instructions to craft your very own adorable bunny!
Supplies Needed
- Regular craft sticks
- Mini craft sticks
- Small googly eyes
- Pipe cleaners
- Small pom-poms
- Fine point Sharpie
- Acrylic paint (white and a color for the hat)
- Cardstock (white and a color for the inside ear)
- Tacky glue or hot glue (with adult assistance)
- Twine (optional, for hanging)
Step-by-Step Instructions
Step 1: Paint and Glue the Popsicle Sticks
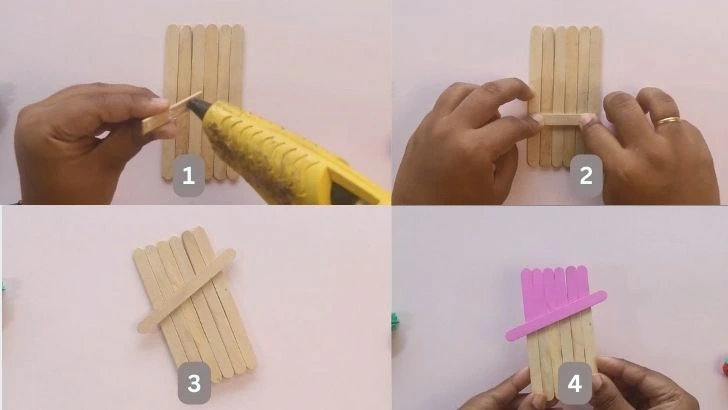
Start by glue them together side by side. For extra stability, attach two mini craft sticks to the back.
Step 2: Create the Hat Brim
You can Paint a mini popsicle stick in a bright color like blue, yellow, or pink. Once dry, glue it diagonally across the front to form the brim of the bunny’s hat.
Step 3: Paint the Hat
Paint the top section of the bunny to match the mini stick’s color, creating a stylish hat for your bunny.
Step 4: Make the Bunny Ears
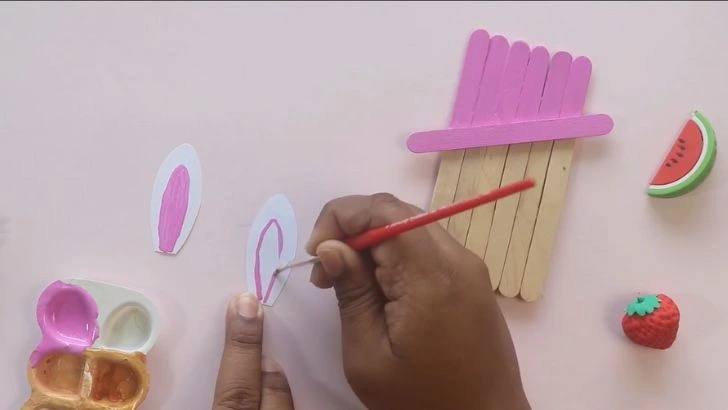
Cut out two ear shapes from white cardstock. Then, cut out two smaller inner ear shapes from colored cardstock to match the hat. Glue the inner ear pieces onto the white ears.
Step 5: Add the Eyes and Whiskers
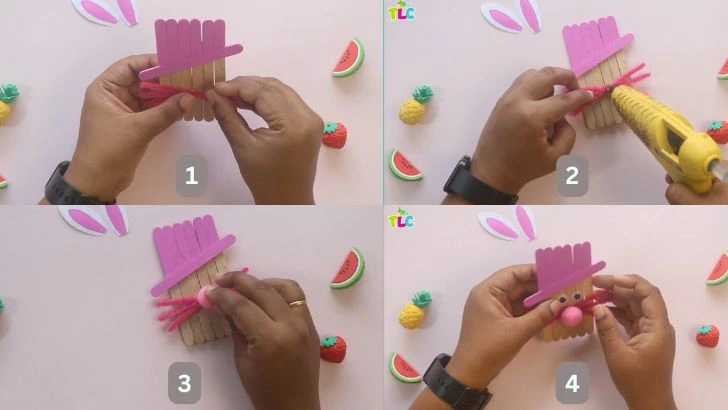
Glue two googly eyes onto the bunny’s face. If you don’t have googly eyes, you can draw them with a Sharpie.
For whiskers, twist three small pipe cleaners together and glue them just below the eyes. Trim to your preferred length.
Glue a small pom-pom over the whiskers to create the bunny’s nose.
Step 6: Attach the Ears
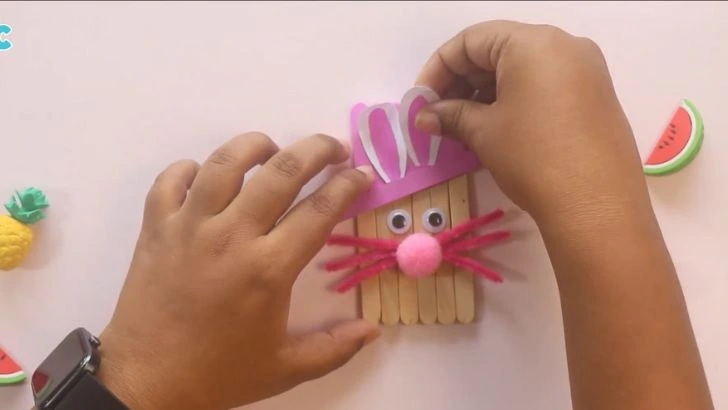
Glue the bunny ears to the back of the popsicle sticks. For a cute touch, curl one ear slightly forward.
Step 7: Draw a Mouth
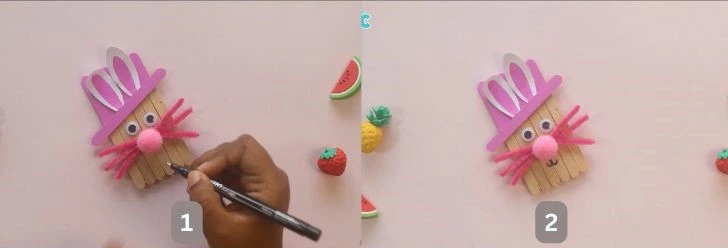
Use a fine point Sharpie to draw the bunny’s mouth just below the nose.
Step 8: Display Your Easter Bunny
Your popsicle stick Easter bunny is now complete! You can make a bunch in different colors and gift them to friends and family.
For hanging decorations, attach a loop of twine to the back using hot glue.
Final Thoughts
This simple and adorable Popsicle Stick Easter Bunny craft is a great way to celebrate the holiday and enjoy some quality crafting time. Whether you use it as a festive decoration, an Easter gift, or a fun kids’ activity, it’s sure to bring a smile to everyone’s face.
Happy crafting and Happy Easter! 🐰🎨🌸