
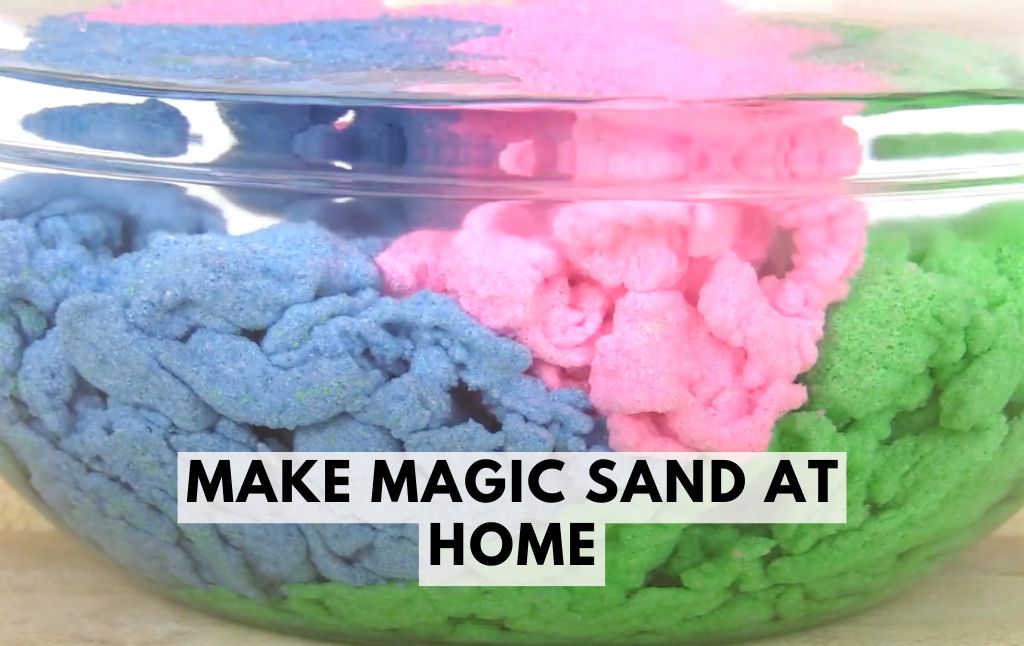
Have you ever tried Aqua Sand? This fascinating play material amazes kids and adults alike! It behaves like regular sand when dry, but once submerged in water, it magically keeps its shape. Instead of spending money on store-bought versions, you can turn this into a fun and educational DIY science experiment.
Today, we’ll show you how to make your own magic sand (hydrophobic sand) using simple materials. Get ready for a hands-on activity that toddlers, preschoolers, and older kids will absolutely love!
What is Magic Sand?
Magic sand, also known as hydrophobic sand, is coated with a special substance that repels water.
This prevents the grains from absorbing moisture, allowing the sand to hold its shape underwater. Kids can explore concepts of chemistry, surface tension, and waterproofing while having tons of fun playing with this mesmerizing sand.
Supplies Needed
- To create your own magic sand, gather these simple materials:
- Colored sand (available at craft stores or online)
- A disposable plate or shallow container
- Water-repellent fabric protector spray
- A plastic spoon for mixing
- A clear container filled with water (for playtime)
Step-by-Step Instructions
Step 1: Prepare the Sand
Spread a thin layer of colored sand onto a disposable plate or shallow container. Make sure it is evenly distributed to allow for proper coating.
Step 2: Apply Water-Repellent Spray
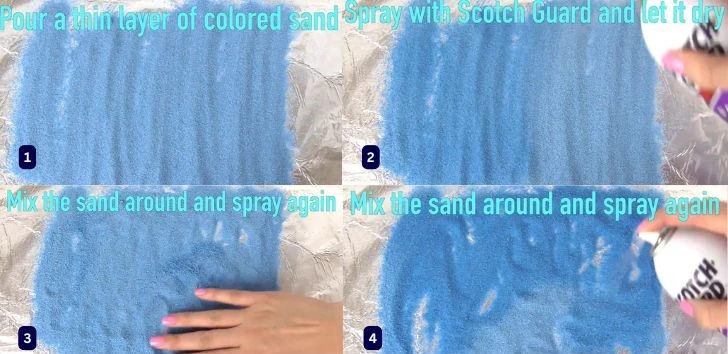
Using a water-repellent fabric protector, spray a generous amount over the sand. Be sure to coat it evenly to ensure all grains become hydrophobic. Allow the sand to absorb the spray for a few minutes.
Step 3: Mix and Reapply
Using a plastic spoon, stir the sand to ensure all grains are coated. Repeat the spraying process, adding another layer of water-repellent spray. Stir again and let it dry completely.
Step 4: Drying Time
For best results, allow the sand to dry completely. This can take a few hours. Stir the sand occasionally to ensure even drying and proper coating.
Step 5: Test Your Magic Sand!

Once dry, fill a clear container with water. Slowly sprinkle a spoonful of your DIY hydrophobic sand into the water and observe the magic happen! The sand will retain its shape, creating beautiful underwater sculptures.
Fun Experiment Ideas
Take your magic sand play to the next level by experimenting with these fun activities:
Pour vs. Drop: Try pouring the sand in different ways—slowly, in a heap, or dropping it in one spot—to see how it behaves.
Spoon Play: Lower a spoonful of sand gently into the water and observe the patterns it creates.
Squeeze Bottle Trick: Put some magic sand in a squeeze bottle and squirt it into the water for a cool effect.
Color Mixing: Make multiple colors of magic sand and mix them underwater to create stunning effects.
The Science Behind Magic Sand
Magic sand works because of the hydrophobic coating from the water-repellent spray. This coating prevents water molecules from clinging to the sand particles, creating a thin layer of trapped air that allows the sand to remain dry even underwater.
This is a great way to introduce kids to chemistry and surface tension in an engaging, hands-on manner!
Final Thoughts
Making magic sand at home is an easy, fun, and educational activity for kids of all ages. It combines science, creativity, and sensory play, making it a perfect project for summer fun or indoor learning. Try making a batch today and watch your little scientists get amazed by the magic of hydrophobic sand!
Have you tried making your own magic sand? Share your experience in the comments below! Happy crafting! ✨🏖️
Kids Activities
Looking for more fun kids activities and other ideas to keep kids engaged, learning, and having fun? Check out these:
Easy Steps: How to Make a Robot Toilet Paper Roll Craft!
Easy Steps: How to Make Toilet Roll Ninjas – A Fun DIY Craft for Kids!
Simple Bernoulli Principle Experiment for Kids
How to Make Anti-stress Crunchy Ball


