As the leaves begin to turn and the air turns crisp, households everywhere prepare for one of autumn’s most beloved traditions: pumpkin carving.
Transforming a simple orange gourd into a glowing piece of art is a wonderful way to bring family members of all ages together.
However, freehand carving can often be intimidating or result in designs that don’t quite turn out as planned.
Using a structured template can turn a potentially frustrating task into a smooth, successful creative project.
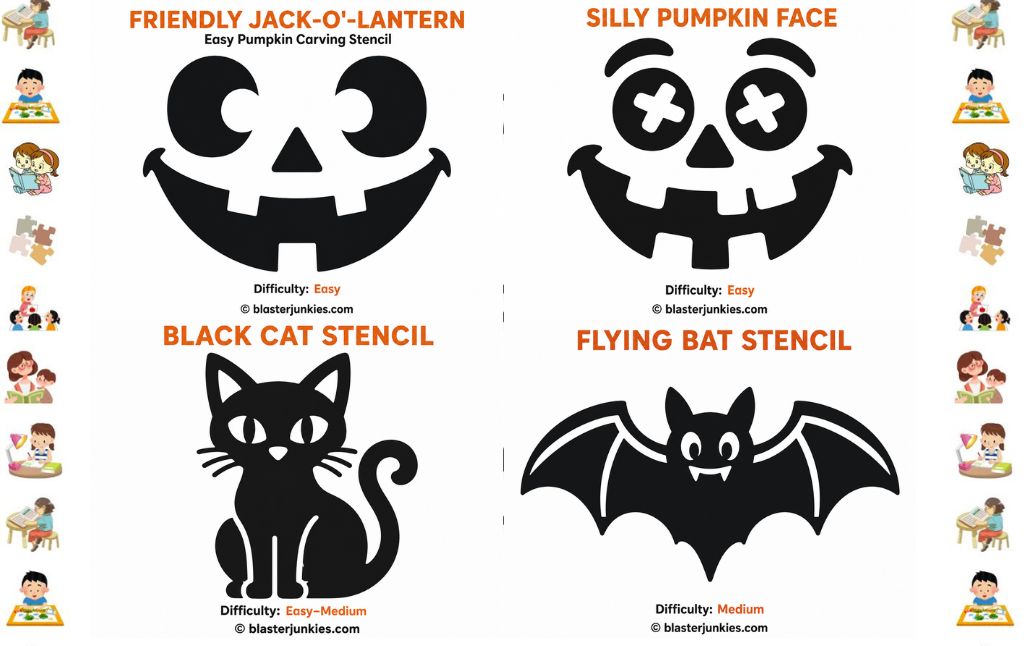
The Pumpkin Carving Stencils pack offers a diverse collection of printable designs tailored to different skill levels, allowing everyone in the family to participate in the seasonal fun.
Planning Your Perfect Autumn Experience
Carving pumpkins is rarely a standalone event; it is usually part of a broader celebration of the season.
To get the most out of your autumn festivities, it helps to plan ahead and integrate your carving session into your household’s seasonal routines.
If you are looking to make this year’s autumn memorable, pumpkin carving is an essential activity that you can easily track using an Autumn Bucket List Printable.
Pacing out your seasonal traditions like visiting a local patch, baking pumpkin seeds, and carving helps prevent the season from flying by too quickly.
Once your jack o’ lanterns are successfully carved, they make excellent seasonal decorations.
You can coordinate your newly carved pumpkins with other festive elements around your porch or entryway using an Autumn Home Decor Checklist to create a warm, welcoming autumn display.
For the best experience, consider turning pumpkin carving into a dedicated, screen free evening.
You can incorporate the carving process into a broader Cozy Night Checklist Printable along with warm apple cider, wool blankets, and a classic family film.
Of course, dealing with pumpkin pulp and sticky seeds can get messy very quickly.
Managing the workspace beforehand and keeping the post carving cleanup stress free is much easier when you apply structured, time saving cleaning routines, such as the strategies found in Deep Cleaning Hacks For Busy Moms.
Exploring the Stencil Collection
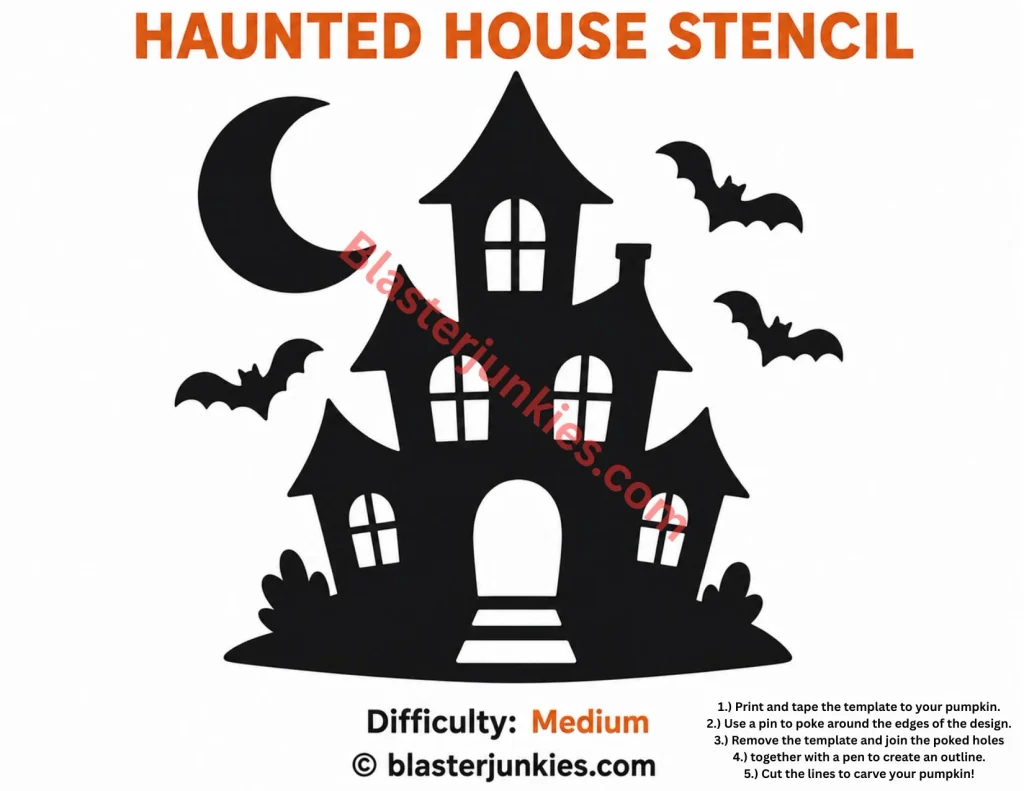
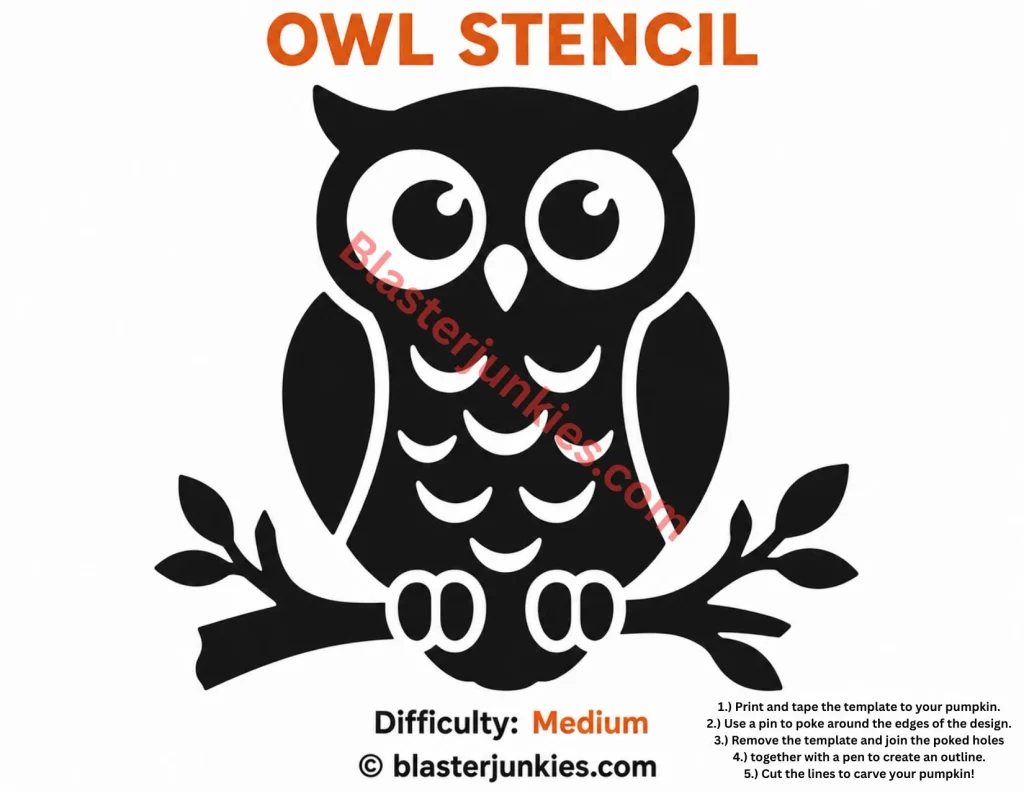
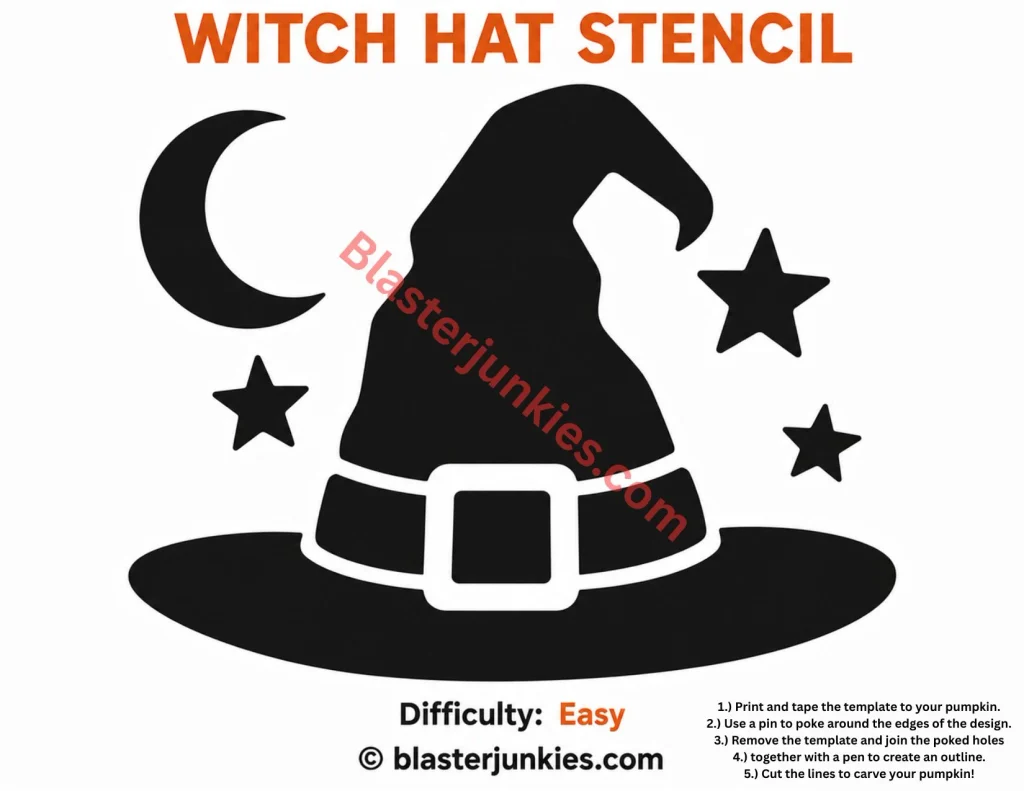
This stencil pack is designed to accommodate different age groups and carving abilities by categorizing designs into “Easy,” “Easy Medium,” and “Medium” difficulty tiers.
This variety ensures that younger children can safely participate with simpler shapes, while older kids and adults can challenge themselves with more intricate details.
The collection features several distinct themes:
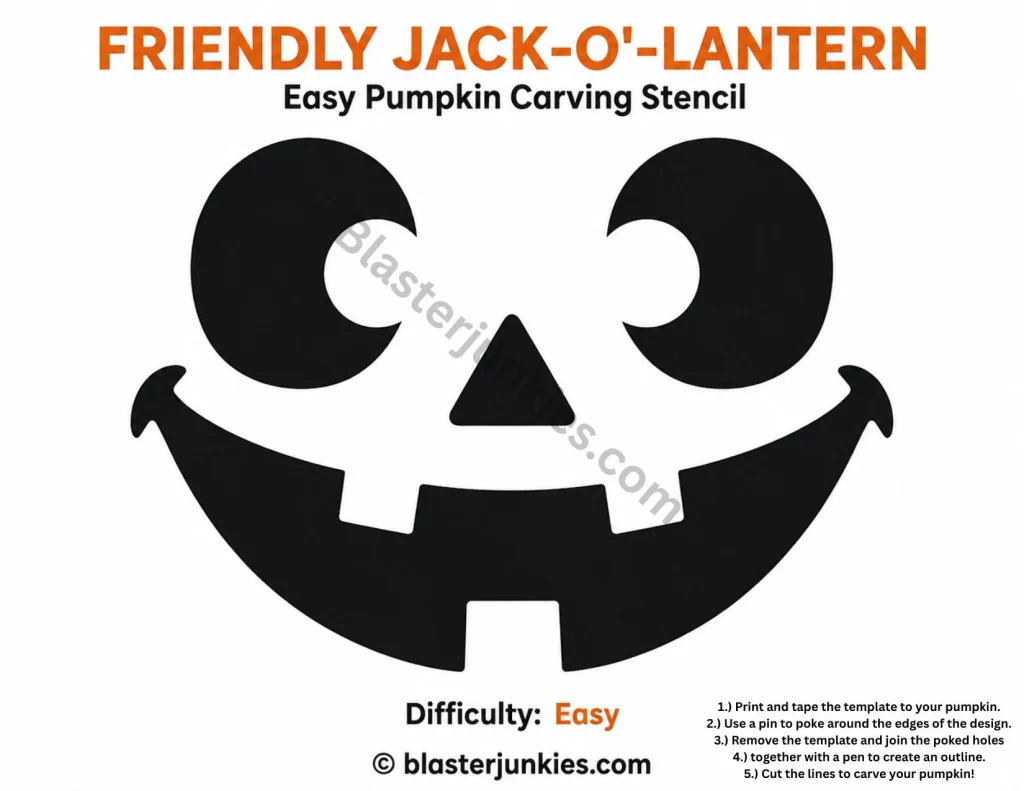
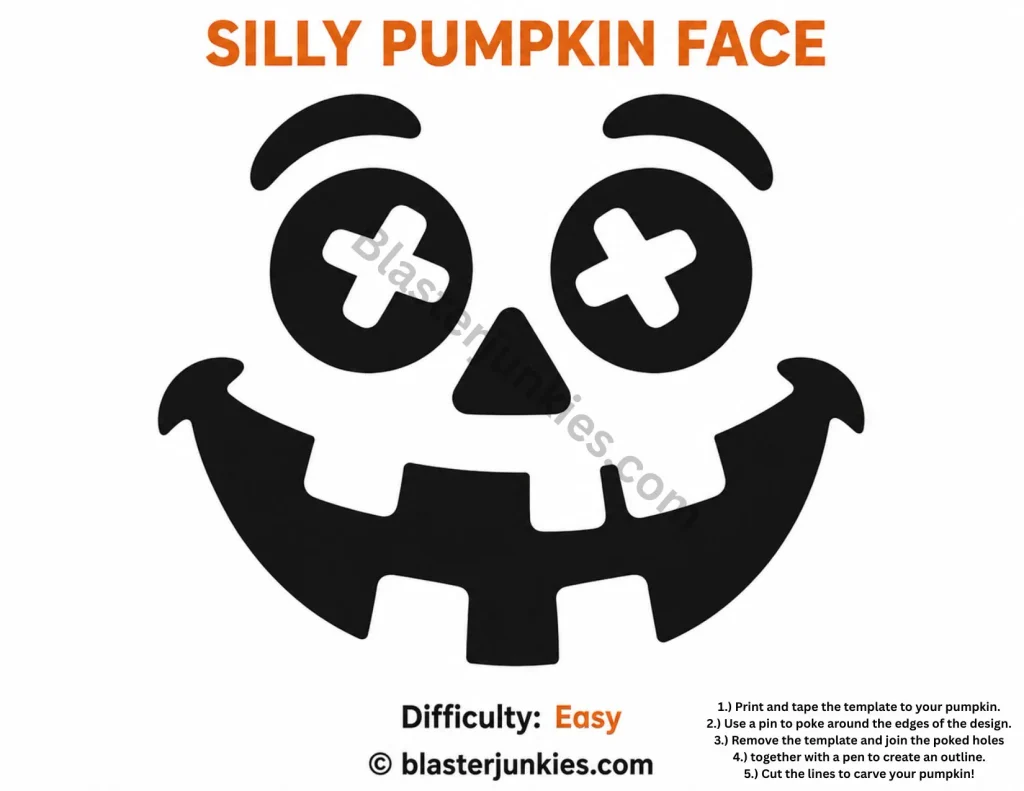
Traditional Jack O’ Lantern Faces: Playful designs, such as the Friendly Jack O’ Lantern or the Silly Pumpkin Face, offer classic, expressive pumpkin looks that are straightforward to cut.
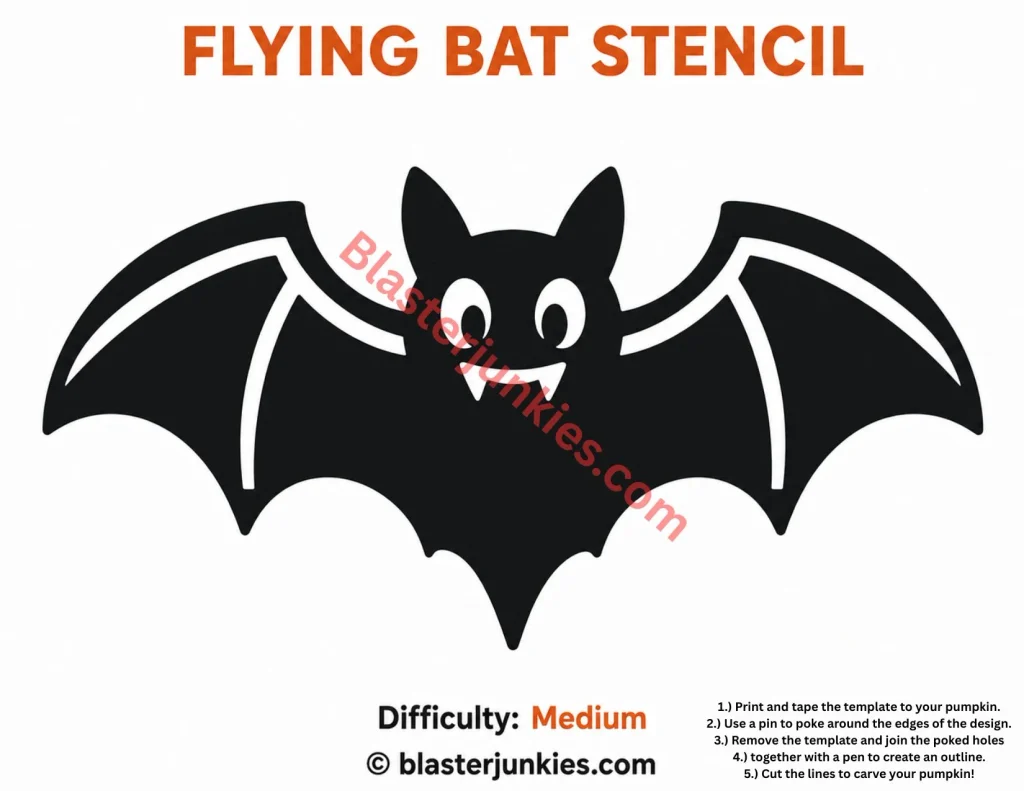
Classic Spooky Silhouettes: Traditional Halloween imagery is well represented with clean, high contrast outlines like the Witch Hat, the Happy Ghost, and a classic Flying Bat.
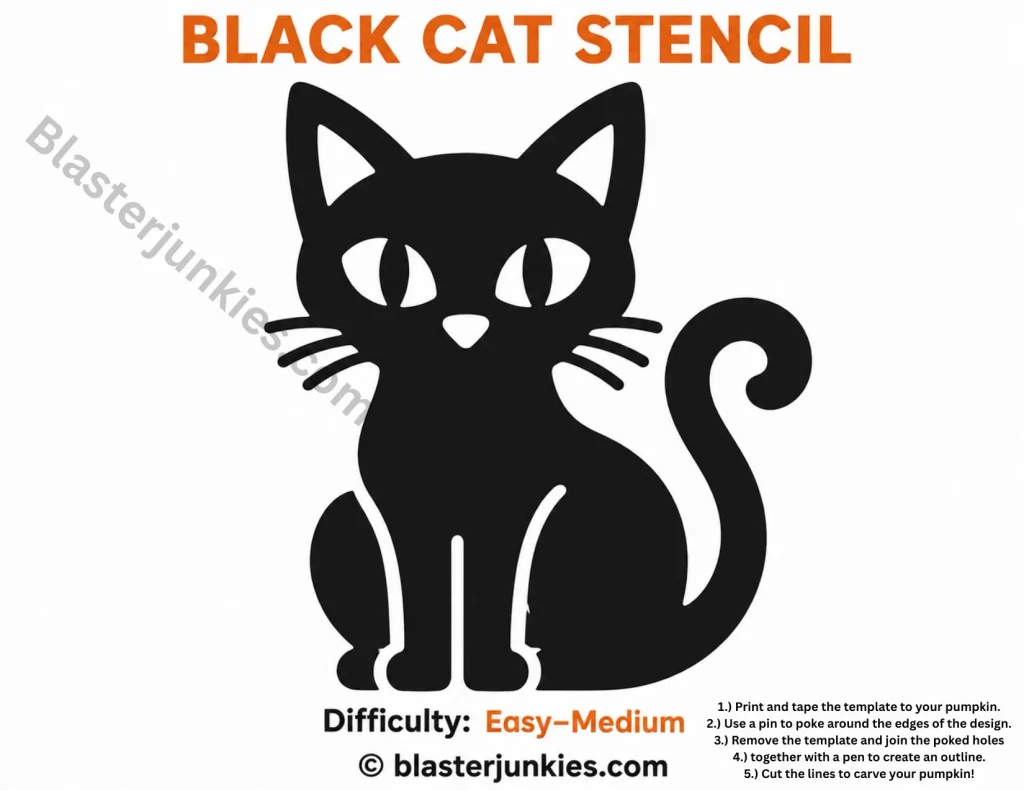
Autumnal and Animal Elements: Nature inspired patterns, including the Maple Leaf, Black Cat, and Owl stencils, provide sophisticated alternatives to standard spooky faces.
Intricate Patterns: For intermediate carvers, the geometric Star Mandala offers a beautiful, radiant pattern that looks striking when lit from within.
Step by Step Pumpkin Carving Method
Using printable stencils requires a specific transfer technique to ensure the design matches the paper template.
Every page in this stencil pack includes a universal 5 step guide. Below, we expand on those instructions with practical tips for a successful carve:

1. Select and Prep the Pumpkin
Choose a pumpkin with a flat bottom so it doesn’t roll while you are carving.
Clean the exterior with a damp cloth to remove any dirt.
Cut a lid around the stem at a 45 degree inward angle (this prevents the lid from falling inside the pumpkin). Thoroughly scrape out the seeds and pulp.
Tip: Scrape the inner wall where you plan to carve down to about 1 inch in thickness.
This makes cutting through the rind much easier and allows more light to shine through.
2. Secure the Template
Print your chosen stencil on standard paper. Since pumpkins are round and paper is flat, you will need to help the template conform to the curved surface.
Cut small slits or V shapes into the outer borders of the paper, tape the center of the template to the pumpkin first, and then wrap and tape down the edges.
This prevents the paper from wrinkling or shifting during transfer.
3. Transfer the Design (The Poke Method)
Do not try to cut directly through the paper template with a carving knife.
Instead, use a pushpin, a clean finishing nail, or a dedicated pumpkin poking tool to poke closely spaced holes along all the black lines of the design.
Space your pokes about 1/16 to 1/8 of an inch apart.
4. Remove and Outline
Carefully peel the paper template off the pumpkin.
Because the tiny poked holes can sometimes be hard to see on the orange skin, use a dry erase marker or a pen to gently connect the dots.
This step gives you a clear, solid line to guide your blade.
5. Carve Safely and Patiently
Using a small, serrated pumpkin saw, begin cutting along your drawn lines.
Hold the saw at a 90 degree angle to the pumpkin’s surface and use a gentle, continuous sawing motion rather than trying to force or push the blade through the rind.
Tip: Always carve from the center of the design outward.
This keeps the surrounding pumpkin wall strong and stable while you work on delicate details.
Simple Tips for Preserving Your Carved Pumpkins
Once you have finished carving, you’ll want to keep your creation looking fresh for as long as possible.
Because exposed pumpkin flesh spoils quickly, try these preservation steps:
Moisture Seal: Apply a thin layer of petroleum jelly or vegetable oil to all the raw, cut edges of the design.
This helps lock in moisture and prevents the pumpkin from shriveling.

Temperature Control: Keep your carved pumpkins in a cool, shaded area.
if freezing temperatures are expected overnight, bring them indoors to prevent the flesh from softening.
Safe Lighting: Instead of real candles, use battery operated LED tealights.
Real candles produce heat that cooks the interior of the pumpkin, accelerating rot and mold growth.

By combining the right tools with a patient, step by step approach, you can turn seasonal pumpkin carving into a fun,
Successful craft that brightens up your home all autumn long.