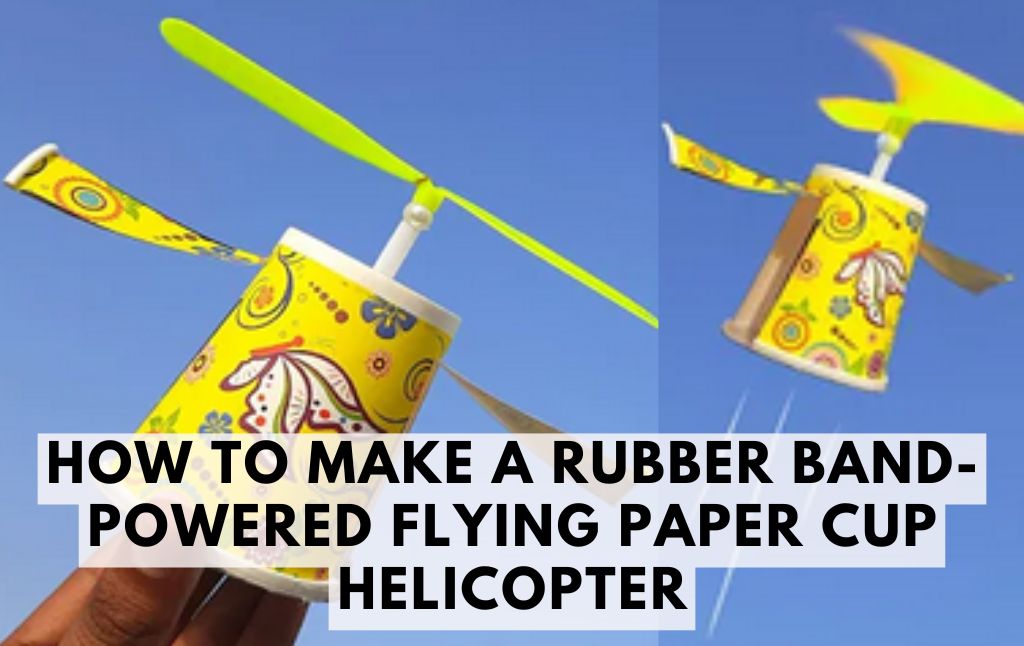
Creating a rubber band-powered flying paper cup helicopter is an exciting and simple DIY project that combines creativity with basic principles of physics and aerodynamics.
This hands-on activity is perfect for kids and adults alike, offering a fun way to explore flight and motion using household materials. Follow these easy steps to build your own flying paper cup helicopter!
Materials Needed:
- A paper cup (standard size)
- A pair of scissors
- A straw or wooden skewer
- Tape or glue
- A rubber band (medium size)
- A paperclip
- Plastic perl
- Plastic propeller
- A thin wooden stick (such as a popsicle stick or bamboo skewer)
- Markers or stickers for decoration (optional)
Step-by-Step Instructions:
Step 1: Prepare the Paper Cup
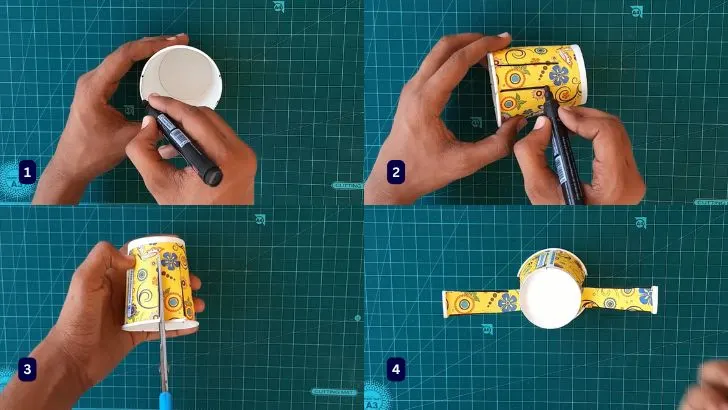
Take your paper cup and cut four vertical slits from the top edge downward, about halfway down the cup. These will form the helicopter’s rotor blades.
Step 2: Shape the Helicopter Blades
Carefully bend each strip outward slightly to resemble helicopter blades. Slightly twisting them will help generate lift when the helicopter spins.
Step 3: Attach the Straw or Skewer
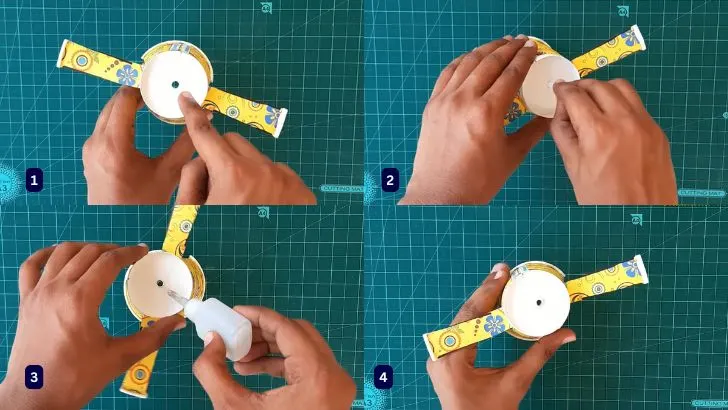
Tape or glue a straw or wooden skewer to the side of the cup. This acts as the helicopter’s main body and provides structure.
Step 4: Add the Rubber Band Mechanism
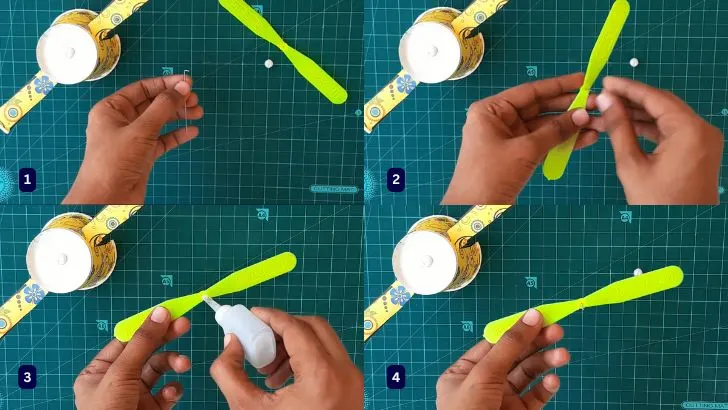
Bend the wire of the paperclip slightly and insert it inside the plastic propeller and secure it with glue.
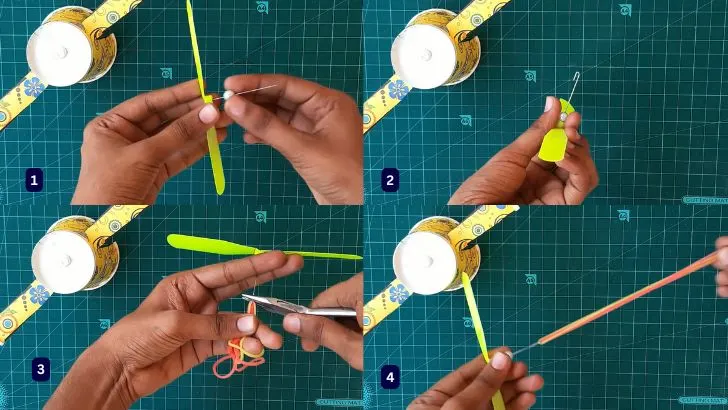
Insert the plastic pearl inside the wire attached to the plastic propeller and bend the other end of the wire slightly and attach 3-4 strings of rubber bands to it and tighten the hook of the wire.
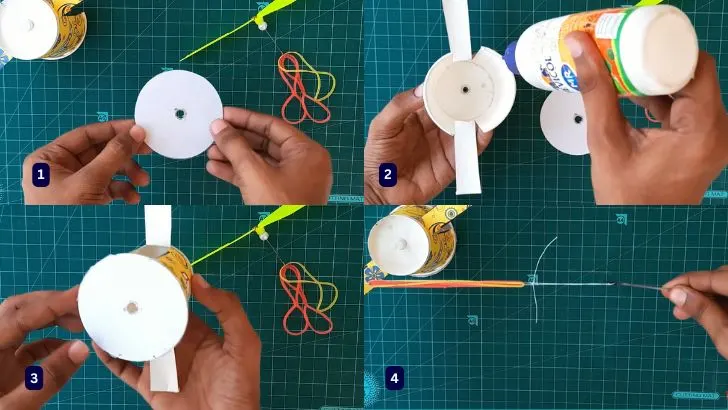
Make a hole in the center of the paper cup lid and secure it with glue. Now you have to assemble the Rubber Band propeller Mechanism in the plastic cup.

For this, put a thread in a Hand Sewing Needle and tie the thread to the bunch of rubber bands and pass that needle through the thread set in the cup and take it out from the hole in the cup lid.
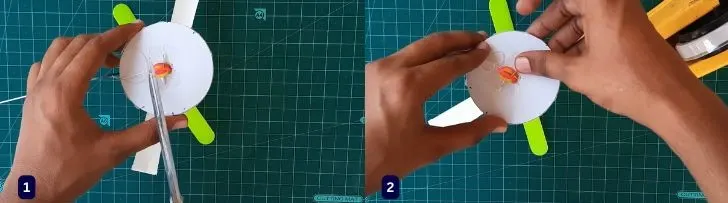
Now a bunch of rubber bands will come out of the hole in the cup lid, secure it with plastic tape.
Step 5: Wind the Rubber Band
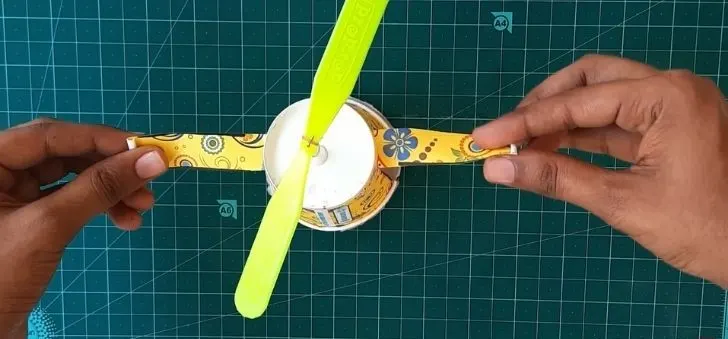
Now to fly this helicopter in the sky, you have to rotate the propeller so that tension can be created in the bunch of rubber bands attached to the propeller.
Once tension is created in the bunch of rubber bands, you have to hold the Flying Paper Cup and the propeller with your hands so that it does not rotate.
Step 6: Let It Fly!
Hold the helicopter by the cup and release the twisted stick. The unwinding rubber band will cause the blades to spin, generating lift and making the helicopter fly!
How It Works
As the rubber band unwinds, it rapidly spins the blades, creating lift and allowing the helicopter to take off. This mimics how real helicopters use rotor blades to achieve flight. Adjusting the rubber band tension and blade shape can impact how high and far it flies.
Experiment & Explore
Try different rubber band sizes to see how they affect the flight duration.
Adjust the blade shape or angle to observe changes in lift and spin.
Test different paper cup sizes to see which flies the best.
Conclusion
Building a rubber band-powered flying paper cup helicopter is a fantastic way to learn about aerodynamics, energy, and motion through play.
It’s a great STEM activity that encourages curiosity and hands-on learning. Gather your materials and start flying your own mini helicopters today! 🚁
Kids Activities
Looking for more fun kids activities and other ideas to keep kids engaged, learning, and having fun? Check out these:
How to Make a Balloon Hovercraft: A Fun DIY Science Experiment
How to Make a Stress Ball Without a Balloon
How to Make Balloon Squish Monsters