

Have you ever been browsing for seasonal decor and fallen in love with something, only to be stopped in your tracks by the price tag?
That’s exactly what happened to me with the adorable handcrafted ghost cloches from Pottery Barn. They are absolutely charming, but I knew I could create that same magical, spooky vibe for a fraction of the cost.
So, if you want to add this high-end, ethereal touch to your Halloween decor without breaking the bank, follow along! Here’s how you can make your very own glowing ghost cloche.
What You’ll Need:
- For the Ghost:
- Cheesecloth or a similar lightweight, open-weave fabric
- Mod Podge Stiffy Fabric Stiffener (or a 1:1 mixture of white glue and water)
- A small object to use as a form (a small bottle, a paint dabber, or even a balled-up piece of aluminum foil)
- Plastic wrap
- A small bowl
- Disposable gloves (highly recommended!)
- Black acrylic paint
- A fine-tipped paintbrush
- For the Display:
- A glass cloche with a wooden base
- A small string of battery-powered LED fairy lights
Step-by-Step Instructions
Step 1: Prepare Your Ghost Form
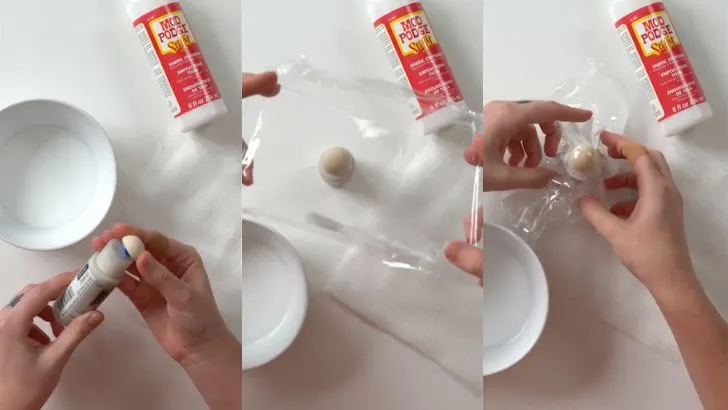
First, find a small object that has a rounded top and a stable base to act as the form for your ghost.
To ensure your ghost doesn’t permanently stick to the form, wrap the entire object tightly in plastic wrap.
Step 2: Stiffen the Fabric
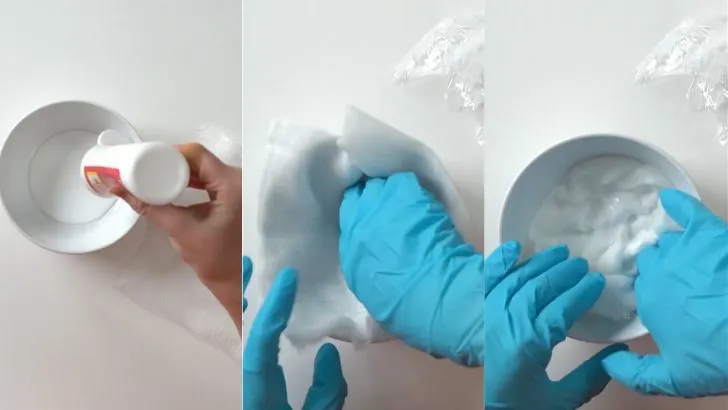
Put on your disposable gloves this part gets a little messy! Pour a generous amount of the fabric stiffener into your bowl.
Cut a square piece of cheesecloth large enough to drape over your form and create a flowing, ghostly effect at the bottom.
Submerge the cheesecloth in the stiffener, making sure it is completely saturated.
Step 3: Drape and Shape Your Ghost
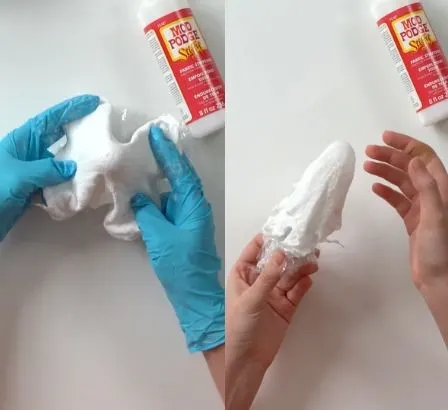
Gently squeeze the excess stiffener out of the cheesecloth so it’s not dripping. Carefully drape the damp fabric over your plastic wrapped form.
Now, get creative! Arrange the fabric, creating soft folds and ripples to give your ghost a sense of movement. Let the bottom pool and flair out a bit.
Step 4: Let It Dry
Patience is key for this step. Leave your ghost on its form to dry completely. This can take several hours, or even overnight, depending on the thickness of the fabric and the humidity.
You’ll know it’s ready when the cheesecloth is completely hard and holds its shape on its own.
Step 5: Add the Eyes
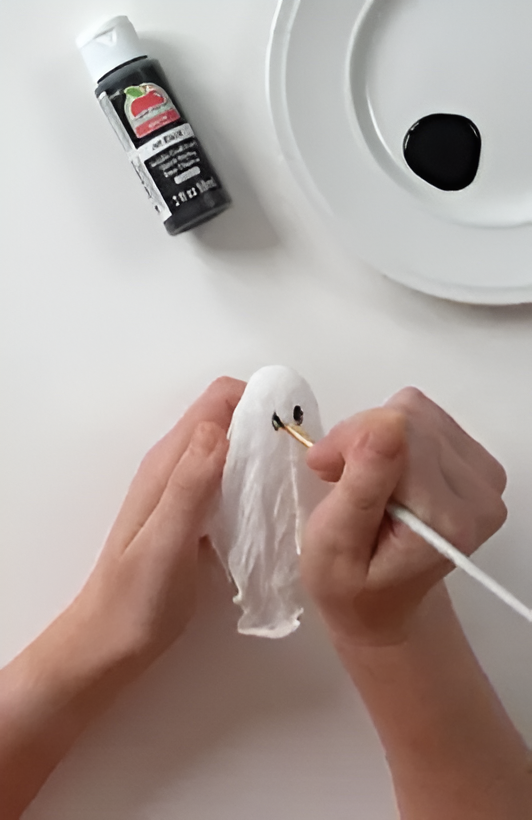
Once your ghost is dry, gently lift it off the form and peel away the plastic wrap from the inside. Now, pour a small dab of black acrylic paint onto a palette or plate. Using your fine-tipped paintbrush, carefully paint two small, simple ovals for the eyes.
Step 6: Assemble Your Spooky Scene
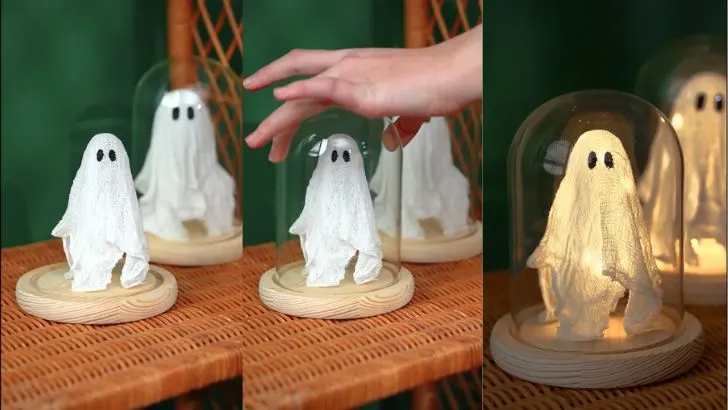
You’re almost done! Place your finished ghost onto the wooden base of your cloche. Artfully arrange the battery powered fairy lights around and inside the ghost to give it a magical glow from within. Finally, place the glass dome over the top.
And there you have it! A beautiful, ethereal glowing ghost that looks just as stunning as the expensive store-bought version. Now you can enjoy your boo-tiful new piece of Halloween decor.
Happy Haunting
Create Your Own Spooky & Glowing Ghost Family This Halloween!
Craft a Vampire Candy Holder for Halloween
Create Your Own Spooky Glowing Ghosts
Create a Magical DIY Heart Bottle Lamp
How to Fold a Glowing Origami Petal Sphere
DIY Rainbow Projector Phone Flashlight Rainbow Hack
Making Flying Tea Bag Ghosts: A Spooky & Fun Science Experiment


