

Hello, fellow educators and crafty parents! As we welcome the beautiful autumn season, there’s no better time to explore one of fall’s most iconic fruits: the apple.
Today, I’m sharing a hands on felt craft that makes learning about the anatomy of an apple a fun, tactile, and engaging experience for little ones.
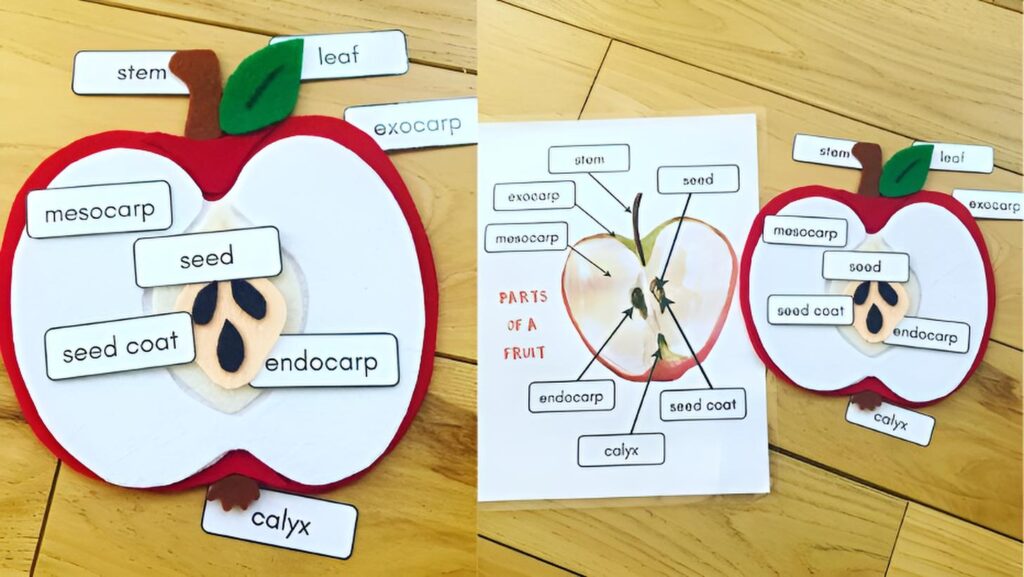
This felt “Parts of an Apple” set is a wonderful, reusable tool for your science center or homeschool lessons. Paired with our free printable diagram and labels, it creates a complete and interactive learning activity.
What You’ll Need:
- Felt in various colors: red, white, off-white, light tan, black, green, and brown
- Sharp fabric scissors
- Fabric glue or a hot glue gun
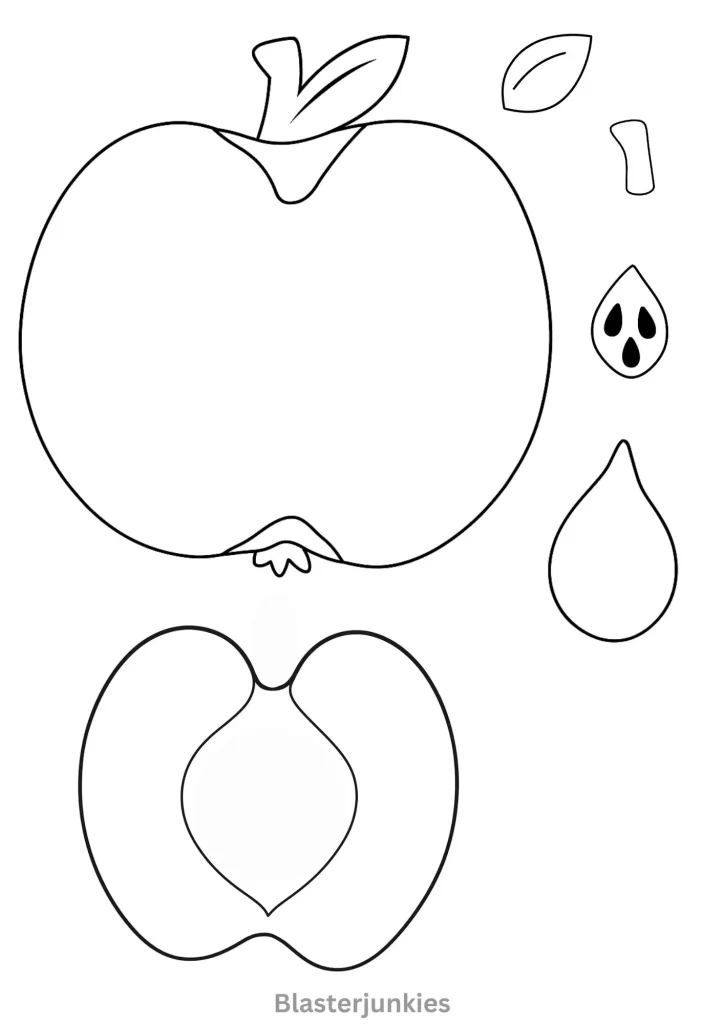
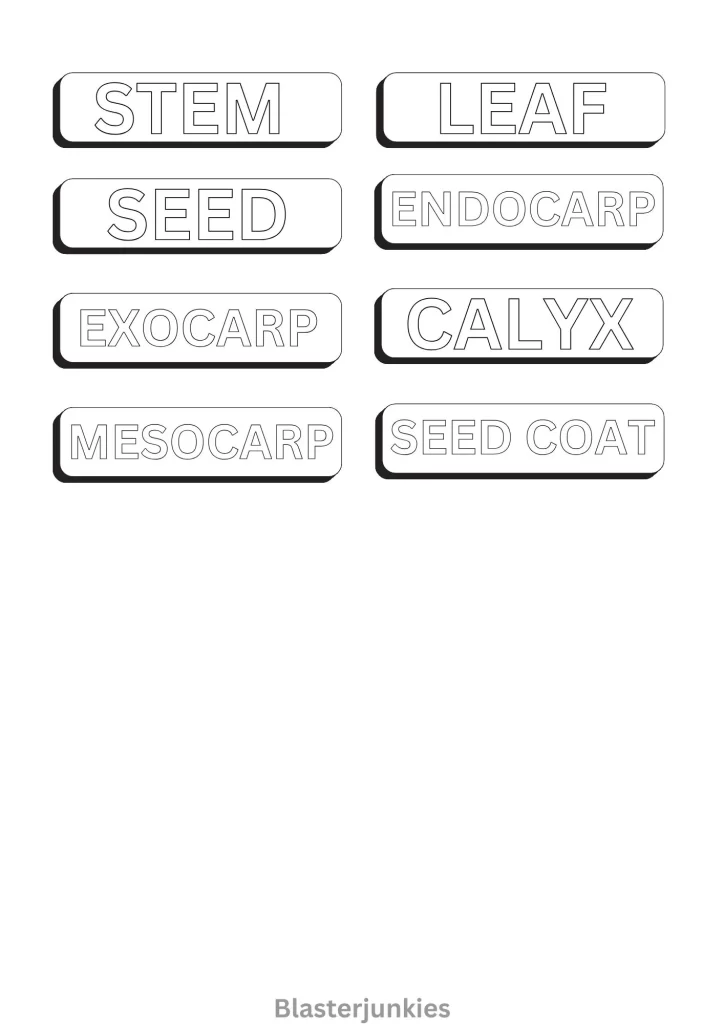
- Free “Parts of an Apple” Printable Labels and Diagram (download link below!)
- Optional: Laminator for the labels
Step-by-Step Instructions
Step 1: Create the Apple Base
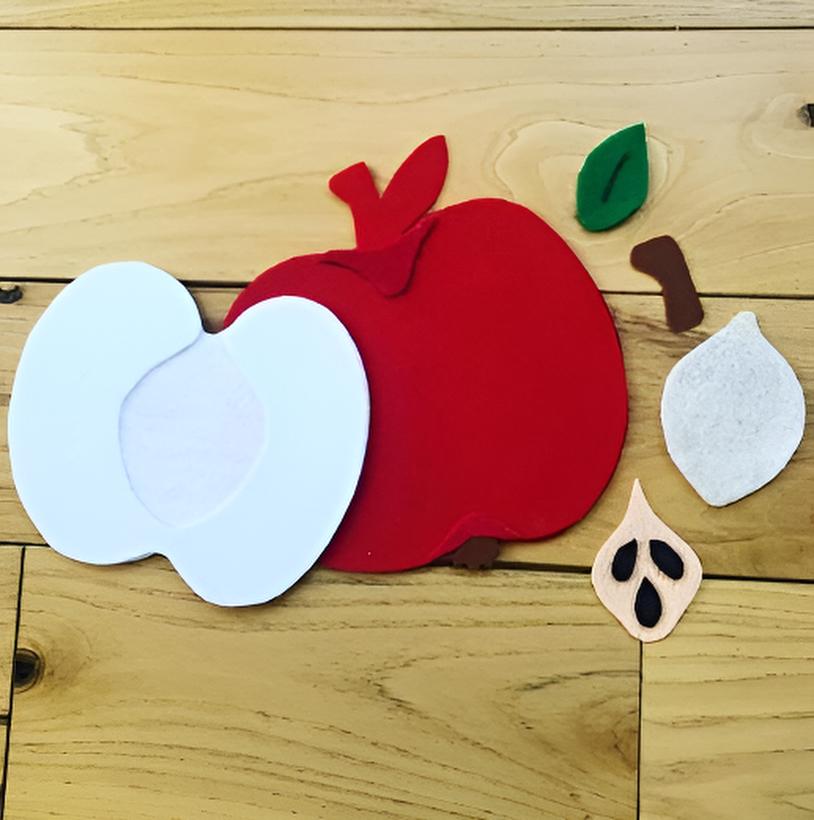
First, let’s create the main part of our apple. On your red felt, draw and cut out a full apple shape. Then, draw and cut out a second identical shape, but this time, cut it in half vertically. These two halves will form the outside of your apple cross section.
In addition, you can use our provided printables to cut out the apple parts and use them in the activity.
Step 2: Cut Out the Inner Parts
Now, let’s craft the inside of the apple.
- Flesh (Mesocarp): Using your red apple half as a template, trace onto the white felt and cut out a slightly smaller shape. This will represent the fleshy part of the apple.
- Core (Endocarp): On the off-white or light tan felt, cut out a smaller, teardrop-like shape for the core where the seeds will sit.
- Seeds: Cut out three small, black, teardrop-shaped seeds.
- Stem, Leaf, and Calyx: From your brown felt, cut a small stem and a little flower-like shape for the calyx (the bottom of the apple). From the green felt, cut out a simple leaf.
Step 3: Assemble Your Felt Apple
It’s time to put all the pieces together!
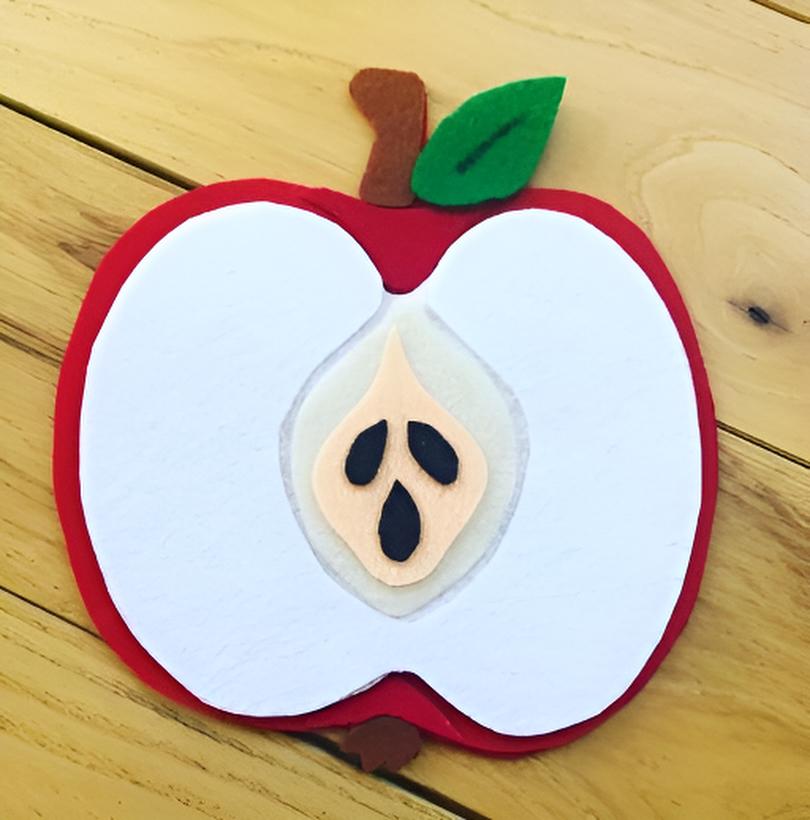
- Take your two red apple halves and glue the white “flesh” piece onto the center, leaving a red border around the edge to represent the skin (exocarp).
- Glue the tan “core” piece onto the center of the white flesh.
- Carefully glue the three black “seeds” onto the core.
- Finally, glue the brown stem and green leaf to the top of your apple, and the brown calyx to the bottom.
Your beautiful felt apple cross section is now complete!
Bringing the Lesson to Life
To turn your craft into a full learning activity, you’ll need our free printables.
Step 1: Prepare Your Labels and Diagram
Download and print the “Parts of an Apple” files. Cut out all the labels. For durability, I highly recommend laminating the labels and the diagram so you can use them year after year.
Step 2: Let the Learning Begin!
Introduce the felt apple to your child or students. Using the printable diagram as a guide, talk through each part of the apple and what it does. Introduce scientific terms like exocarp (skin), mesocarp (flesh), and endocarp (core).
Then, let them have fun matching the labels to the correct parts of the felt apple. The tactile nature of the felt makes this a memorable and engaging way to learn!
I hope you and your little learners have a wonderful time exploring the science of autumn with this fun, hands on activity. Happy crafting
Dive into Fall with 5 Fun Apple Investigation Activities!
A Fun and Personalized Apple Name Craft for Kids
A Fun and Educational Apple Life Cycle Craft
3 Fun and Easy Apple-Themed Activities for Kids (with Free Printables!)
Capture the Beauty of Autumn with These DIY Clay Leaf Bowls
Create a Colorful Paper Turkey for Thanksgiving!
Build Your Own Amazing Dancing Robot!
Craft a Wicked Animated Eyeball Spellbook for Halloween
Create Adorable Upcycled Ghost Portraits for Halloween
Create Your Own Spooky & Glowing Ghost Family This Halloween!


