
Are you tired of giving gifts wrapped in store bought sentiment? If you want to deliver a message that literally pops out with personalized love and effort, you’ve found your next project!
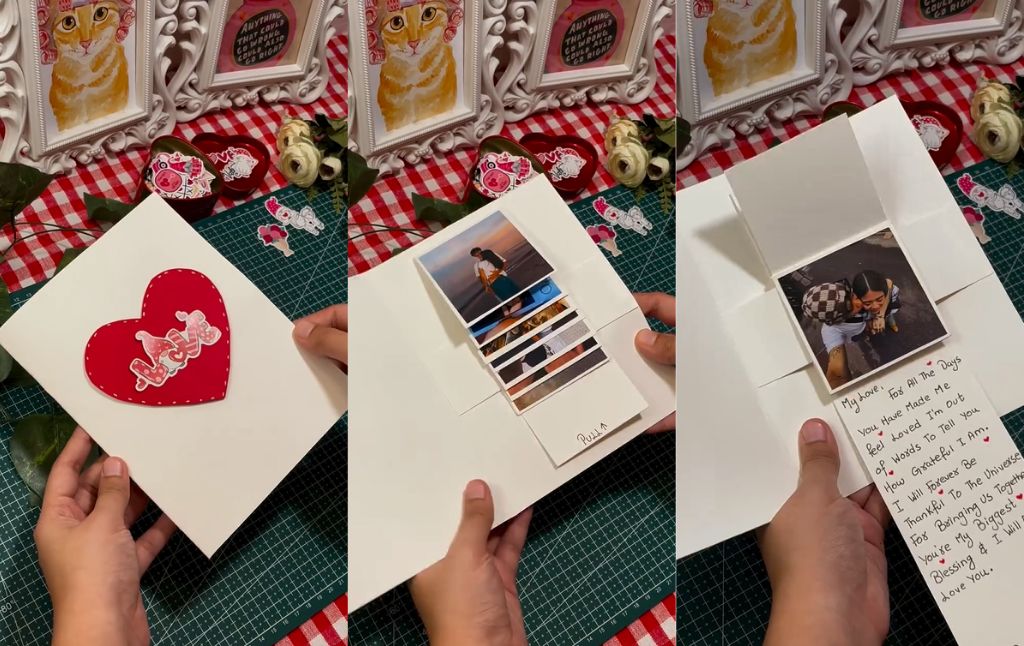
This stunning Cross Fold Waterfall Card (sometimes called a cascade card) is the perfect way to combine a handwritten message with your favorite photos.
Here is your step by step guide to mastering this intricate, yet accessible, DIY gift card project, using the techniques you’ve perfected in the video.
Step 1: Preparing Your Foundation Pieces
Before the magic happens, careful measurements are key to ensure your mechanism flows smoothly.
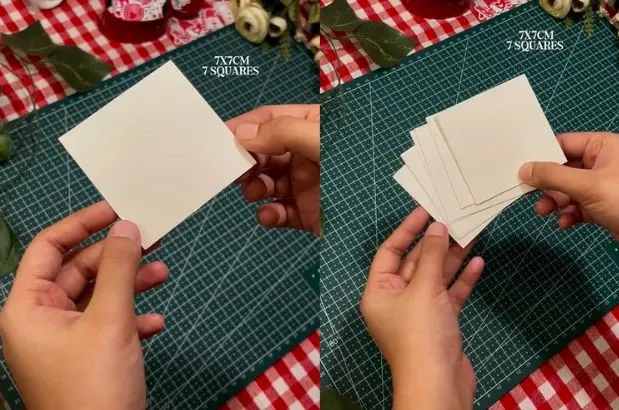
Cut the Squares: Start with a sturdy base card, which you used for the exterior (perhaps 15cm x 15cm). You will need 7 cards
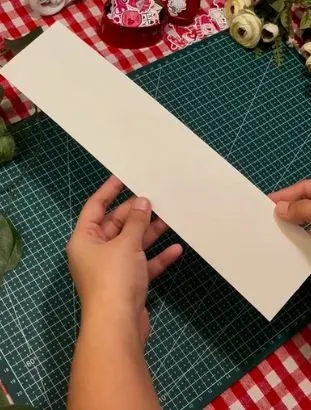
Then, you need a long strip of paper that will become the waterfall mechanism. This strip should be slightly less wide than your squares (you used 7cm squares).
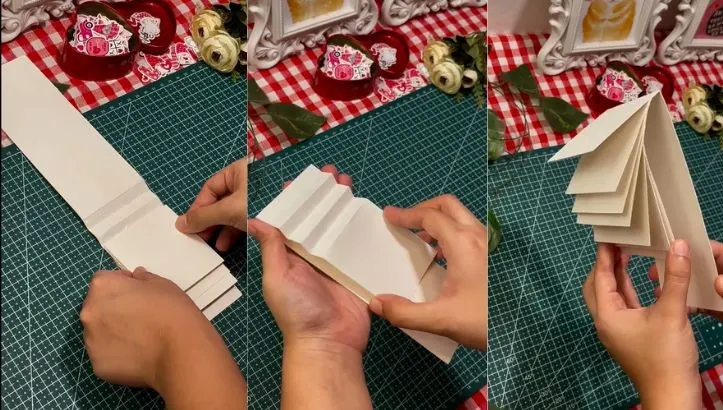
Master the Scoring: Take your long strip. From one end, measure and score the first line at 7 cm. This first 7 cm segment will hold your main photo.
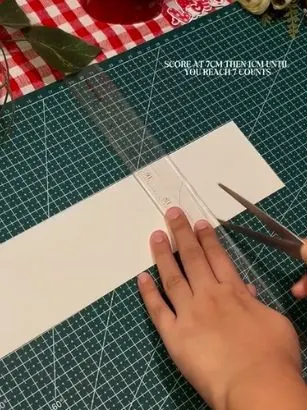
Create the Cascade: After the 7 cm mark, you need six additional scores, each exactly 1 cm apart.
This means your scoring lines will be at 7 cm, 8 cm, 9 cm, 10 cm, 11 cm, 12 cm, and 13 cm. These 1 cm segments are the core of the pulling mechanism.

Fold Neatly: Once scored, fold along every line, creating a precise accordion fold. Use a bone folder or the edge of your ruler to get crisp creases.
Step 2: Assembling the Accordion Pull Mechanism
This is where you transform the strip into the functional pull tab.
Glue the 1cm Folds: Looking at your folded strip, you should see six narrow 1 cm sections. Apply glue (you used white craft glue) only to the ridges of these 1 cm sections.
Press and Adhere: Gently press these glued 1 cm folds together. When finished, the piece should look like a small, thick block attached to the main 7 cm square, followed by the rest of the strip.
When you pull the long tail, the little block should spring open slightly. This block is what gives your photos their staggered, pull out effect.
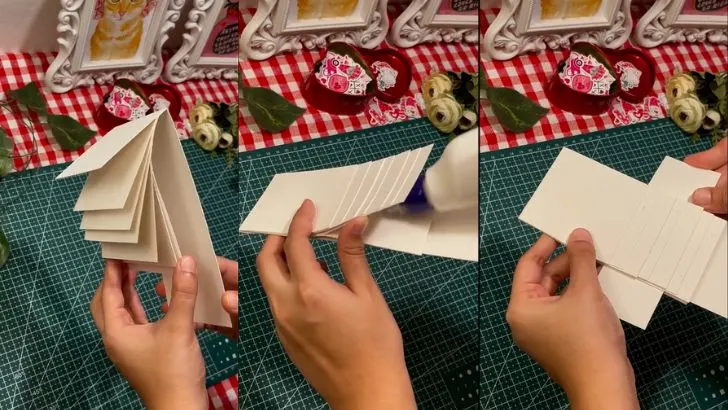
You need to take the pull mechanism and apply glue to the top end of the strip. Then, attach a horizontal paper strip there.
This strip will be used to connect the pull mechanism inside the cross fold envelope. (Make sure that the horizontal paper strip is not glued to any of the seven cards attached to the pull mechanism.)
Step 3: Building the Cross Fold Envelope
Now you need the shell that houses your exciting pop out message.
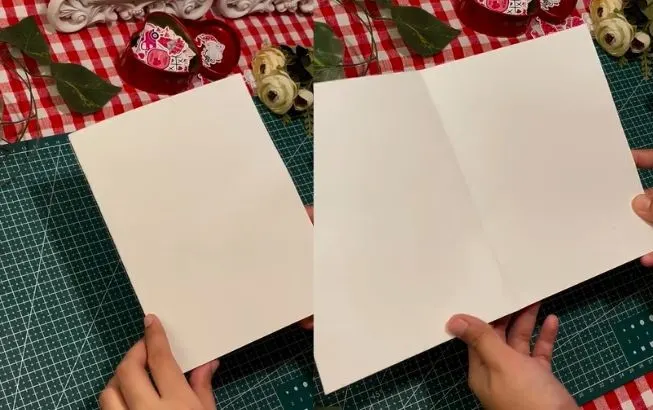
Fold the Outer Card: Take your large base card and find the center. Fold the two long side edges inward so they meet exactly in the middle.
Create the Flaps: Now, fold the top and bottom edges inward so they also meet perfectly in the center.
When complete, your card should be a neat square with four folded flaps meeting at the center point. When you open these four flaps, the card should lay flat like a cross.
Step 4: Integrating the Waterfall Mechanism
Time to insert the pop out piece into your card base.
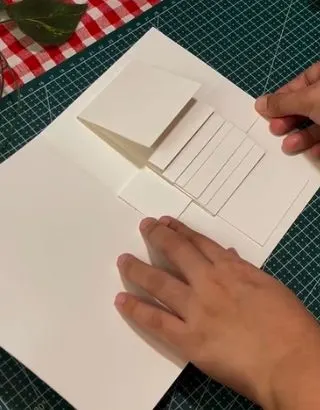
Position the Pull Tab: Lay your cross fold card flat (open). Take your accordion piece (the one you made in Step 2). Center the thick, glued block onto the right side of the central crease.
Secure the Block: Glue only the back of the thick, accordion block onto the card base. Crucially, do not glue the long tail strip! This tail needs to be free to pull.
Attach the Message Strip: To the very bottom of the long tail strip, attach an additional, longer strip of paper. This is where you will write your beautiful, heartfelt message. Label the end of this strip with “PULL.”
Step 5: Adding Photos and Personalizing the Story

The structure is complete; now you fill it with love!
Place the Main Photo: Attach your first photo (perhaps a sweet image showing a joyful moment) onto the top 7 cm square of the mechanism.
Fill the Cascade: You have several small square surfaces on the accordion block waiting for content.
Glue small photos or decorative pieces onto each of these mini squares. As the mechanism is pulled, each photo will pop up sequentially.
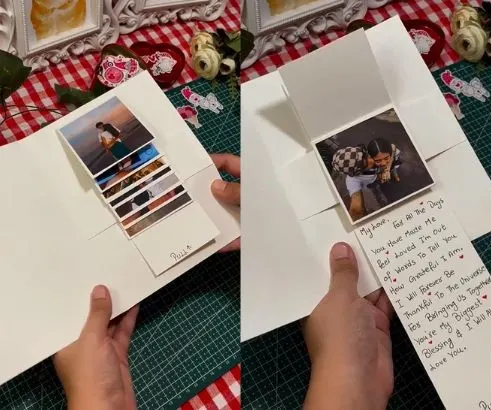
Tuck and Test: Fold the card closed, ensuring the pull tab and message strip tuck neatly underneath the top flap.
When you lift the top and bottom flaps, the tail should be accessible and ready to pull, revealing the cascade of photos and your long, sweet message!
Step 6: Finishing the Exterior Design
A fantastic interior deserves a beautiful exterior.
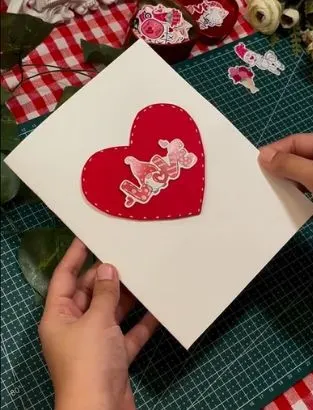
Decorate the Cover: You chose a classic look by adhering a large, bold red paper heart to the front of the closed card.
Add Embellishments: Finish the look with small thematic stickers like the “LOVE” cherubs and smaller hearts you used to decorate the red heart and the surrounding white space.
When the recipient opens this personalized card, the effort and love you poured into every score, fold, and placement will shine through!
Immortalizing Your Closest Bonds: Creating the Ultimate Aesthetic Friendship Journal
Creative Junk Journal Spreads from a Weekend Getaway
Crafting the Ultimate Personalized Gift: Heartfelt Scrapbook Layout Ideas
25 Captivating Ideas to Elevate Your Junk Journal Spreads
15 Inspiring Styles to Kickstart Your Next Junk Journal Spread
10 Interactive Junk Journal Ideas to Bring Your Pages to Life
10 Inspiring Junk Journal Spreads to Try Today
Create a Spooktacular Light Up Halloween Card: A Step by Step Guide


