
Are you looking for a birthday card that’s more than just a message a heartfelt, interactive keepsake?
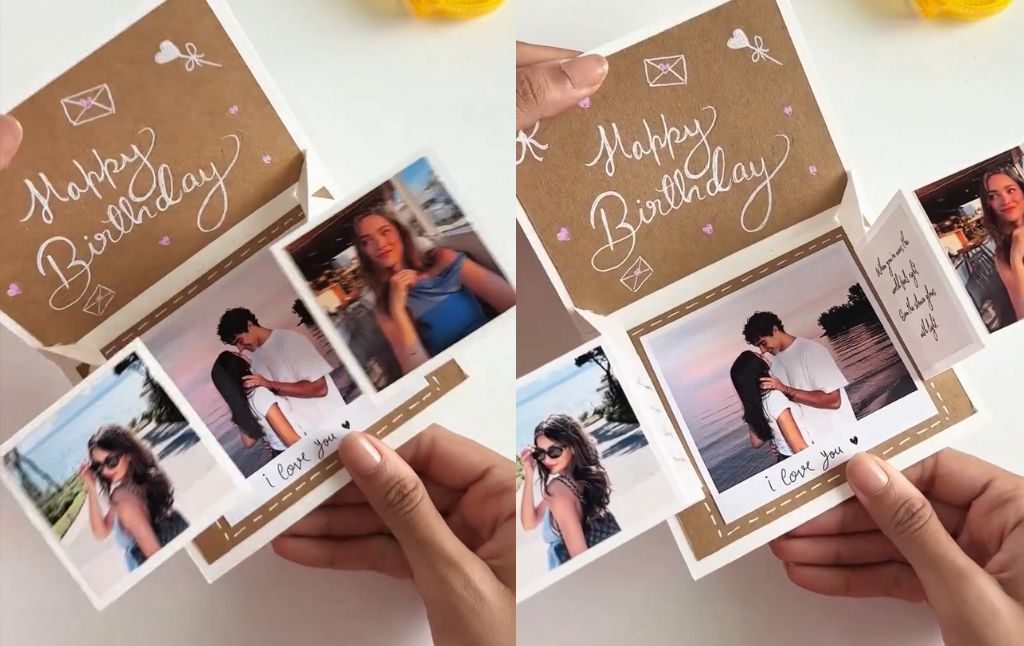
This DIY Photo Explosion Card (also known as a waterfall or origami card) unfolds to reveal multiple personalized photos and hidden messages, making it an incredibly thoughtful and memorable gift.
Here is your step by step guide to mastering this beautiful, sentimental craft, using the elegant design you demonstrated.
Step 1: Creating the Card Base and Interior Lining
The foundation of this card is a sturdy envelope structure with a rustic feel.

Fold the Outer Card: Start with a piece of heavy, textured white cardstock. Fold it in half to create a standard, square greeting card base.
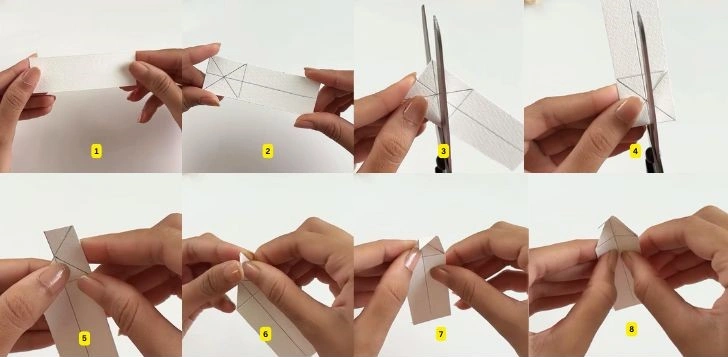
Prepare the Pop Out Mechanism (The Zig Zag Fold): Take a small, narrow strip of white cardstock. You will be using the principles of origami to create the pop out folds.
Mark a vertical line down the center of the strip.
Draw diagonal lines from the center point of the vertical line to the top and bottom corners of the strip’s end.
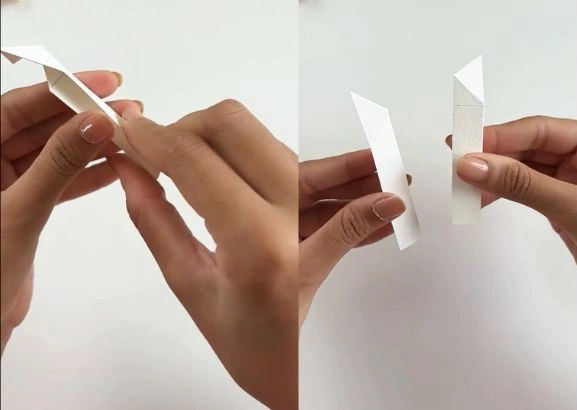
Cut along these diagonal lines and fold along the remaining lines to create a small, pointed, self folding tab. You need two of these small folded mechanisms.
Step 2: Assembling the Interior Photo Box
You need a central square attached to the card that holds the main photo and is supported by the pop out mechanisms.
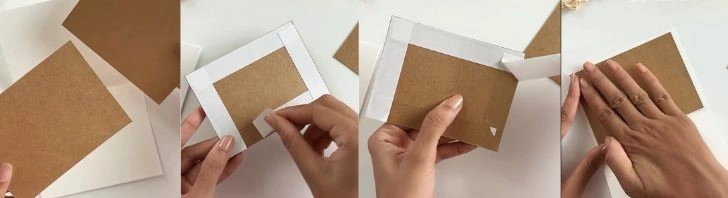
The Central Square: Cut a square of brown kraft paper (slightly smaller than your interior panels) that will hold the main photo.
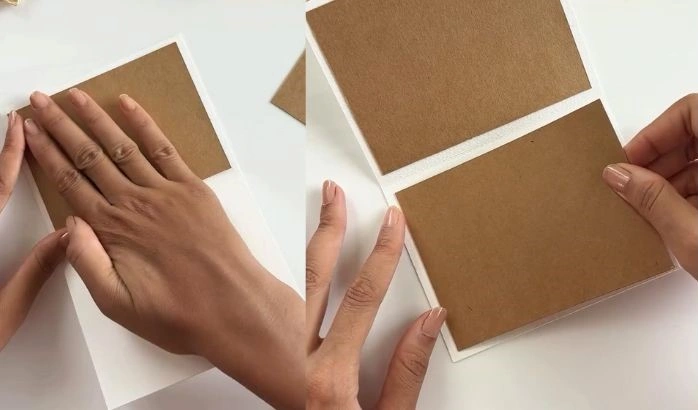
Now stick these brown craft papers on the white paper with the help of glue tape.
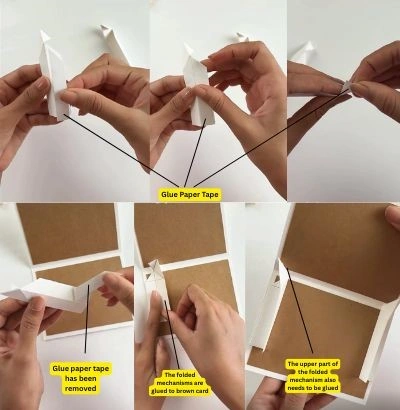
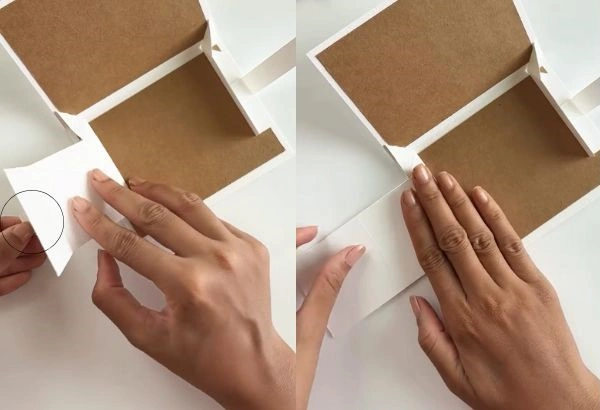
Attach the Pop Outs: Take the two small, folded mechanisms you created in Step 1. Glue the flat back of one mechanism to the bottom edge of the left interior panel of the card, and the other mechanism to the bottom edge of the right interior panel. They should be positioned so the pointed, folded tips face inward.
Secure the Central Square: Glue the left side of your central brown photo square to the pointed tip of the left mechanism, and the right side of the photo square to the pointed tip of the right mechanism.
- Test the fold: When the card is closed, the mechanisms should fold flat, pulling the central brown square up slightly. When opened, the brown square should pop out slightly, ready for your main photo.
Step 3: Attaching the Side Photo Flaps
This step adds the additional photo reveals to the sides of the central pop-out.
Prepare the Side Photo Flaps: Cut two long, narrow strips of white cardstock. Score these strips two or three times to create small, accordion style folds. Now stick these strips horizontally in the center of the folded mechanism with the help of glue tape.
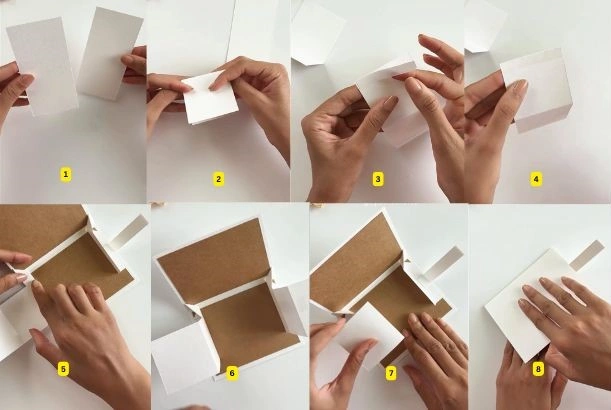
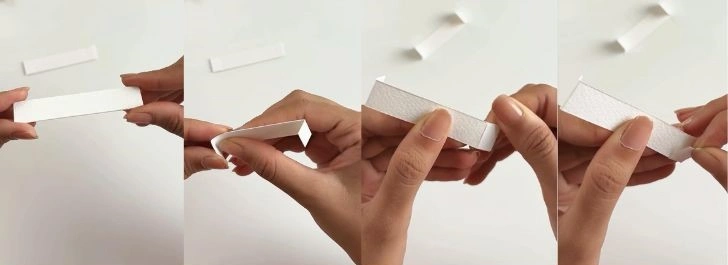
Make Photo Flaps supporter: Cut two long white cardstock strips long enough to hold a photo and message card on each side. Fold each cardstock strip in the middle, then apply paper glue tape on one side. Remove the backing and stick the cardstock onto the top flap of the folded mechanism.
Stick the Side Photo Flaps on both sides to the Photo Flaps supporter strip
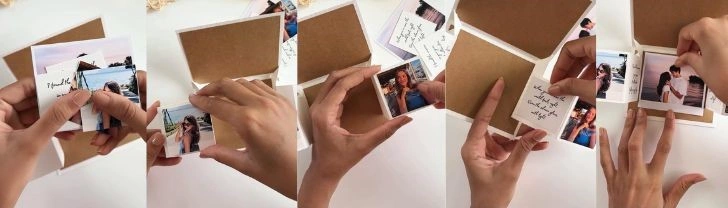
Attach Photos and Messages: Print your photos in a small square format (like mini Polaroids). Glue one photo to the outer edge of each strip. You can also attach small, handwritten notes or quotes onto the inner folds of the strips.
Step 4: Personalizing the Interior Design
With the mechanics complete, you can now add the personalized details.
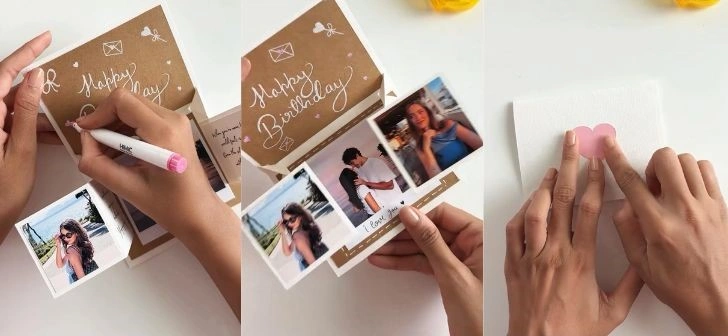
The Main Message: On the upper brown panel (the top flap when opened), use a white gel pen or marker to write your main greeting, such as “Happy Birthday,” in beautiful script.
Add Decoration: Enhance the message with small, hand drawn details like hearts, envelopes, bows, or small decorative stitching.
Final Photo Details: Attach your largest, most meaningful photo to the central brown square. Use a thin tipped pen to add a final personal note, like “I love you,” just beneath the photo.
Step 5: Finishing the Card Exterior
The outside should be simple, clean, and inviting.
Keep it Minimal: You kept the card exterior clean white. This emphasizes the surprise inside.
The Cover Icon: Apply a small, single pink paper heart to the center of the front cover.
When the card is opened, the mechanisms spring out, revealing your central photo and the two accordion photo flaps on either side a truly magnificent, personal gift that celebrates beautiful memories!
How to Craft the Ultimate Confetti Surprise Photo Card
How to “Build A Turkey” Cut and Color Activity (Free A4 Printable Inside!)
How to Build Your Own Thankful Turkey Craft (Free Printable Included!)
DIY Balloon Floats: Bringing the Thanksgiving Day Parade to Your Kids’ Table!
Immortalizing Your Closest Bonds: Creating the Ultimate Aesthetic Friendship Journal
Crafting the Ultimate Personalized Gift: Heartfelt Scrapbook Layout Ideas
15 Inspiring Styles to Kickstart Your Next Junk Journal Spread
10 Inspiring Junk Journal Spreads to Try Today
Create a Spooktacular Light Up Halloween Card: A Step by Step Guide


