

Looking for a fun, interactive, and meaningful Christmas craft for kids? You’ve come to the right place!
We all know that Christmas Rocks, and now you can celebrate that message literally with this adorable Rocking Baby Jesus Paper Craft. This is the perfect activity for Sunday school classes, holiday parties, or a cozy crafting afternoon at home.
The best part? It actually moves! With a gentle tap, Baby Jesus rocks back and forth in the manger. We have made it incredibly easy for you to recreate this by providing a Free A4 Printable PDF template.
Why You’ll Love This Craft
- Interactive: Unlike flat coloring pages, this craft becomes a toy that kids can play with.
- Simple Materials: All you need is paper, scissors, and glue.
- Message Focused: It’s a great way to teach the Nativity story while keeping little hands busy.
- Print & Go: Our template fits perfectly on standard A4 paper.
Materials Needed
- Our Free “Christmas Rocks” Printable Template (Download link below)
- White cardstock or heavy A4 paper (recommended for better rocking action)
- Scissors
- Glue stick
- Crayons, markers, or colored pencils

Step by Step Instructions
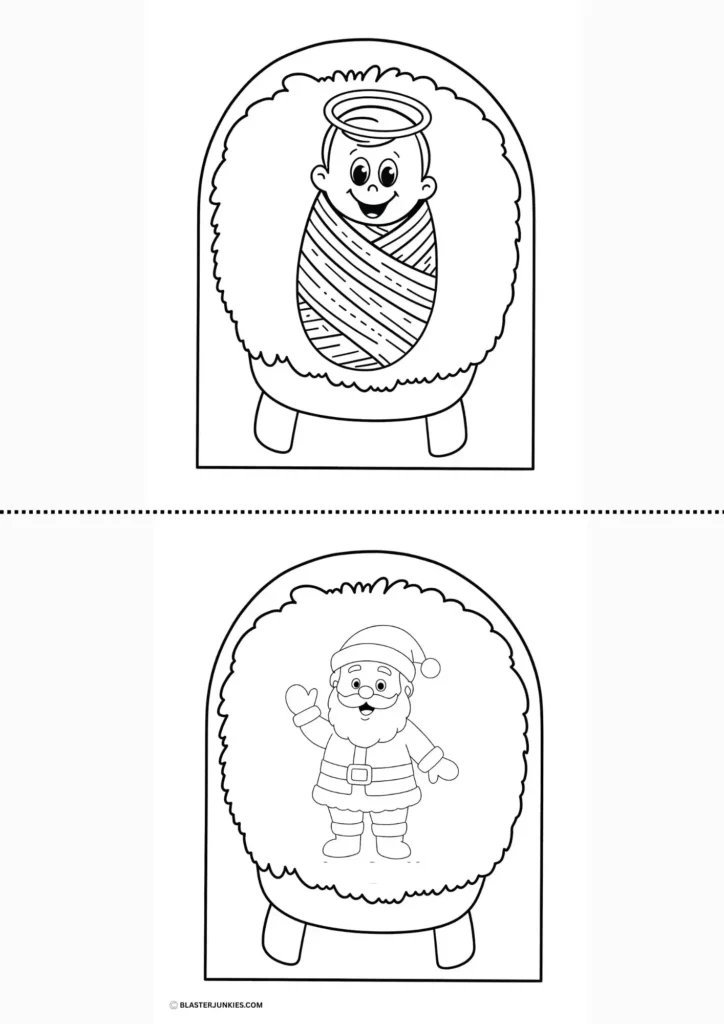
1. Color and Cut
Start by printing the template on A4 paper. Let the kids get creative coloring in Baby Jesus, the manger, and the “Christmas Rocks” base. Once colored, carefully cut out the three pieces: the main base, the Baby Jesus figure, and the small support strip.
2. Fold the Base
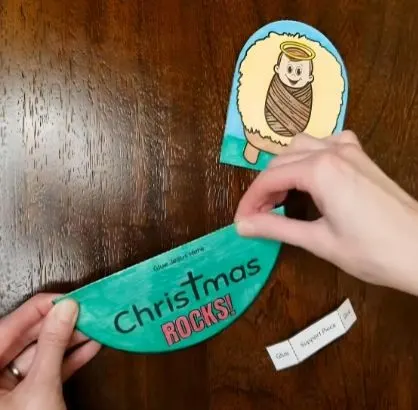
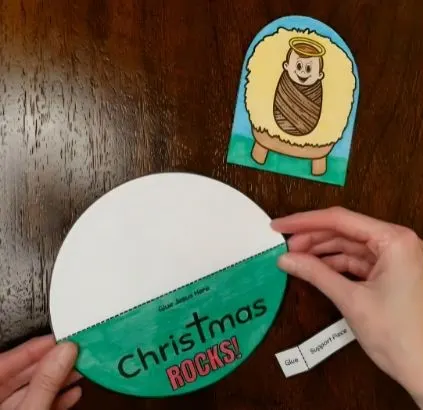
Take the half circle piece that says “Christmas Rocks!” and fold it gently in half along the crease line (if applicable) or simply curve it so the colored side faces out. Note: You want a soft fold, not a sharp crease, so it rocks smoothly.
3. Attach Baby Jesus
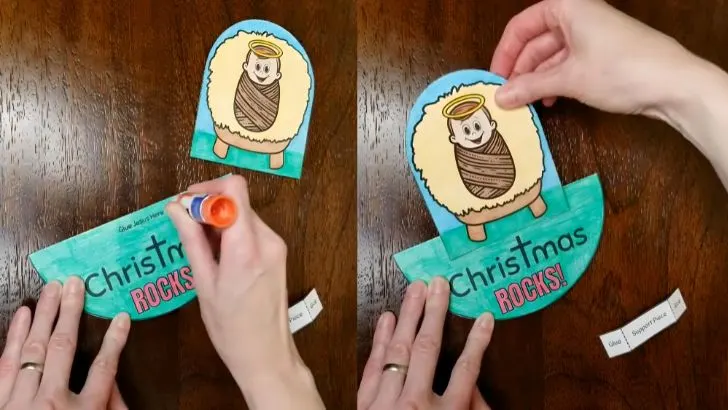
Apply a little bit of glue to the area marked “Glue Jesus Here” on the back rim of the green base. Press the Baby Jesus cutout firmly onto the glue so he sits right on top of the rocking base.
4. Add the Support Piece
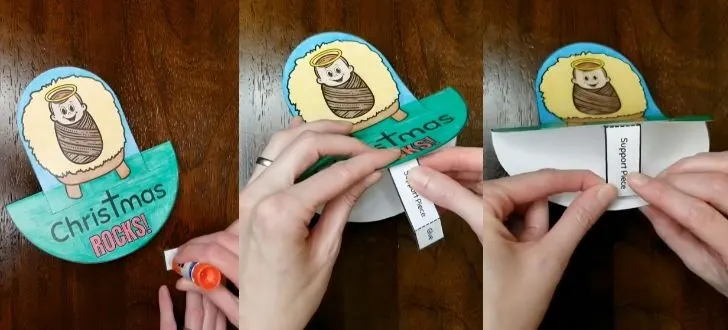
This is the secret to making it stand up! Take the small rectangular “Support Piece.” Fold the small tabs on the ends. Apply glue to those tabs and stick them inside the folded base. This acts like a bridge to keep the bottom open, giving it stability to stand and rock.
5. Watch Him Rock!
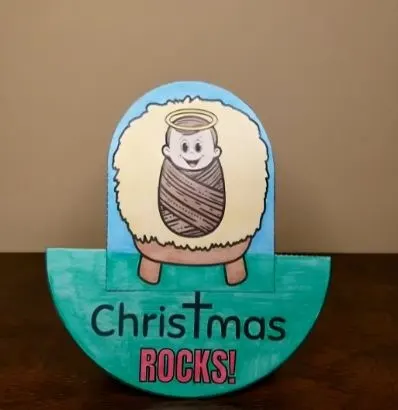
Set your creation on a flat table, give it a gentle nudge, and watch Baby Jesus rock back and forth!
2> Perfect for Sunday School and Home
This craft is a wonderful visual lesson for children. As they watch the manger rock, you can share the story of the first Christmas. It serves as a cute decoration for the mantlepiece or a keepsake for parents.
Psalm 23 is one of the most beautiful and comforting passages in the Bible. Teaching children that the Lord is their Shepherd who watches over them is a foundational lesson for Sunday School, Homeschooling, or VBS.
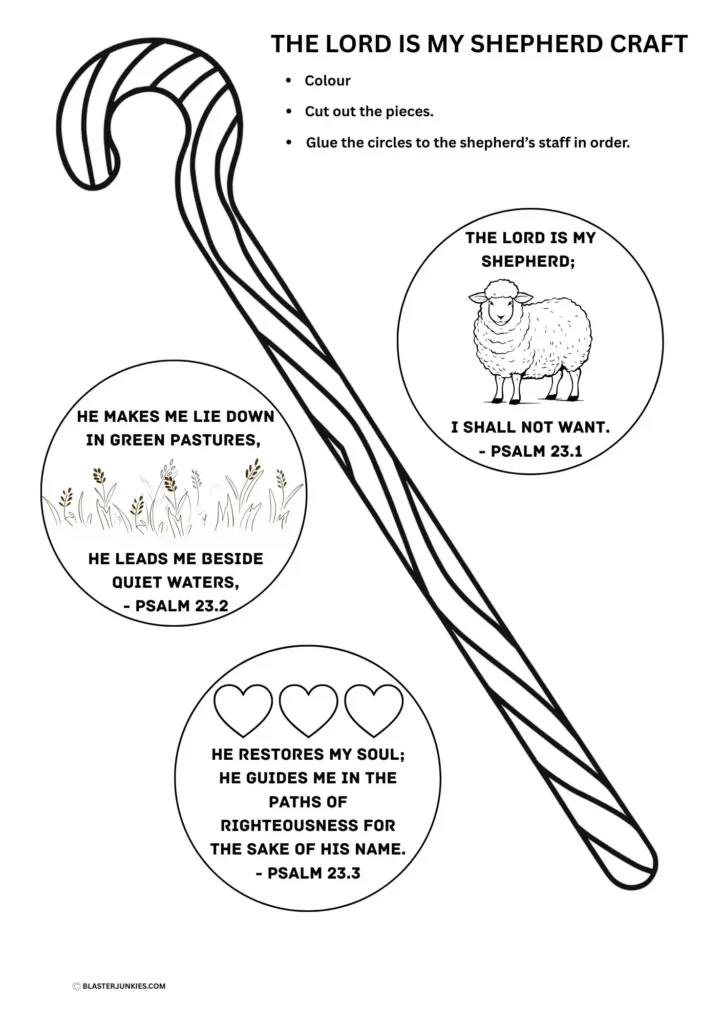
To help make this lesson stick, we have created a simple, visual, and hands on “The Lord is My Shepherd” Staff Craft. It breaks down the first three verses of Psalm 23 into easy to understand sections.
Best of all? We have done the hard work for you. You can download our Free A4 Printable PDF below to get started immediately!
Why This Craft?
Visual aids are powerful tools for memory. By assembling the Shepherd’s staff, children aren’t just hearing the verses; they are physically building them in order.
- Circle 1 (The Sheep): “The Lord is my shepherd; I shall not want.” (Psalm 23:1)
- Circle 2 (Green Pastures): “He maketh me to lie down in green pastures: he leadeth me beside the still waters.” (Psalm 23:2)
- Circle 3 (Hearts): “He restoreth my soul…” (Psalm 23:3)
Materials You Will Need
- Our Free Printable Template (Download link at the bottom of this post)
- A4 size white paper or cardstock (Cardstock is best for a sturdy staff!)
- Scissors
- Glue stick
- Crayons, markers, or colored pencils
Step by Step Instructions
1. Print and Color
Download the free PDF file and print it out on A4 paper. Give the kids plenty of time to color in the shepherd’s crook and the three scripture circles. Encourage them to use green for the pastures and bright colors for the hearts!
2. Cut Out the Pieces
Carefully cut out the long staff and the three circles. This is great fine-motor practice for younger children, though they may need a little help navigating the curve of the staff.
3. Assemble the Staff
This is where the lesson comes together!
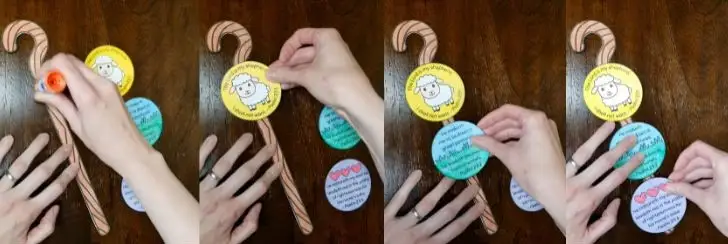
- First: Apply a dab of glue near the top curve of the staff. Place the Sheep Circle (Psalm 23:1) here. This reminds us that God leads us from the front.
- Second: Apply glue in the middle of the staff. Attach the Green Pastures Circle (Psalm 23:2).
- Third: Apply glue near the bottom/handle of the staff. Attach the Hearts Circle (Psalm 23:3).
4. Review the Verse
Once the glue is dry, have the children hold up their staffs and read the verses from top to bottom. It serves as a wonderful bookmark or a wall decoration for their bedroom.
Teacher’s Tip:
As the children glue each circle onto the staff, take a moment to pause and discuss what that specific verse means. Ask them, “What does a shepherd do?” or “What do you think ‘green pastures’ look like?” This turns a simple craft into a meaningful conversation about God’s love.
Merry Christmas and Happy Crafting!
Free Printable Calendar Templates 2026: Plan Your Best Year Yet
How to Make the Cutest Peek A Boo Interactive Card
How to Craft the Ultimate Confetti Surprise Photo Card
How to “Build A Turkey” Cut and Color Activity (Free A4 Printable Inside!)
How to Craft the Ultimate DIY Exploding Love Card
Creative Junk Journal Spreads from a Weekend Getaway
15 Inspiring Styles to Kickstart Your Next Junk Journal Spread
How to Craft Your Own Glowing Ghostface Lamp


