
Get ready to create a truly magical and personal gift! With this simple but brilliant card-making technique, you can present someone with a beautiful black-and-white drawing that transforms into a vibrant, colorful masterpiece with a simple pull.
It’s an amazing optical illusion that’s perfect for anniversaries, birthdays, or just to show someone how much they brighten your life. Let’s get started on this enchanting project!
What You’ll Need:
- Thick white cardstock or paper
- A clear plastic sheet (like an acetate sheet or a clear report cover)
- A fine-tipped black permanent marker
- Coloring supplies (markers, watercolors, etc.)
- A ruler
- A craft knife
- A cutting mat
- Glue
Step-by-Step Instructions: Creating the Magic
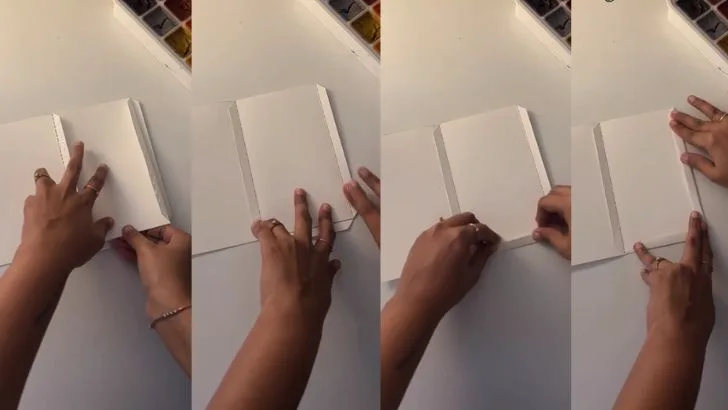
Step 1: Create the Card Sleeve
First, you’ll build the outer sleeve that will hold and hide the magic.
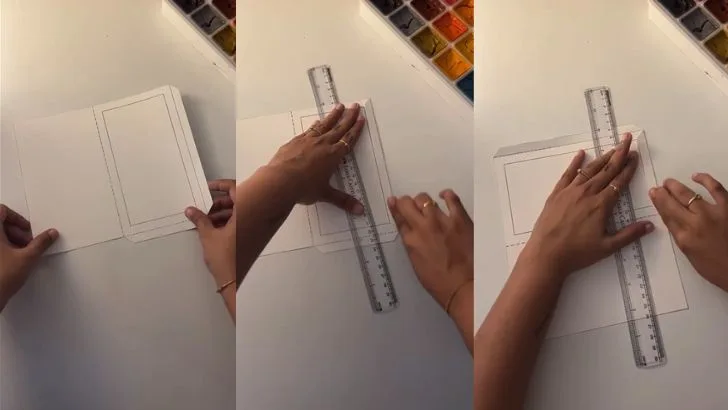
Take a piece of white cardstock. You will need to measure and cut out a shape that can be folded into a sleeve.
This involves a back panel, a front panel with a window cut out of the center, and small flaps on the sides and bottom of the front panel.
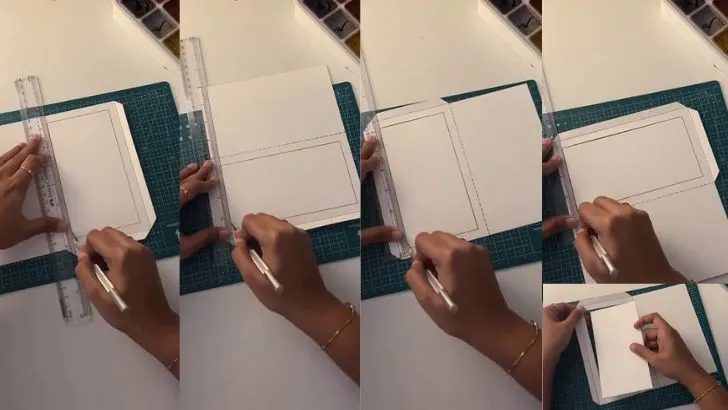
Use a ruler and craft knife to cut out the window from the front panel. Then, carefully cut the outer shape of the sleeve.
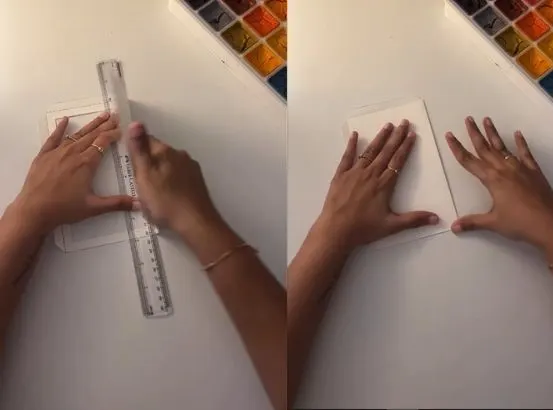
Score the fold lines with the back of your craft knife to ensure clean folds.

For the front panel, take a piece of paper and fold both flaps at the sides, then apply glue to the flaps.
Now place the front panel over the white cardstock so that it shows through the window cut.
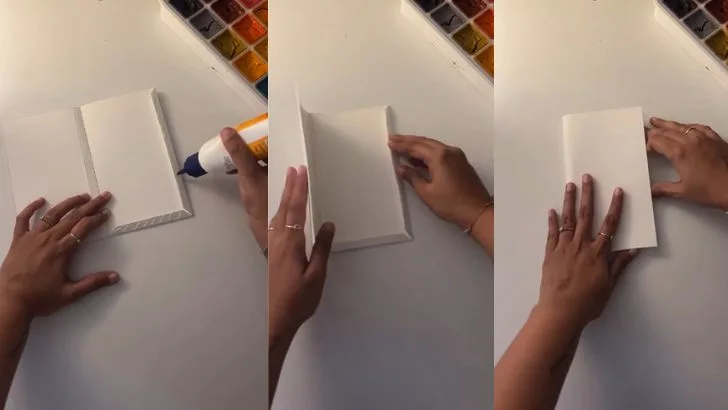
Fold the side and bottom flaps of the front panel inwards. Apply glue to these flaps and press the back panel on top to create a pocket with a window in the front.
Step 2: Create the Sliding Insert and Artwork
This is where your illustration comes to life in two parts.
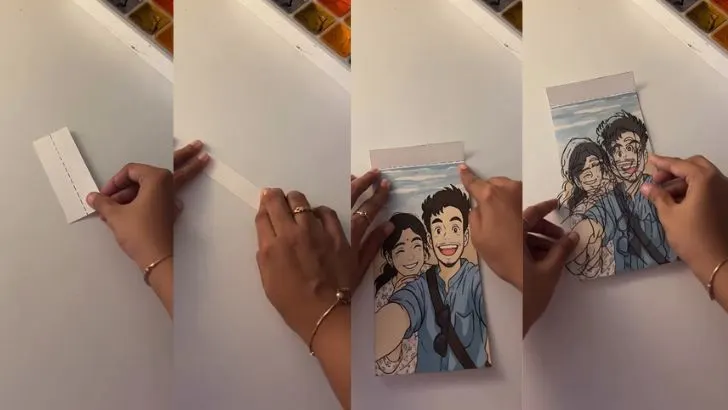
Cut a new piece of cardstock to be your sliding insert. It should be slightly narrower than your sleeve so it can move freely, but taller so it sticks out at the top to act as a pull-tab.
Cut a clear plastic sheet to be the same size as your insert.
On the clear plastic sheet, use your black permanent marker to draw the outline of your picture.
Place the paper insert underneath the clear outline sheet as a guide. On the paper, create the colored version of your drawing, making sure it aligns perfectly with the outline above it.
Step 3: Assemble Your Magic Card
Now, let’s put all the pieces together for the final reveal.
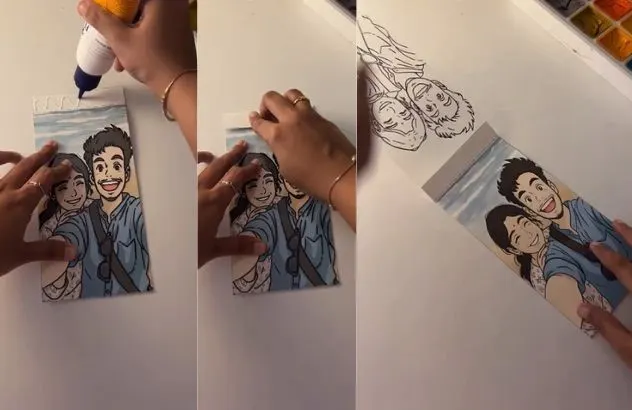
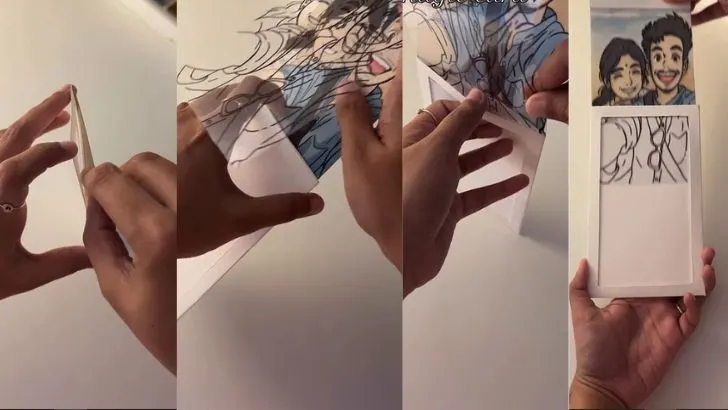
Take your completed black outline on the clear plastic sheet and carefully glue it to the inside of the sleeve’s front window.
Once the glue is dry, take your colored paper drawing and slide it into the sleeve.
How the Magic Works
The secret to this card is all about clever layering! Here’s the breakdown:
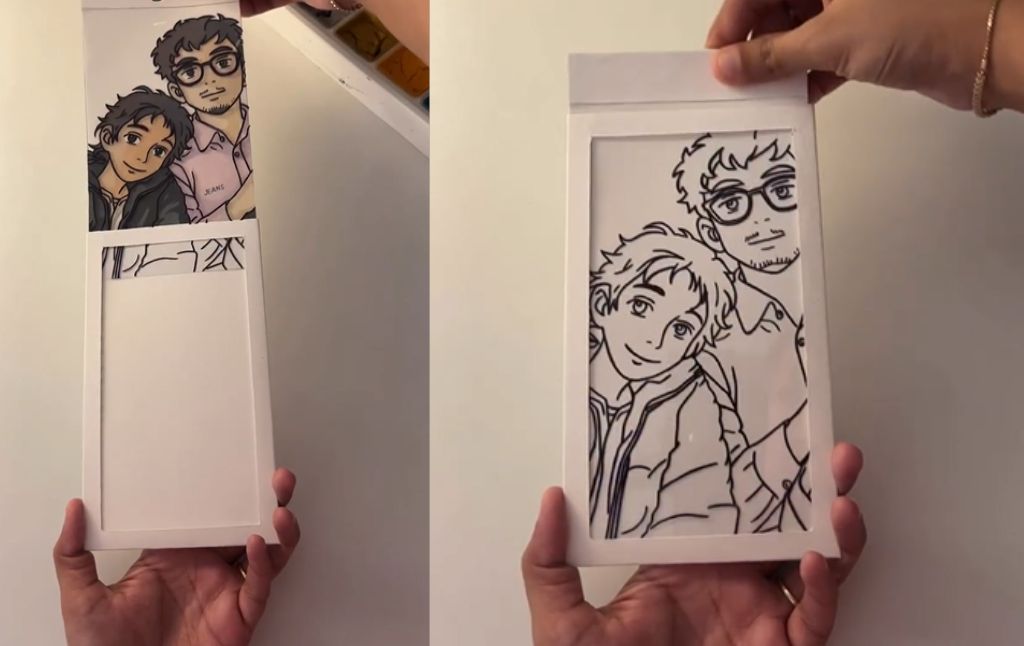
There is a page between the colored version and the outline. When the insert is pulled out, the two layers get together, and you see the beautiful color through the outline. When they are separated by pulling the tab, the colored version goes behind the solid paper of the sleeve, and you only see the black outline through the window. That’s how it works!!
Now, when you present the card, you can slide the tab up to show just the black-and-white image. Then, let the recipient push the tab down to magically fill the picture with color! It’s a beautiful and unforgettable surprise.
Kids Activities
Looking for more fun kids activities and other ideas to keep kids engaged, learning, and having fun? Check out these:
Create a Dazzling Color Explosion with the Magic Milk Experiment!
Easy Inertia Science Experiments with Pennies
Floating Egg in Water Experiment – A Fun Density Science Activity for Kids
Easter Peeps Science Experiment: What Happens When You Soak Peeps in Different Liquids?
Easy DIY: How to Make an Easter Bunny Lollipop for Young Kids
The Easiest Easter Bunny Craft Using Unmatched Socks
Melting Ice in Salt Water – A Cool Science Experiment for Kids


