
Forget store bought cards this year! If you want to give someone a truly memorable Halloween greeting,
it’s time to get crafty. We’re going to create a stunning greeting card with a jack o’ lantern that actually glows from within.
This project is easier than it looks and the result is a magical, eerie glow that is sure to impress anyone who receives it.
Ready to light up the night? Let’s get started!
What You’ll Need:
- Black cardstock (one piece for the main card, another for the backing)
- A printed and cut out illustration of a jack o’ lantern
- A small strand of battery-powered LED fairy lights (the kind with wire strings are perfect)
- A craft knife
- A pencil
- Double sided tape
- Foam mounting tape or squares
- A white paint marker

Step by Step Instructions
Step 1: Carve Your Paper Pumpkin
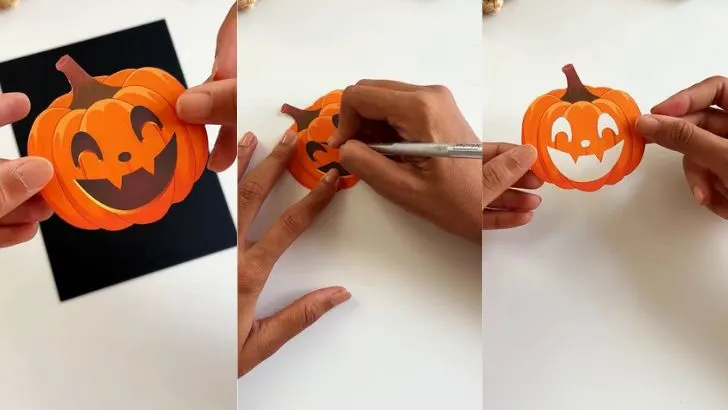
Take your printed jack o’ lantern cut out. Using your craft knife, carefully cut out the eyes, nose, and mouth. Go slowly to get clean, crisp edges. You now have a spooky pumpkin face ready to be illuminated!
Step 2: Prepare Your Card Base
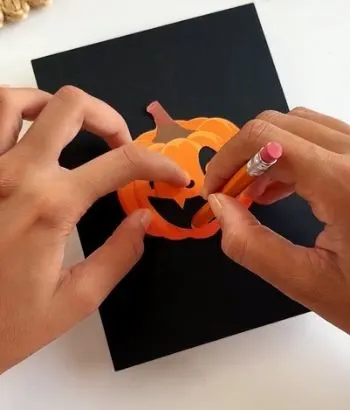
Place your pumpkin cut out on the front of your folded black card, positioning it where you want it to be.
Lightly trace the inside of the eyes, nose, and mouth onto the black card with your pencil.
Remove the pumpkin, The pencil marks will give you an idea of how to set up the light strip.
Step 3: Install the Lights
Poke a small hole in the center of the area you just cut out. From the inside of the card, push the end of your fairy light string through to the back.
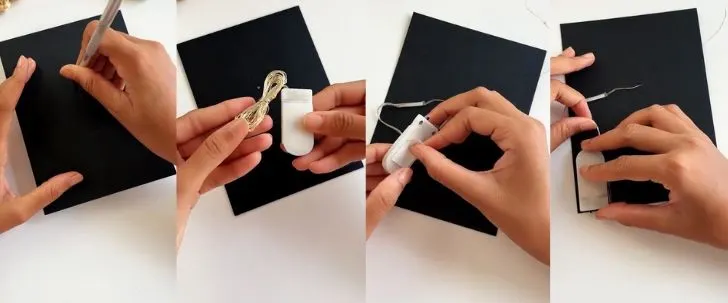
Secure the LED strip’s electronics firmly to the back of the cover using double sided tape.
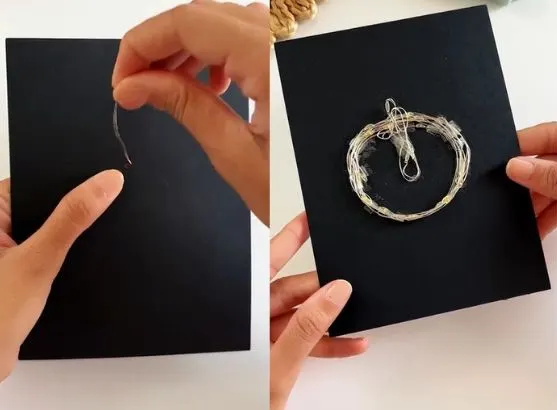
On the inside of the card’s front cover, arrange the wire of the fairy lights in a circle around the cut out face, ensuring the tiny LED bulbs are spread out.
Use small pieces of double sided tape to secure the wire in place. Tape the battery pack to the bottom edge on the inside.
Step 4: Create a 3D Effect
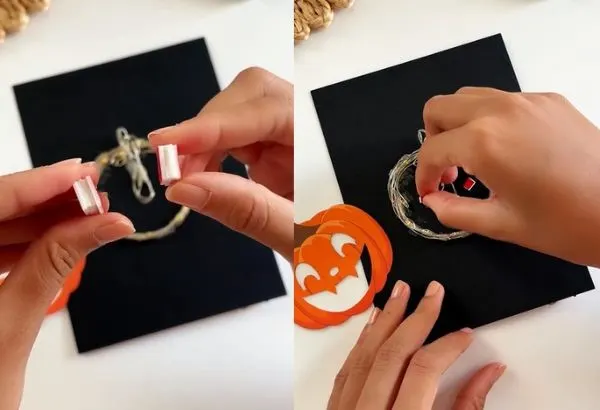
To give the pumpkin a floating, 3D look and to create space for the lights, you’ll need foam tape.
Place small pieces of foam mounting tape around the circle of lights on the inside cover. This creates a small gap that will allow the light to diffuse beautifully.
Step 5: Attach the Pumpkin
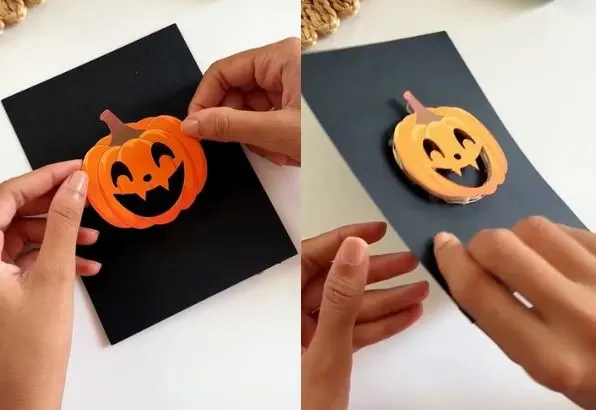
Carefully peel the backing off your foam tape. Line up your pumpkin cut out on the front of the card, making sure its eyes, nose, and mouth align perfectly with the holes you cut in the black card. Press it down firmly to secure it to the foam tape.
Step 6: Hide the Mechanics
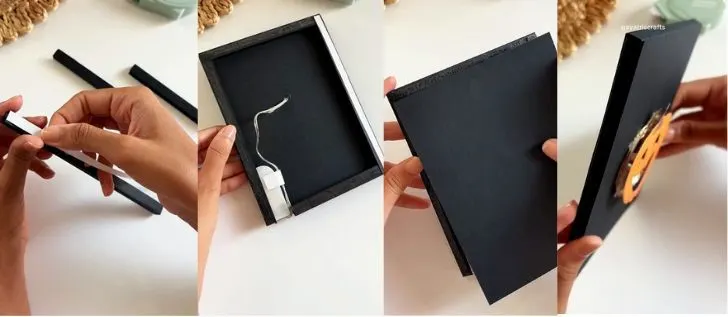
To conceal the battery pack and wires for a clean finish, cut three strips of black cardstock. Fold them into long, U shaped channels.
Apply double sided tape to the edges of these channels and attach them to the three open sides of the inside cover, creating a frame.
Then, take another piece of black cardstock cut to size and press it onto the frame, sealing the electronics inside.
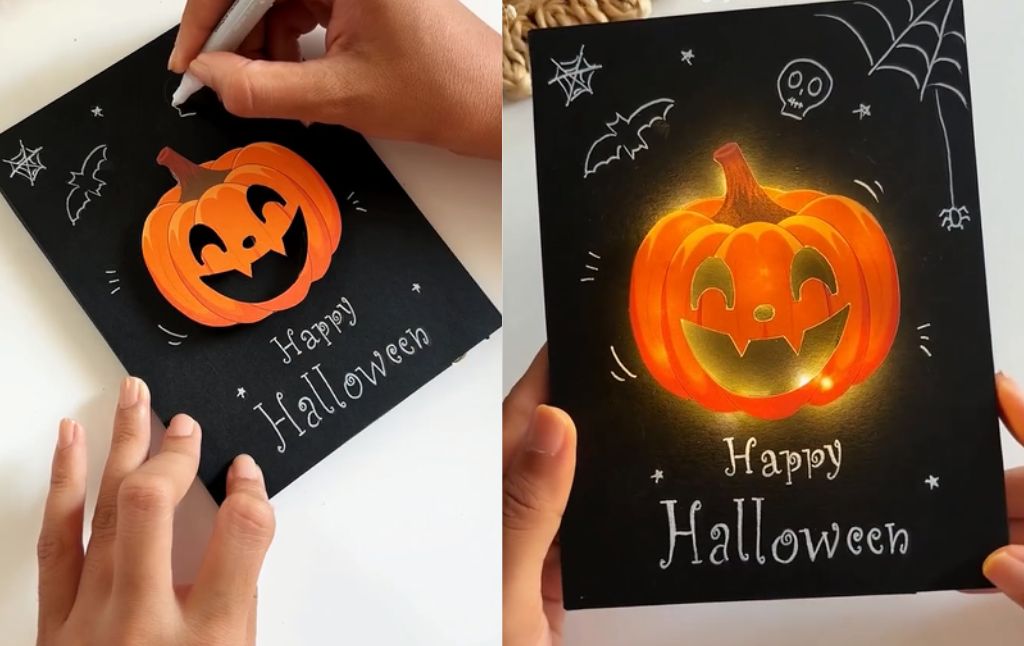
Step 7: Add the Finishing Touches
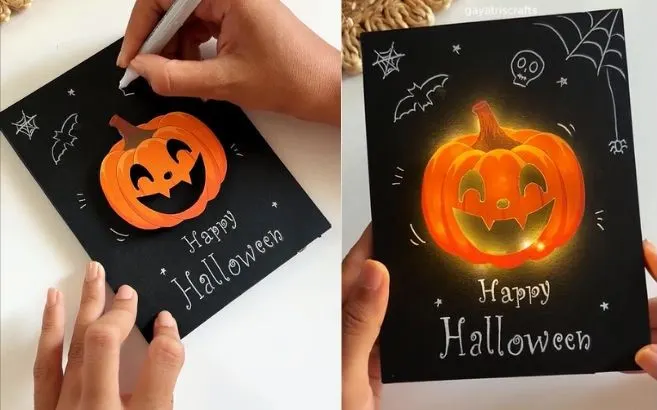
Now for the fun part! Use your white paint marker to bring the card to life. Write “Happy Halloween” in a spooky font.
Add festive doodles like spiderwebs, a friendly skull, little bats, and twinkling stars to fill the black space and complete the look.
The Grand Reveal!
Your incredible, light up Halloween card is complete! Press the switch on the battery pack and watch your jack o’ lantern come to life with a warm, spooky glow.
It’s a fantastic way to send a one of a kind Halloween wish that’s sure to be treasured.
Happy crafting and have a very Happy Halloween
How to Make Your Own Glow in the Dark Ghost Window Clings
How to Make Gorgeous Melted Crayon Ornaments
Create Stunning DIY String Lanterns
How to Make a Spooky Halloween Jar Lantern
Seven Pumpkin Creative Painting Ideas for Halloween!
3 Creative No Carve Pumpkin Painting Ideas for Halloween


