

If you’re looking to add a killer touch to your home decor this Halloween, forget the generic store bought decorations.
With a few simple materials, you can create a hauntingly cool, backlit Ghostface lamp that will impress any fan of the iconic horror franchise.
This DIY project is surprisingly straightforward and the final result is a spooky silhouette that casts an eerie glow.
Ready to find out what your favorite scary movie is? Let’s get crafting!
What You’ll Need:
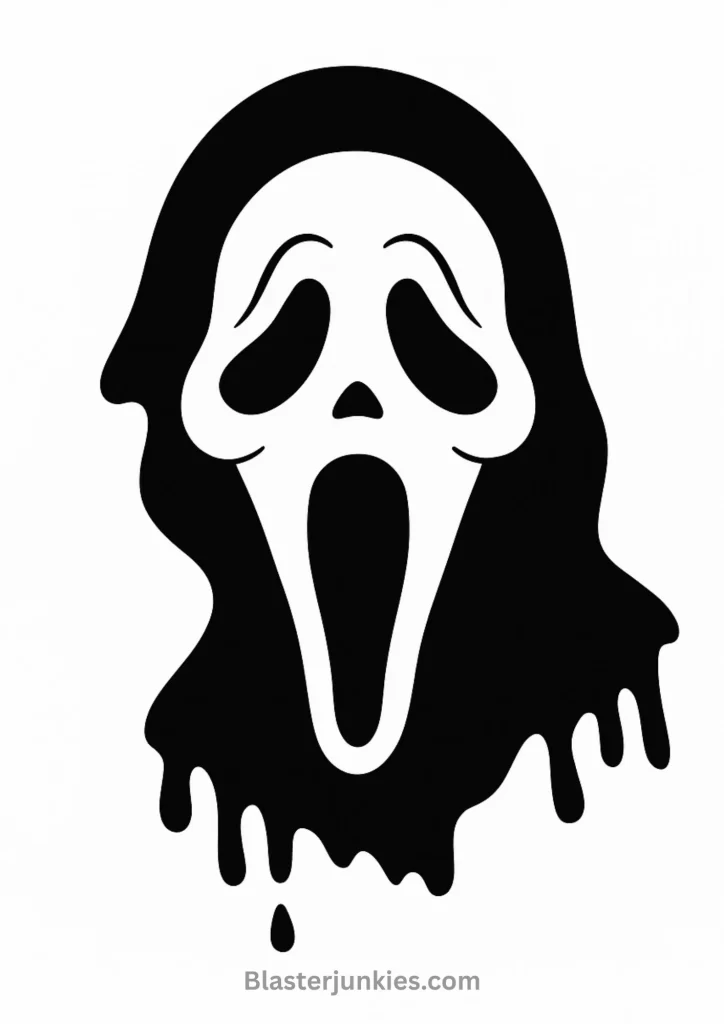
- A printout of a Ghostface mask silhouette
- A sturdy piece of cardboard (an old shipping box works perfectly)
- Black cardstock or heavy paper
- A craft knife or box cutter
- A cutting mat
- Hot glue gun and glue sticks
- A strand of battery powered LED fairy lights (the kind with a thin wire are best)
- Cotton batting or poly fil
- A popsicle stick (optional, but helpful for pressing things into hot glue)
- Scissors
Step by Step Instructions
Step 1: Prepare Your Pieces
First, you’ll need to create the two main parts of your lamp: the cardboard base and the black silhouette.
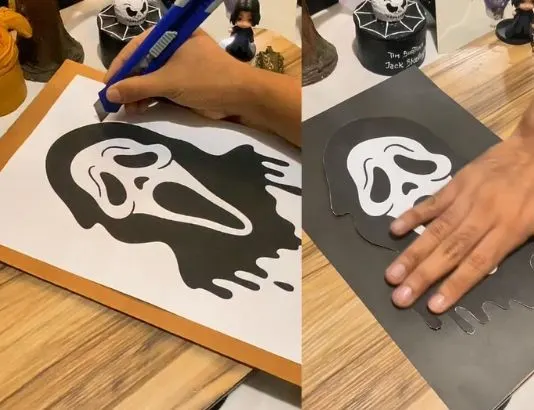
Start by cutting out your printed Ghostface silhouette. Trace its outline onto your piece of cardboard and carefully cut it out using your craft knife.
This will be the sturdy backing for your lamp. Next, trace the same silhouette onto your black cardstock.
This time, not only will you cut out the main shape, but you’ll also need to carefully cut out the eyes and mouth from the mask. This black piece will be the front of your lamp.
Step 2: Wire It Up
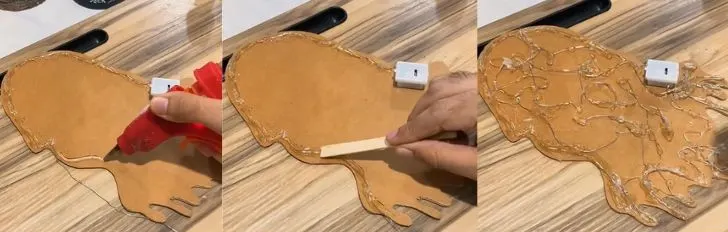
Take your cardboard cutout and lay it flat. Apply a generous bead of hot glue around the entire outer edge of the shape.
Working quickly before the glue sets, press the wire of your fairy lights into the glue. Continue this process, snaking the lights across the middle of the cardboard to ensure an even glow.
Find a convenient spot (usually near the bottom) to secure the battery pack with a dab of hot glue.
Step 3: Create the Diffuser

This step is the secret to getting that perfect, eerie glow instead of harsh points of light. Take your cotton batting and gently pull it apart to create a thin, fluffy layer.
Place this layer over the entire surface of the cardboard, covering all the lights and wires. Use small dabs of hot glue to hold it in place. The cotton will act as a diffuser, softening the light beautifully.
Step 4: Bring Ghostface to Life
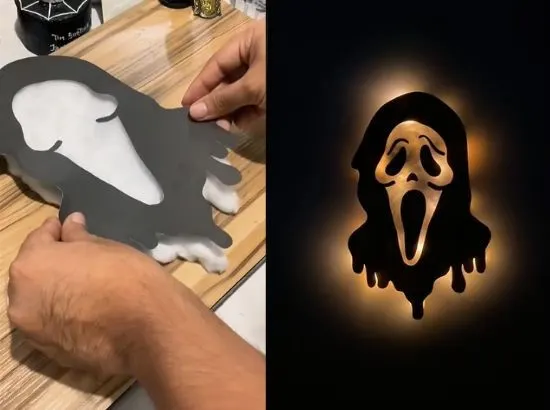
It’s time for the final assembly. Take your black cardstock Ghostface silhouette (with the eyes and mouth cut out) and carefully apply glue to the back.
Press it firmly onto the cotton covered cardboard base, lining up the edges. You should now have a complete Ghostface shape with a layer of cotton sandwiched in the middle.
Step 5: Finishing Touches and Illumination
Flip your project over and use scissors to trim any excess cotton batting that might be peeking out from the edges for a clean, sharp look.
Find the perfect spot on your wall, hang your new lamp, and flip the switch on the battery pack.
You now have a custom piece of horror decor, ready to set a perfectly spooky mood for a scary movie marathon.
Happy Haunting
Create a Spooktacular Light Up Halloween Card: A Step by Step Guide
How to Craft a Stunning Autumn Leaf Bowl
A Spooktacular DIY Jack Skellington Lantern
Fun & Easy Halloween DIYs Glowing Jar & Bat Candle
2 Spooky & Easy DIY Glowing Jars for Halloween
5 Creative No Carve Pumpkin Painting Ideas for a Spooktacular Halloween!
3 Spooktacular and Creative Pumpkin Carving Ideas for Halloween
3 Whimsical Autumn Leaf Crafts to Make with Kids
3 Fun and Easy Fall Tree Crafts for Kids (with Free Printable!)


