
Have you been wanting to document the memories with your best friend in a way that’s as unique and layered as your relationship?
This journal spread you’ve created themed “Years of Friendship” is the perfect inspiration! It masterfully combines nostalgic patterns, interactive elements, and meaningful quotes.
Here is a breakdown of how you can recreate this stunning, layered aesthetic spread for yourself or for a treasured friend.
Step 1: Laying the Nostalgic Foundation
Before you dive into the photos, you need a cohesive background that sets a nostalgic and warm mood.
Choose Your Base: You selected a beautiful pink and white gingham paper, instantly giving the spread a cozy, vintage feel. Apply this paper across both sides of the open spread.
Add Vintage Texture: To break up the checkerboard pattern, you glued strips or corner pieces of vintage style paper (like old maps or newspaper text) around the edges. This layered technique adds depth and interest.
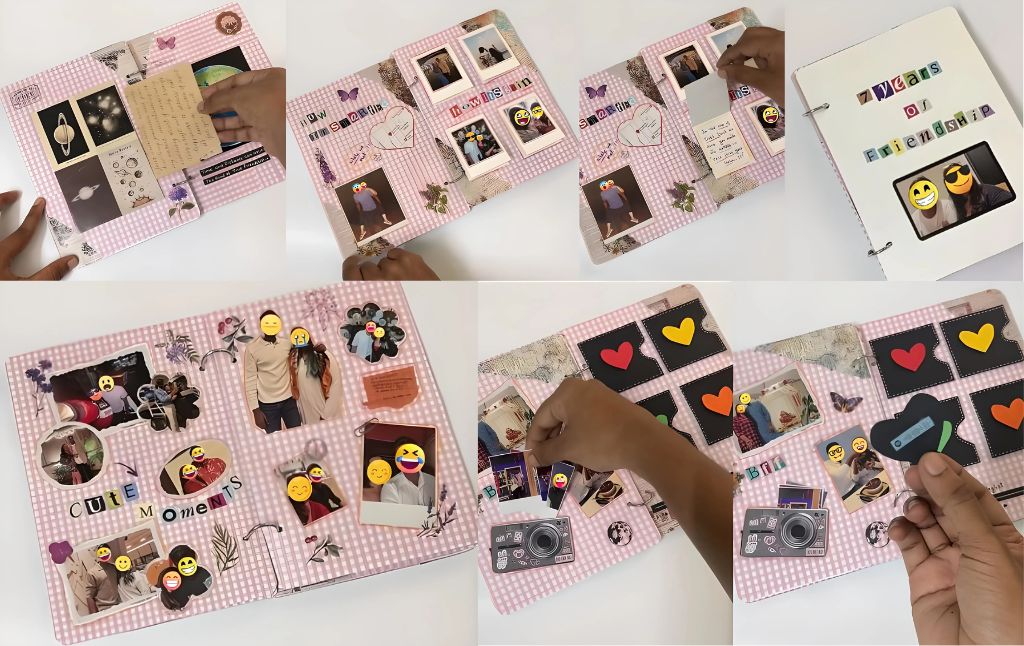
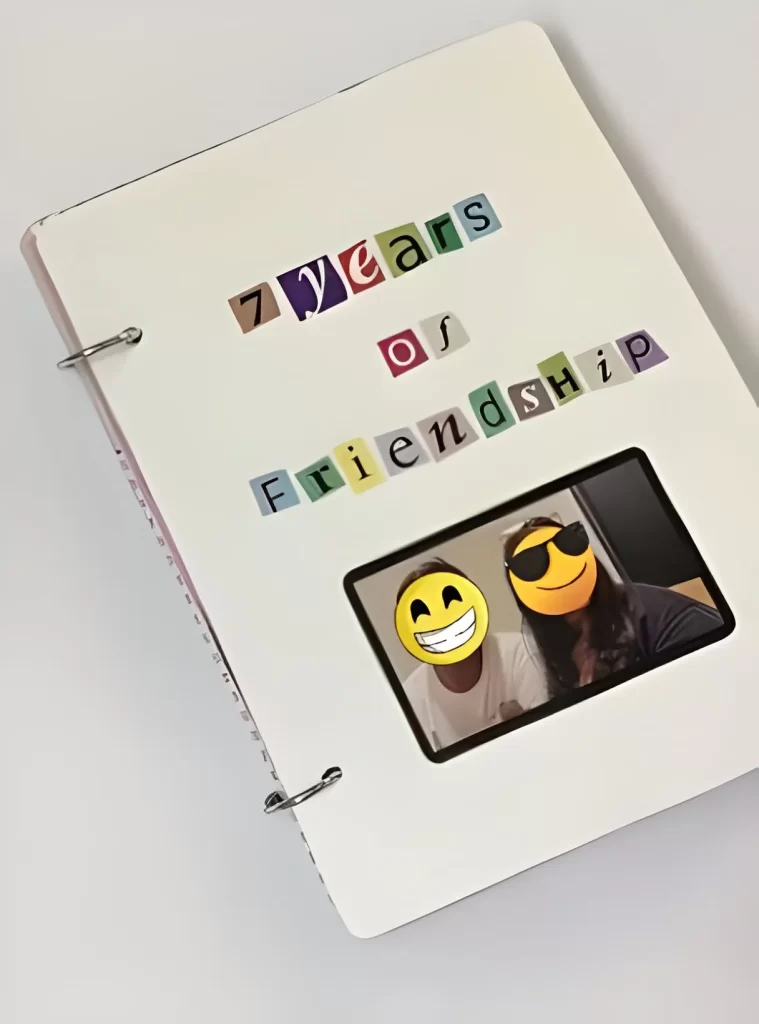
Establish the Title Page: The initial page acts as a protective cover. You used bold, colorful block stickers to spell out “YEARS OF FRIENDSHIP” and cut simple windows to tease the photos underneath.
Step 2: Detailing “How It Started” with Interactive Flaps
The first revealed spread focuses on the beginning of the journey, using traditional photo styles and a touch of secret journaling.
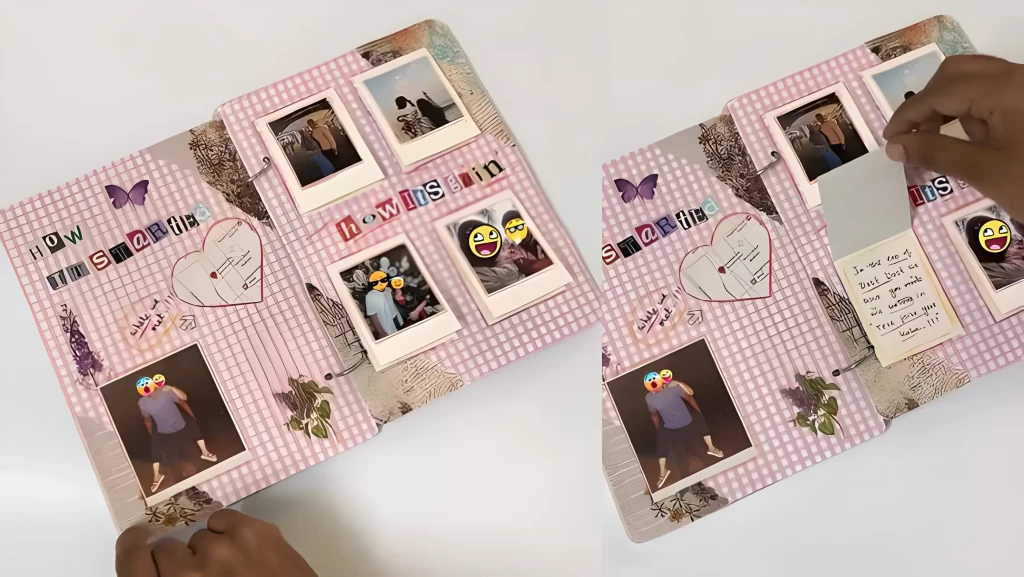
Frame Your Memories: You printed several photos in a faux Polaroid style, giving them a classic white border. You arranged these carefully, usually two on each side of the fold.
Write the Narrative: Use simple block letters or stickers to title this section “HOW IT STARTED.”
Create a Hidden Note: To add a surprise element, make one of the photos on the right hand side a flap.
Attach it only at the top edge. Tucked underneath, you wrote a short, personal message or a reflective quote on a small piece of light yellow paper. This allows the reader to truly interact with the story.
Decorate with Whimsy: Add small, soft stickers like florals, leaves, and butterflies (you used a beautiful purple butterfly) to fill the negative space and soften the grid layout. You also added a heart shaped map sticker to symbolize a shared location or journey.
Step 3: Collage the “Cute Moments” Page
This step creates a lift up page that bursts with visual memories. This page should be entirely covered in photos to create a feeling of abundance and joy.
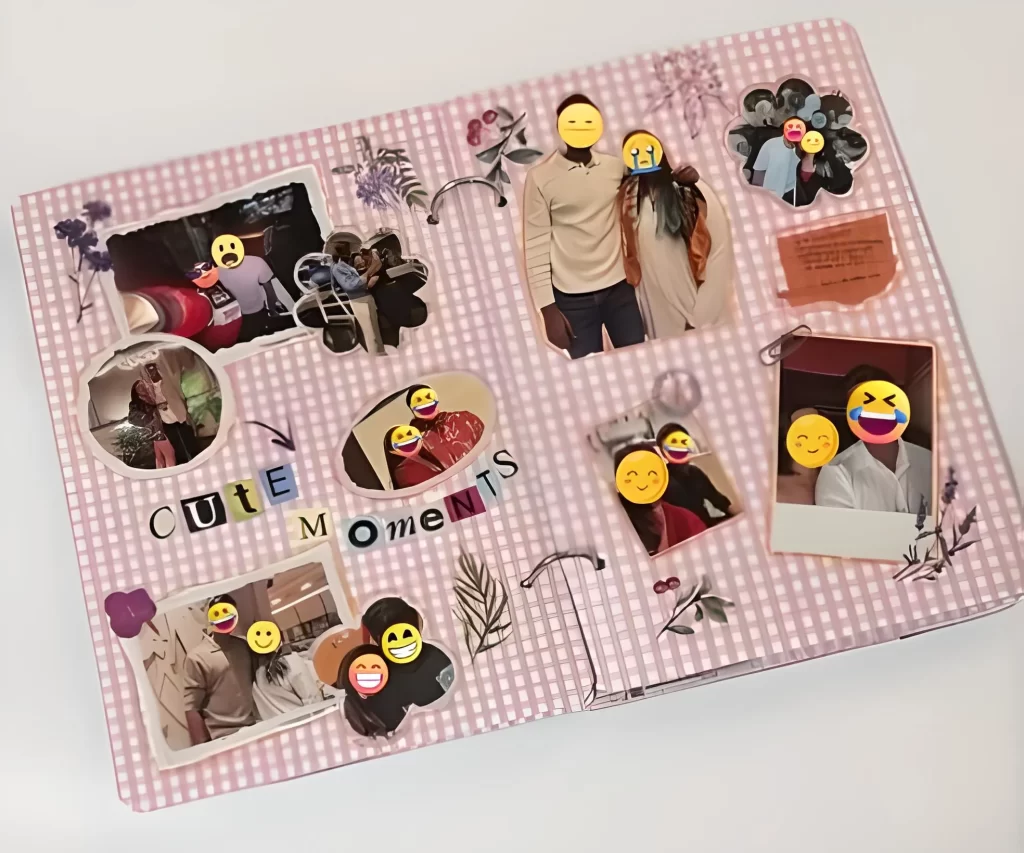
The Flap Structure: This entire page is attached to the ring binders (or fixed at the spine) so it completely lifts to reveal the next layer.
Maximize Photo Density: Unlike the structured layout of Step 2, this page is where you went wild with variety! You cut your photos into various shapes ovals, circles, and small irregular squares and layered them tightly across the page.
Use Stickers for Emphasis: You added the title “CUTE MOMENTS” using colorful, slightly mismatched stickers placed centrally to draw the eye. You also added tiny, stylized floral stickers to separate the photo clusters.
Step 4: Adding the “Friendship Playlist” & BFF Details
When you lift the “Cute Moments” page, this middle layer is revealed. It’s perfect for capturing hobbies, inside jokes, and favorite things.
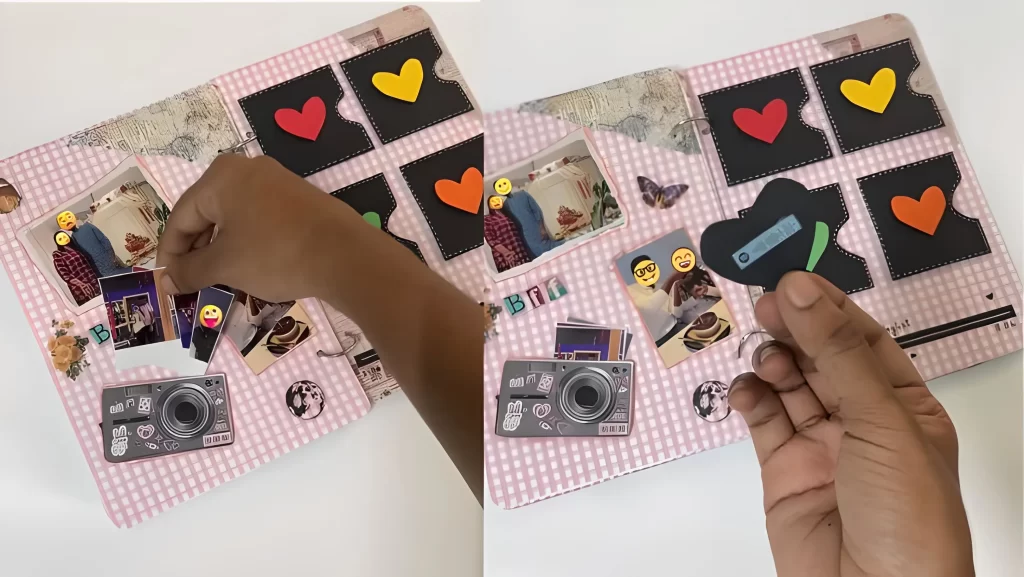
Focus on Shared Hobbies: On the left, you anchored the page with a fun sticker of a vintage camera, creating a pocket or a place to tuck in extra, smaller photos (like photo booth strips or mini prints). You titled this area with “BFF” stickers.
The Playlist Element: This is the centerpiece of the right side. You created four black, cut out “pocket” shapes, each attached only at the sides and bottom.
You then decorated the front of each pocket with brightly colored paper hearts (red, yellow, green, orange).
Reveal the Secrets: Underneath the four heart cutouts, you hid small, meaningful icons. You can place a Spotify code snippet, a tiny note, or a symbol representing a favorite shared memory.
Label this section “Our Friendship Playlist” with a simple line mimicking a song progress bar.
Step 5: The Cosmic Finale Eternal Friendship
The very last layer is reserved for a powerful theme: the everlasting nature of your bond, using space and distance as metaphors.
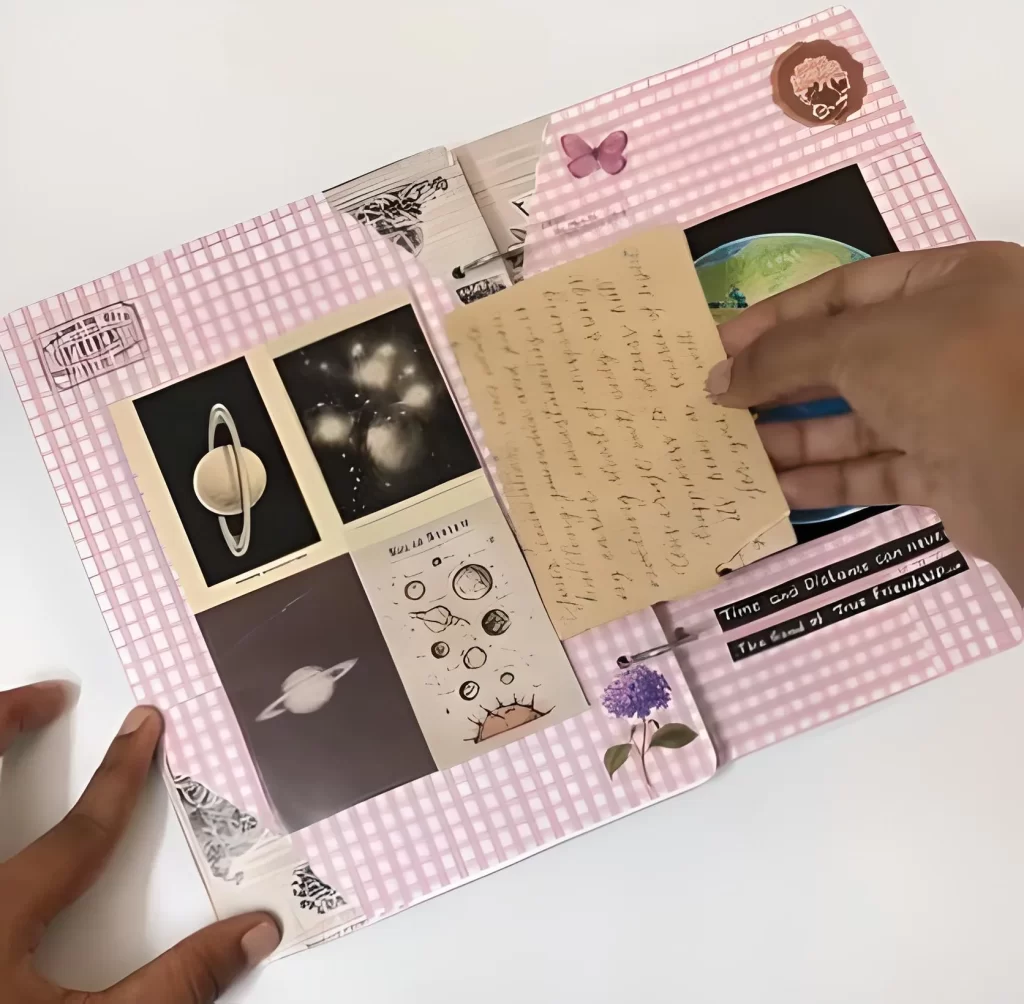
The Cosmic Theme: On the left side, you created a dedicated photo space for images related to the cosmos planets, stars, and the solar system. This immediately shifts the tone to something grand and timeless.
The Globe Reveal: On the right, you used a large, vibrant image of the Earth globe. This globe is attached at the top, forming the final, key flap.
The Grand Message: Underneath the globe, you included a handwritten message or a long, beautiful quote about friendship and loyalty. This adds an extremely personal and intimate closing note.
The Closing Quote: Finally, you used a bold, black strip of paper underneath the globe to print your thematic closing statement: “Time and distance can never break The bond of True Friendship…”
By thoughtfully layering these different elements—from the playful photos to the meaningful hidden notes you have created not just a journal entry, but a tactile, emotional monument to a lasting friendship.
Creative Junk Journal Spreads from a Weekend Getaway
Crafting the Ultimate Personalized Gift: Heartfelt Scrapbook Layout Ideas
25 Captivating Ideas to Elevate Your Junk Journal Spreads
15 Inspiring Styles to Kickstart Your Next Junk Journal Spread
10 Interactive Junk Journal Ideas to Bring Your Pages to Life
10 Inspiring Junk Journal Spreads to Try Today
Create a Spooktacular Light Up Halloween Card: A Step by Step Guide
How to Make Gorgeous Melted Crayon Ornaments
Create Stunning DIY String Lanterns


