

If you’re looking for a low cost, high engagement activity that combines coloring, cutting, and gluing for your young children or students, you’ve found the perfect holiday project!
This Build a Turkey printable craft is a Thanksgiving staple that allows children to practice crucial fine motor skills while creating a colorful and festive decoration.
Here is your step by step guide on how to facilitate this wonderful activity, resulting in a beautiful, personalized turkey.
Step 1: Preparation Print and Color Your Pieces
This activity begins with creative coloring, allowing kids to personalize their turkey before assembly.

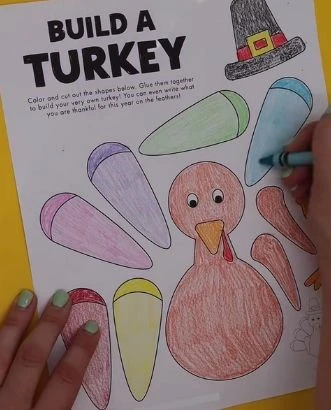
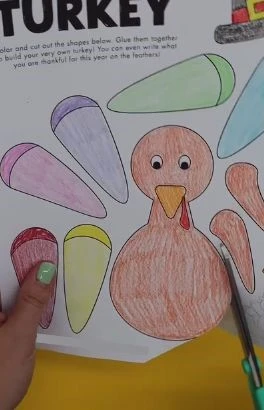
Download and Print: Download our free Build a Turkey A4 printable template. This sheet contains all the necessary parts: the main turkey body (head and body combined), seven decorative feathers, two wings, two legs, and a pilgrim hat.
Gather Coloring Supplies: Lay out crayons, colored pencils, or markers.
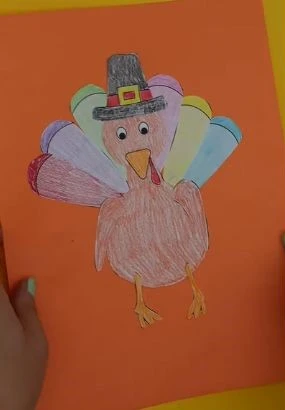
Color the Parts: Encourage the crafters to get creative! As shown in the video, you colored the turkey body a light brown/red and gave each of the feathers a bright, distinct color (pink, purple, blue, green, yellow, red, etc.) to make the tail stand out. Don’t forget the orange beak, red wattle, and black pilgrim hat!
Step 2: Cutting Out the Turkey Pieces
Once the coloring is complete, it’s time to practice scissor skills.
Cut Carefully: Using child safe scissors, carefully cut out all the colored shapes along the lines. This is excellent practice for precision and control.
If you are working with very young children, you may want to pre cut the smaller or more intricate pieces, leaving them to cut the larger feather shapes.
Organize the Pieces: Place the cut out pieces to the side, ready for assembly.
Step 3: Setting the Background and Gluing the Body
Now you will assemble the turkey on a vibrant background.
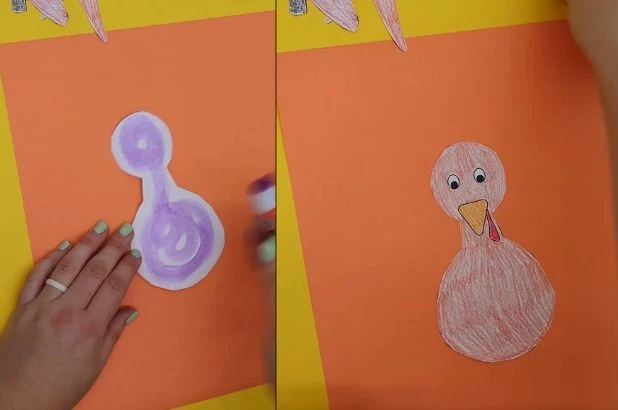
Choose the Background: Select a piece of sturdy cardstock or construction paper for the background. You chose a bright orange, which perfectly complements the autumn and holiday colors.
Glue the Body: Take the largest piece the colored turkey body and apply glue evenly to the back using a glue stick. Press the turkey body firmly onto the center of your background paper.
Step 4: Building the Festive Feather Fan
The colorful feathers are what make this turkey come alive!
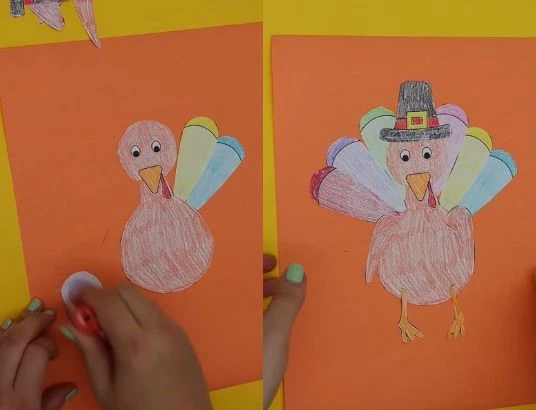
Arrange the Feathers: Begin arranging the seven colored feather pieces in a fan shape behind the turkey’s body. You want the fan to spread out widely and symmetrically.
Attach the Feathers: Apply glue to the bottom section of each feather piece (the part that will be hidden behind the turkey’s body). Carefully stick them down, one by one, to create the full, magnificent tail.
Add the Wings and Legs: Glue the two wing shapes onto the sides of the turkey’s body. Then, attach the two orange leg pieces sticking out from the bottom.
Step 5: The Final Touches
Finish the craft with the iconic Thanksgiving accessory.
The Pilgrim Hat: Apply glue to the back of the colored pilgrim hat and place it squarely on the turkey’s head.
Personalize the Feathers (Optional): The prompt on the printable suggests an extra step: You can even write what you are thankful for this year on the feathers! If you want to turn this into a gratitude activity, write a thankful note on the back of the feathers before gluing them down, or even directly on the front if space allows.
Your finished turkey is now ready to be displayed! This engaging activity offers a wonderful way to keep young hands busy and minds engaged during the festive season.
How to Create a Fun “Shape Turkey” Math Craft (Free Printable Included!)
How to Build Your Own Thankful Turkey Craft (Free Printable Included!)
The Ultimate Thanksgiving Craft: A Step by Step Guide to Making a Textured Turkey
DIY Balloon Floats: Bringing the Thanksgiving Day Parade to Your Kids’ Table!
Immortalizing Your Closest Bonds: Creating the Ultimate Aesthetic Friendship Journal
Crafting the Ultimate Personalized Gift: Heartfelt Scrapbook Layout Ideas
15 Inspiring Styles to Kickstart Your Next Junk Journal Spread
10 Inspiring Junk Journal Spreads to Try Today
Create a Spooktacular Light Up Halloween Card: A Step by Step Guide


