
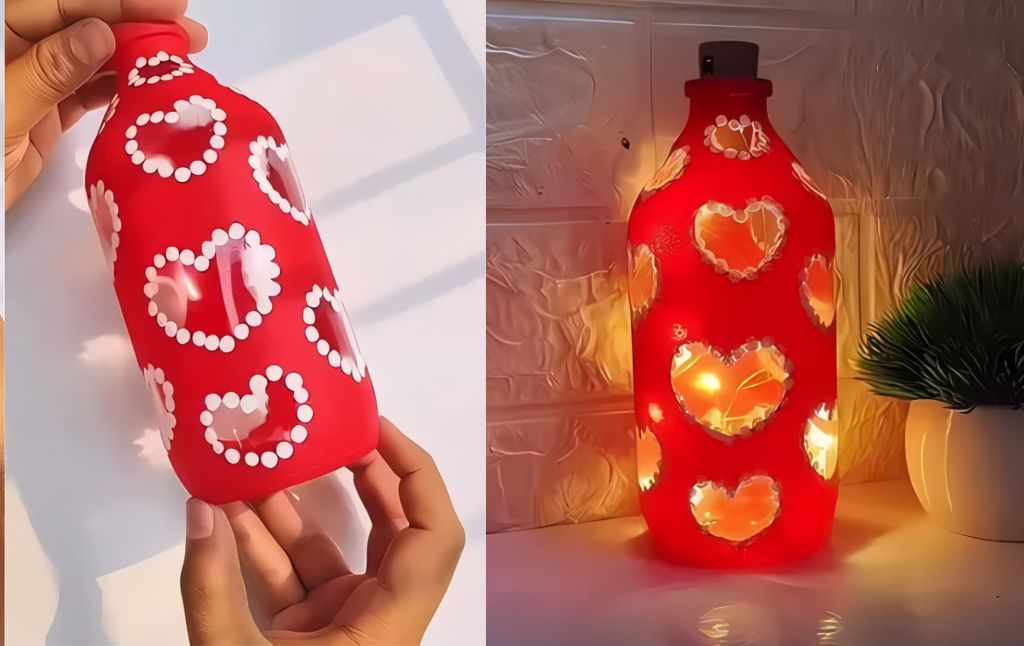
Looking for a charming and creative way to upcycle an old glass bottle? Transform it into a beautiful, glowing heart lamp that adds a warm and personal touch to any room.
This simple DIY project is perfect for a relaxing afternoon, and the result is a stunning piece of decor that also makes a wonderful handmade gift.
Ready to get started? Here’s everything you need to create your own heart bottle lamp.
What You’ll Need:
- A clean, empty glass bottle
- Heart-shaped stickers (or you can cut hearts from paper and use temporary adhesive)
- Acrylic paint in your desired colors (the example uses red and white)
- A paintbrush
- A small sponge
- A dotting tool, the end of a thin paintbrush, or even a toothpick
- Battery-powered LED fairy lights
Step-by-Step Instructions
Step 1: Prepare Your Bottle with Hearts
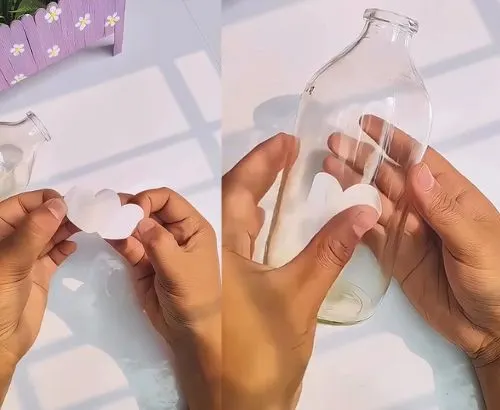
Start with your clean and completely dry glass bottle. Take your heart-shaped stickers and begin placing them around the bottle.
Arrange them randomly for a playful, scattered look. Press them down firmly to ensure no paint will seep underneath the edges.
Step 2: Apply Your Base Coat of Paint

Using your paintbrush, apply a solid coat of red paint over the entire surface of the bottle. Don’t worry about painting over the stickers that’s part of the plan! Cover the bottle from top to bottom.
Step 3: Create a Textured Finish
While the paint is still slightly wet, take your sponge and gently dab it all over the painted surface.
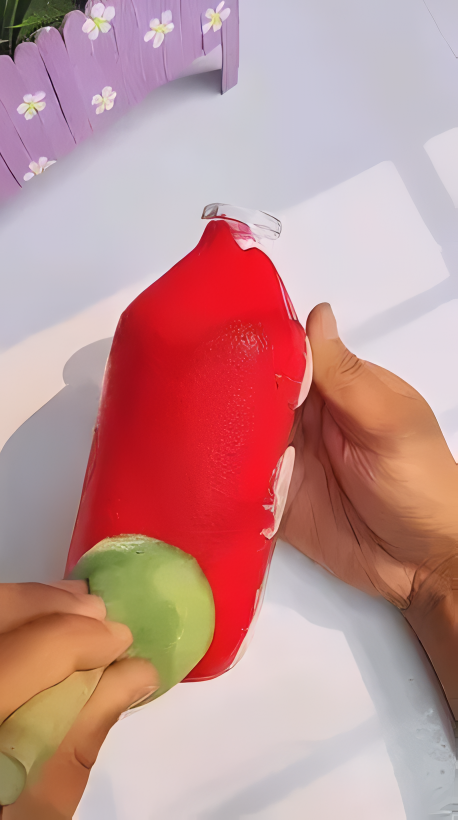
This technique will smooth out any brush strokes and give the bottle a lovely, uniform, and slightly textured matte finish.
Once you’re happy with the texture, set the bottle aside to dry completely.
Step 4: The Big Reveal
Once the paint is fully dry to the touch, it’s time for the most satisfying part! Carefully peel off each of the heart stickers.
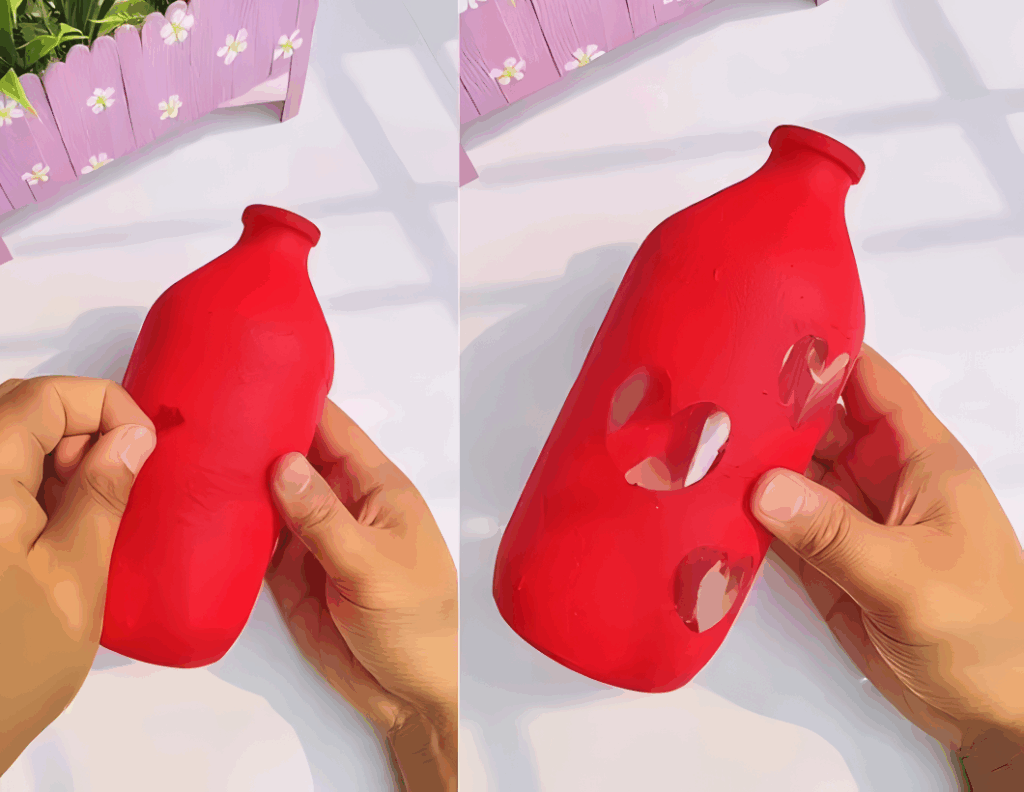
As you lift them, they will reveal the clear glass underneath, creating beautiful heart shaped “windows” in your bottle.
Step 5: Add the Delicate Details
Now, let’s add the finishing touches. Pour a small amount of white paint onto a palette or paper plate.
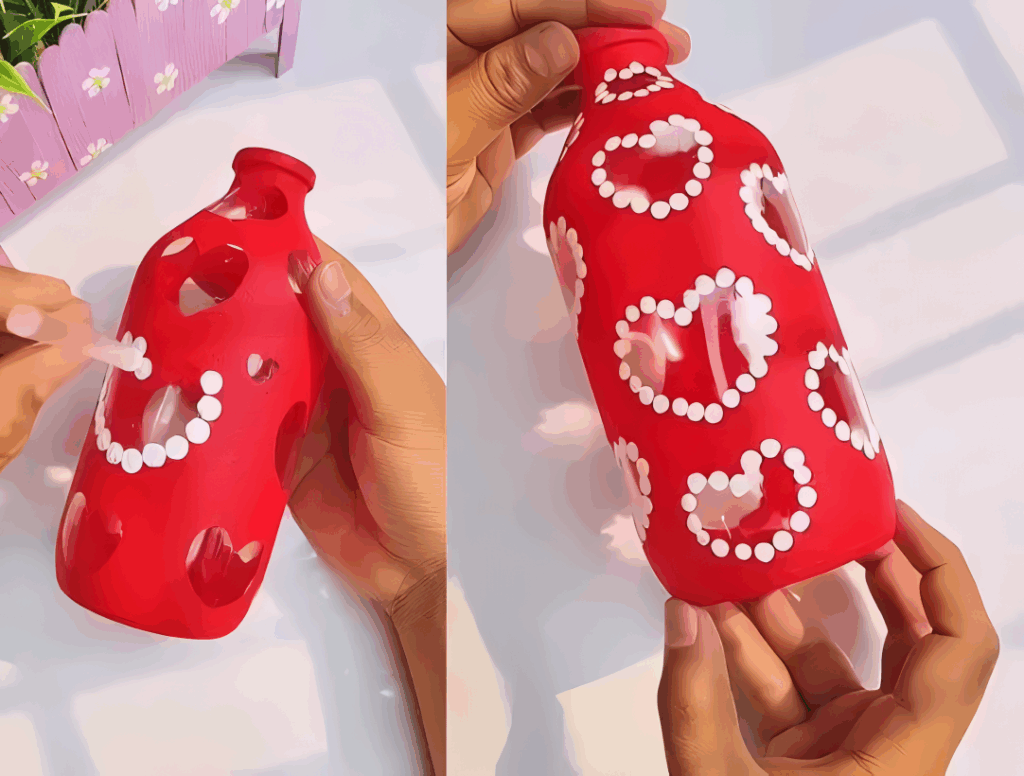
Using your dotting tool (or the end of a toothpick), carefully apply small white dots around the edges of each clear heart.
This creates a charming, pearl like border. You can also add smaller, painted hearts in the spaces between the larger ones for extra detail.
Step 6: Light It Up!
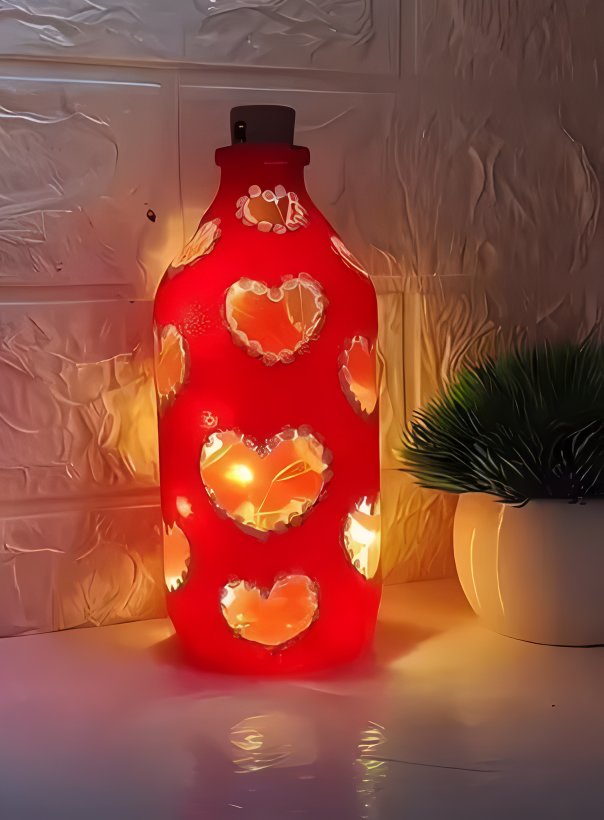
After the white paint has dried, your decorative bottle is complete! To turn it into a magical lamp, carefully feed the string of battery powered fairy lights inside. Switch them on, dim the lights, and watch as your creation comes to life, casting a warm and heartfelt glow.
Kids Activities
Looking for more fun kids activities and other ideas to keep kids engaged, learning, and having fun? Check out these:
How to Fold a Glowing Origami Petal Sphere
DIY a Surprise I Love You This Much Pop-Up Card!
Create a Dazzling Color Explosion with the Magic Milk Experiment!
Turn Your Smartphone into a Magical 3D Hologram Projector!
Create a Mesmerizing 3D Hologram Projector for Your Smartphone!
Struggling with Brushing Time? This 5-Minute DIY Activity is a Game-Changer!


